6
1 First steps
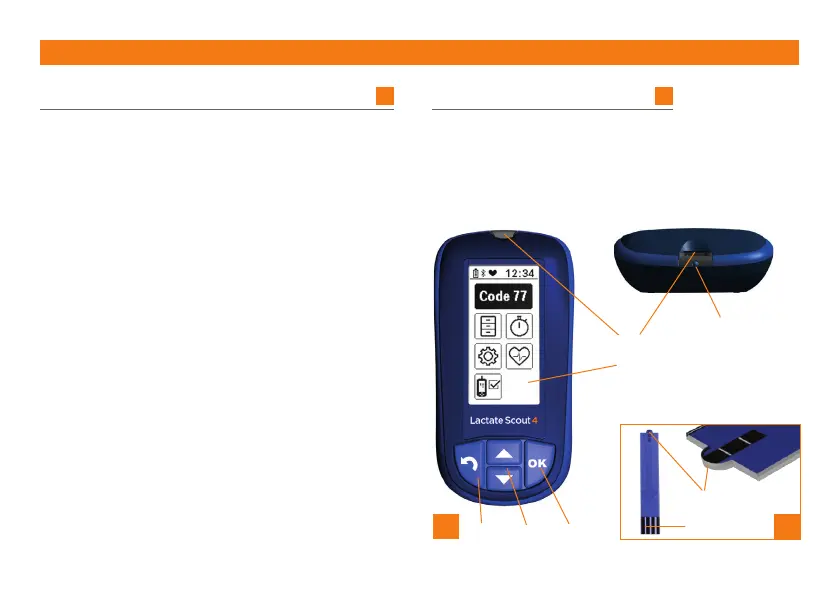
1.1 Lactate Scout 4 measuring device
1
Opening (1A) for inserting the sensor
Display
(1B) for displaying when the device
is ready to take a measurement, blood lactate
levels, warning messages, configuration options
and status information
Keypad for operating the measuring device
• Arrow keys (1C):
- for moving between menus, sub-menus and
menu items
- for adjusting values
• OK button
(1D):
- for enabling menus, sub-menus and
menu items
- for confirming choices
- for activating and deactivating
configuration mode
• Back button (1E):
for undoing the last step/cancelling
• Temperature sensor (1F):
for reading the ambient temperature
1.2 Lactate Scout sensor
2
The sensor has an opening for the blood
sample (2A). This opening is connected to
the measuring chamber. The contacts (2B)
connect the sensor to the measuring device.
1A
1B
2B
1E 1C 1D
2A
21
1F