For service or Technical Assistance contact the local distributor from where the
unit was obtained.
Any unit returned for service / maintenance should be accompanied by a
completed Decontamination Certificate prior to any work be undertake. Copies
of the certificate are available from the Suppler / Distributor and Manufacturer.
Little maintenance is required, except for ensuring a general standard of
cleanliness by periodically wiping the apparatus clean with a dry, lint-free cloth.
CAUTION: DO NOT USE SOLVENTS FOR CLEANING ANY PART OF THE
APPARATUS.
Capillary Tubes.
These must not be reused. Discard tubes immediately after analysis. If tubes
break inside the oven, remove by raising the arm to a vertical position,
observing the need to loosen the clamp screw first. Then remove the white
tube guide by pulling gently. Rotate the head upwards and backwards so that
the broken parts fall out. A gentle tap may be necessary to ensure complete
removal. Return to the correct viewing position and reinsert the tube guide.
Object lens.
When necessary, remove the object lens and wipe with a clean, dry, liny free
cloth.
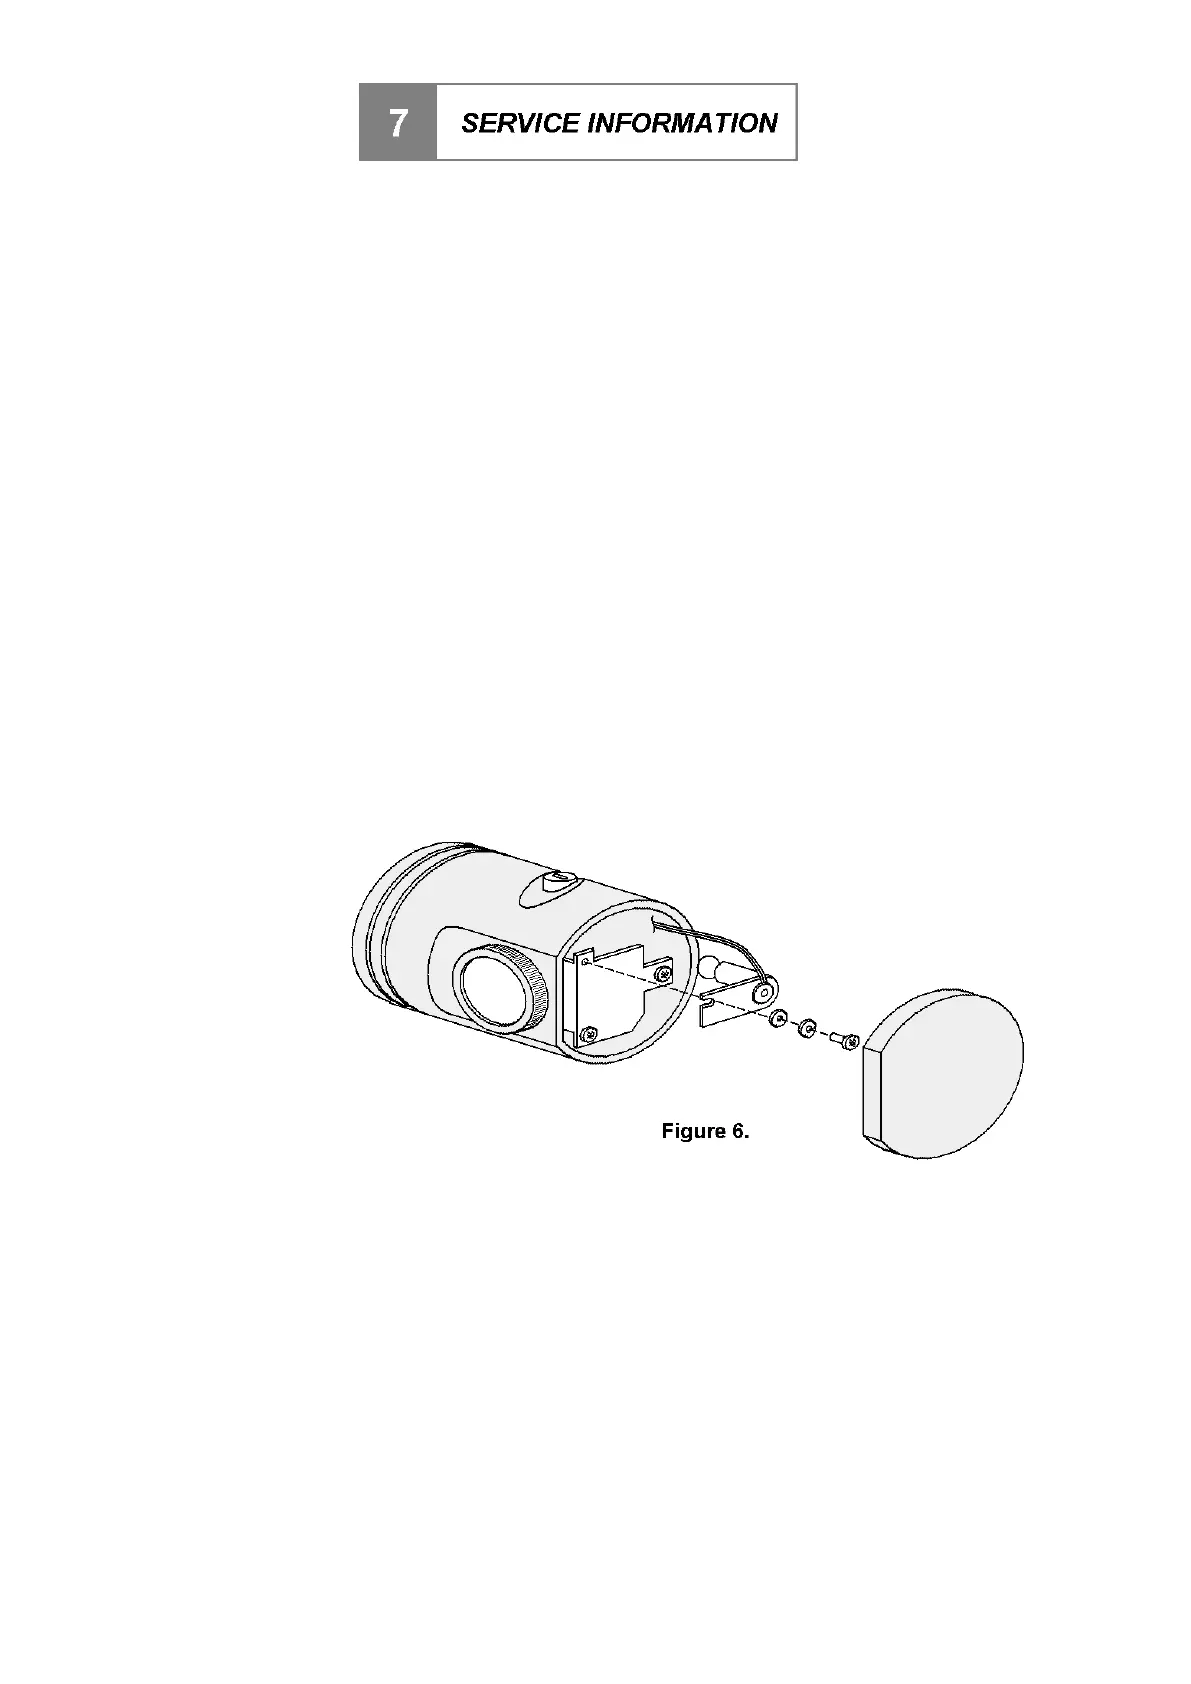
Bulb (see Figure 6).
In the event of a bulb failure, proceed as follows.
Ensure the unit is switched off and the oven is cool to touch.
Remove the semi-circular end cover to the right of the object lens by
pulling it gently.
Using a No 1 Posidrive screwdriver, remove the one screw retaining
the bulb bracket.
Withdraw the bracket taking care not to strain the connection leads.
Unscrew the defective bulb and replace it with a new one (part No
AZ9185).
Reassemble the bulb bracket using the screw and replace the end
cover.