EM TEST VDS 200 Series
Manual for Operation V 5.19 35 / 57
Level settings by the user
The protection level factory setting is 60V. For change the protection level the user must proceed the following
steps:
The protection level setting must be done from people who are trained to work with electrical
devices.
DO not touch the heat sink or electrical parts inside the VDS200. These elements can be
under voltage during operation and even when the device is switched off (up to 95Vdc).
1. Switch off the VDS200N; disconnect the main power supply over the night.
2. Open the rear side of the VDS200. The protection device is located in the lower part of the VDS
3. Power ON the VDS200N with no load and press Test ON button
4. Press button Test fail release on the crowbar control board. This will trip the overvoltage protection.
5. Switch OFF the VDS200
6. Change the bridge for level setting to the desired voltage level
7. Switch power on and check if the protection level is correct indicated with the LED
8. Increase manually the voltage for check the overvoltage is tripping.
9. Switch power off and close the Rack
After switch OFF the VDS200N do not touch any electric conducted parts as long the two
LED on the printed circuit board are illuminated ( some few seconds).
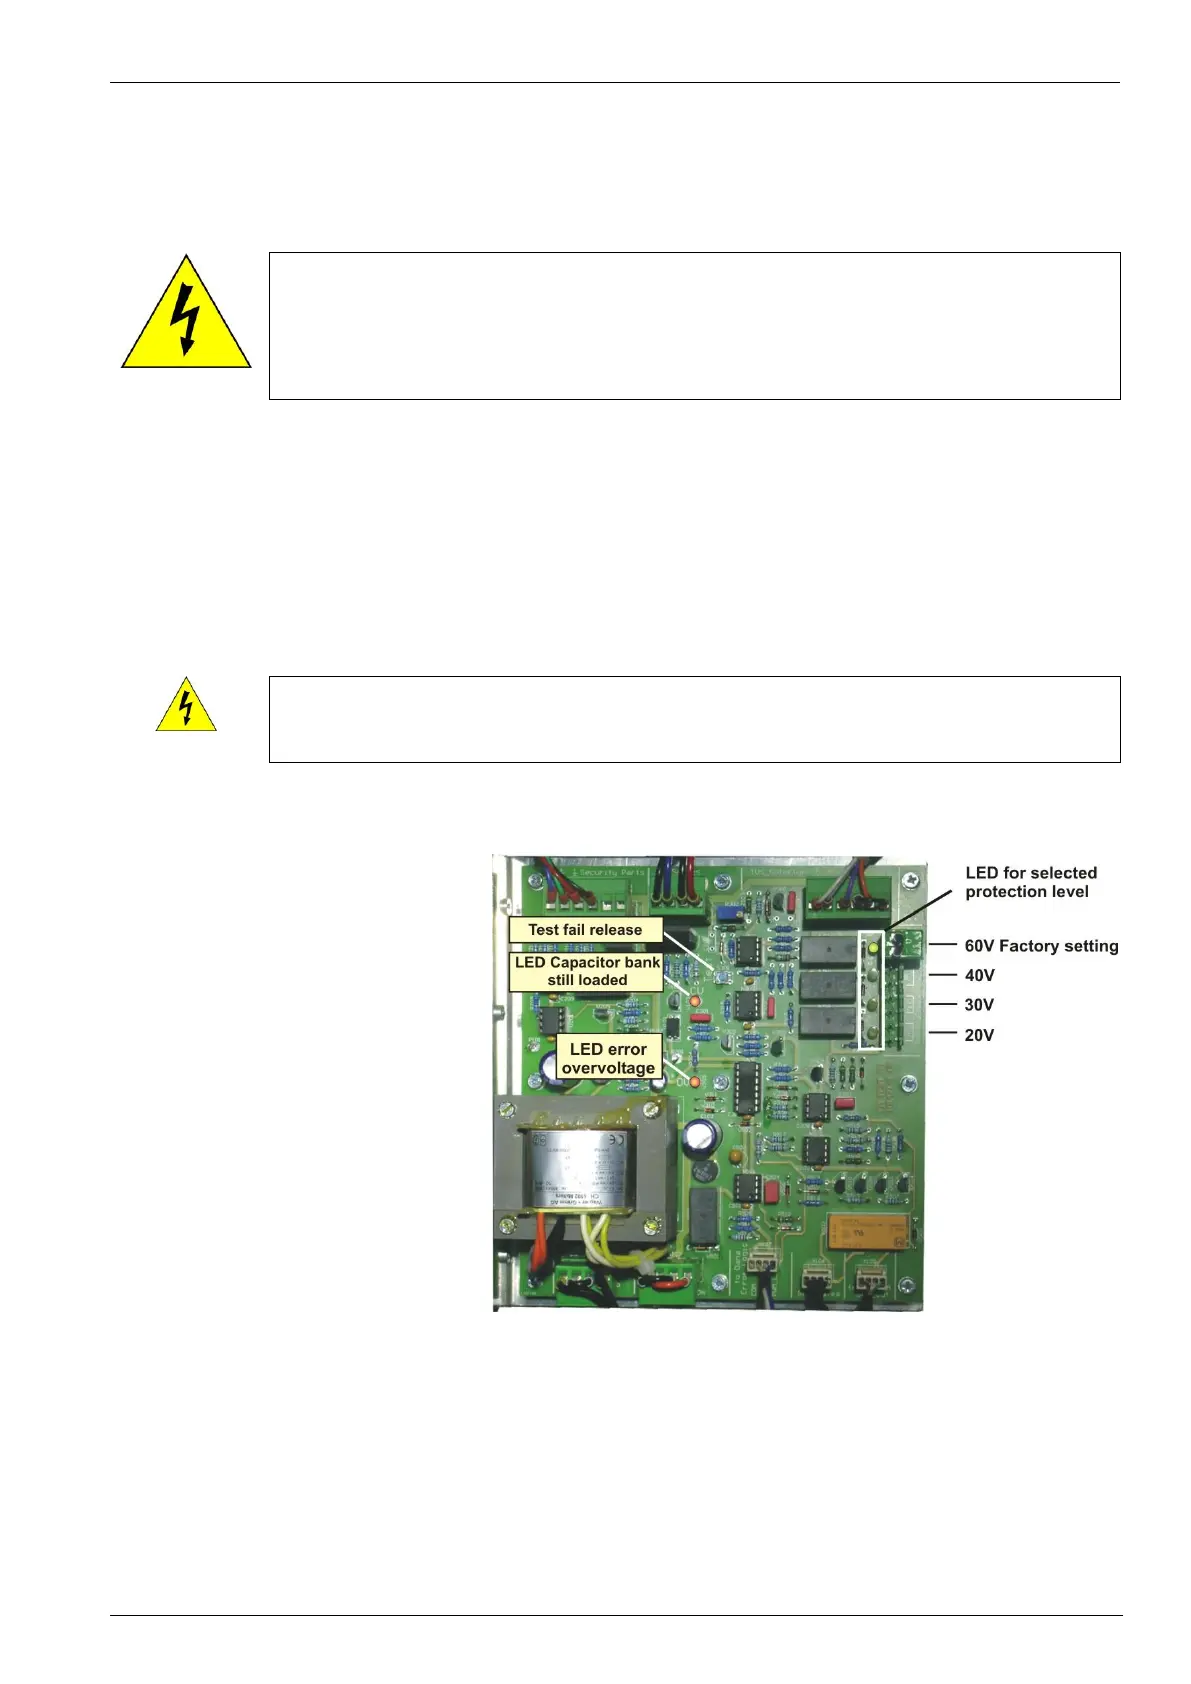
Indication on the control board.
Test fail release button pressed will trip
the overvoltage protection immediately.
LED Capacitor bank still loaded
appears al long the capacitor voltage is
higher than 2-5V after fail
LED error overvoltage shows the
overvoltage protection was activated.
Switch off the VDS200. The same
message appears on the LCD display if
the VDS200. For release switch OFF /
ON the VDS200N
Control board for Crowbar protection

 Loading...