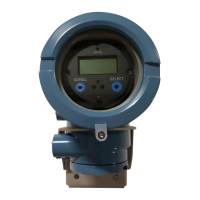
Loop Powered Indicator Page 4 Appendix B
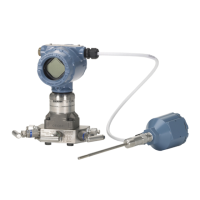
2. Referring to Figure 2-2, install the two (2) 4-40 x .759 Standoffs into the Model 2808
Transmitter at location A.
Figure 2-1 - Transmitter Cover Assembly Removal
3. Referring to Figure 2-2, install the two (2) 4-40 x .375 Standoffs into the Model 2808
Transmitter at location B.
4. Disconnect the Field Wires (if installed) from the Model 2808 Transmitter’s Terminal
Block.
5. Remove the three (3) Field Wiring Screws/Clamps from the Model 2808 Transmitter’s
Terminal Block.
6. Secure the Meter Motherboard to the Model 2808 Transmitter via the three (3) Field
Wiring Screws/Clamps removed in step 5. Using two (2) #4 M/F Shoulder Standoffs,
secure the Motherboard to the Standoffs installed in step 3.
7. Install the Meter/Display Board onto the Meter Motherboard after aligning the ap-
propriate Meter/Display Board Interface Connector (P1 through P4) with J1 of the
Meter Motherboard. Secure the Meter/Display Board to the four standoffs (Locations A
& D of Figure 2-2) via four (4) 4-40 x ¼ Pan Head Screws.
 Loading...