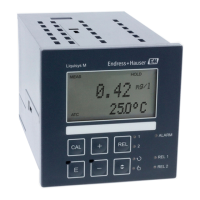
Repair Liquisys M CLM223/253
102 Endress+Hauser
Item Kit description Name Function/contents Order no.
330, 340,
450
Inner housing fittings Docking module, empty electronics
box, small parts
51501073
310, 320 Ribbon cable lines 2 ribbon cable lines 51501074
430 Hinges 2 pairs of hinges 51501069
470 Terminal strip power supply 2-pin terminal strip 51501079
420a,
420b
Terminal strip set Complete terminal strip set
PROFIBUS DP
51502493
403 PE terminal strip PE and shielding terminals 51501087
A Electronics box with relay
module LSR-1 (bottom) and
power unit LSGA/LSGD (top)
B Fuse also accessible if
electronics box installed
C Fuse Part of power unit, item 15
D Choice of line voltage Position of jumper on power unit,
item 15 depending on line voltage
10.4 Replacing the central module
Generally, when a central module has been replaced, all data which can be changed
are set to the factory setting.
If possible, note the customized settings of the device, such as:
• Calibration data
• Current assignment, main parameter and temperature
• Relay function selections
• Limit value/controller settings
• Cleaning settings
• Monitoring functions
• Interface parameters
Proceed as described below if a central module is replaced:
1. Disassemble the device as explained in the "Dismantling the panel-mounted
instrument" or "Dismantling the field instrument" section.
2. Use the part number on the central module to check whether the new module has
the same part number as the previous module.
3. Reassemble the device with the new module.
4. Put the device back into operation and check the basic functions (e.g. measured value
and temperature display, operation via keyboard).
5. Read the serial number (“ser-no.”) off the nameplate of the device (e.g.
6A345605G00) and enter this number in fields E115 (1st digit = year, one-digit (6
in the example)), E116 (2nd digit: month, one-digit (A in the example)), E117 (digits
3-6 cons. number, four-digit (3456 in the example)).
In the field E118, the complete number is displayed again so you can check it is
correct.
You can only enter the serial number for new modules with the serial number 0000.
This can only be done once! For this reason, make sure the number entered is correct
before you press ENTER to confirm!
If an incorrect code is entered, the additional functions are not enabled. An incorrect
serial number can only be corrected at the factory!
 Loading...
