TS-12 Musician’s Manual Section 14 — Understanding Sampled Sounds
17
Here’s how:
• Press Sounds.
• While holding down the BankSet button, press the Bank 8 button. This displays Sampled
Sound BankSet 8.
• Press each of the Bank buttons (0-9) and verify that for each Sampled Sound Bank, the bottom
center of the display shows the name of a Sampled Sound that you want to save with the
Sample-Banks file, or (*EMPTY-BANK*).
Note: If you have expansion SIMMs installed, after viewing BankSet 8, repeat the previous step for
BankSet 9. To select BankSet 9, press the BankSet button once.
• If you should find a Sampled Sound either loaded (muted or unmuted) or - -NOT LOADED- -
that you do not want to save with the Sample-Banks file, press the bottom right soft button
beneath OPTIONS.
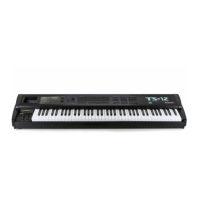
• Press the bottom left soft button to *DELETE* the Sampled Sound. The display shows:
name of Sampled Sound to be deleted
location of Sampled Sound to be deleted
• Press the soft button above *YES*.
• Repeat these steps for all Sampled Sound Banks that contain Sampled Sounds that you do not
want to save with the Sample-Banks file.
• When you are sure that all Sampled Sounds that you do not want to save with the Sample-
Banks file are deleted, insert a formatted TS-12 floppy disk into the disk drive.
• Press Storage.
• Press the bottom center soft button beneath DISK.
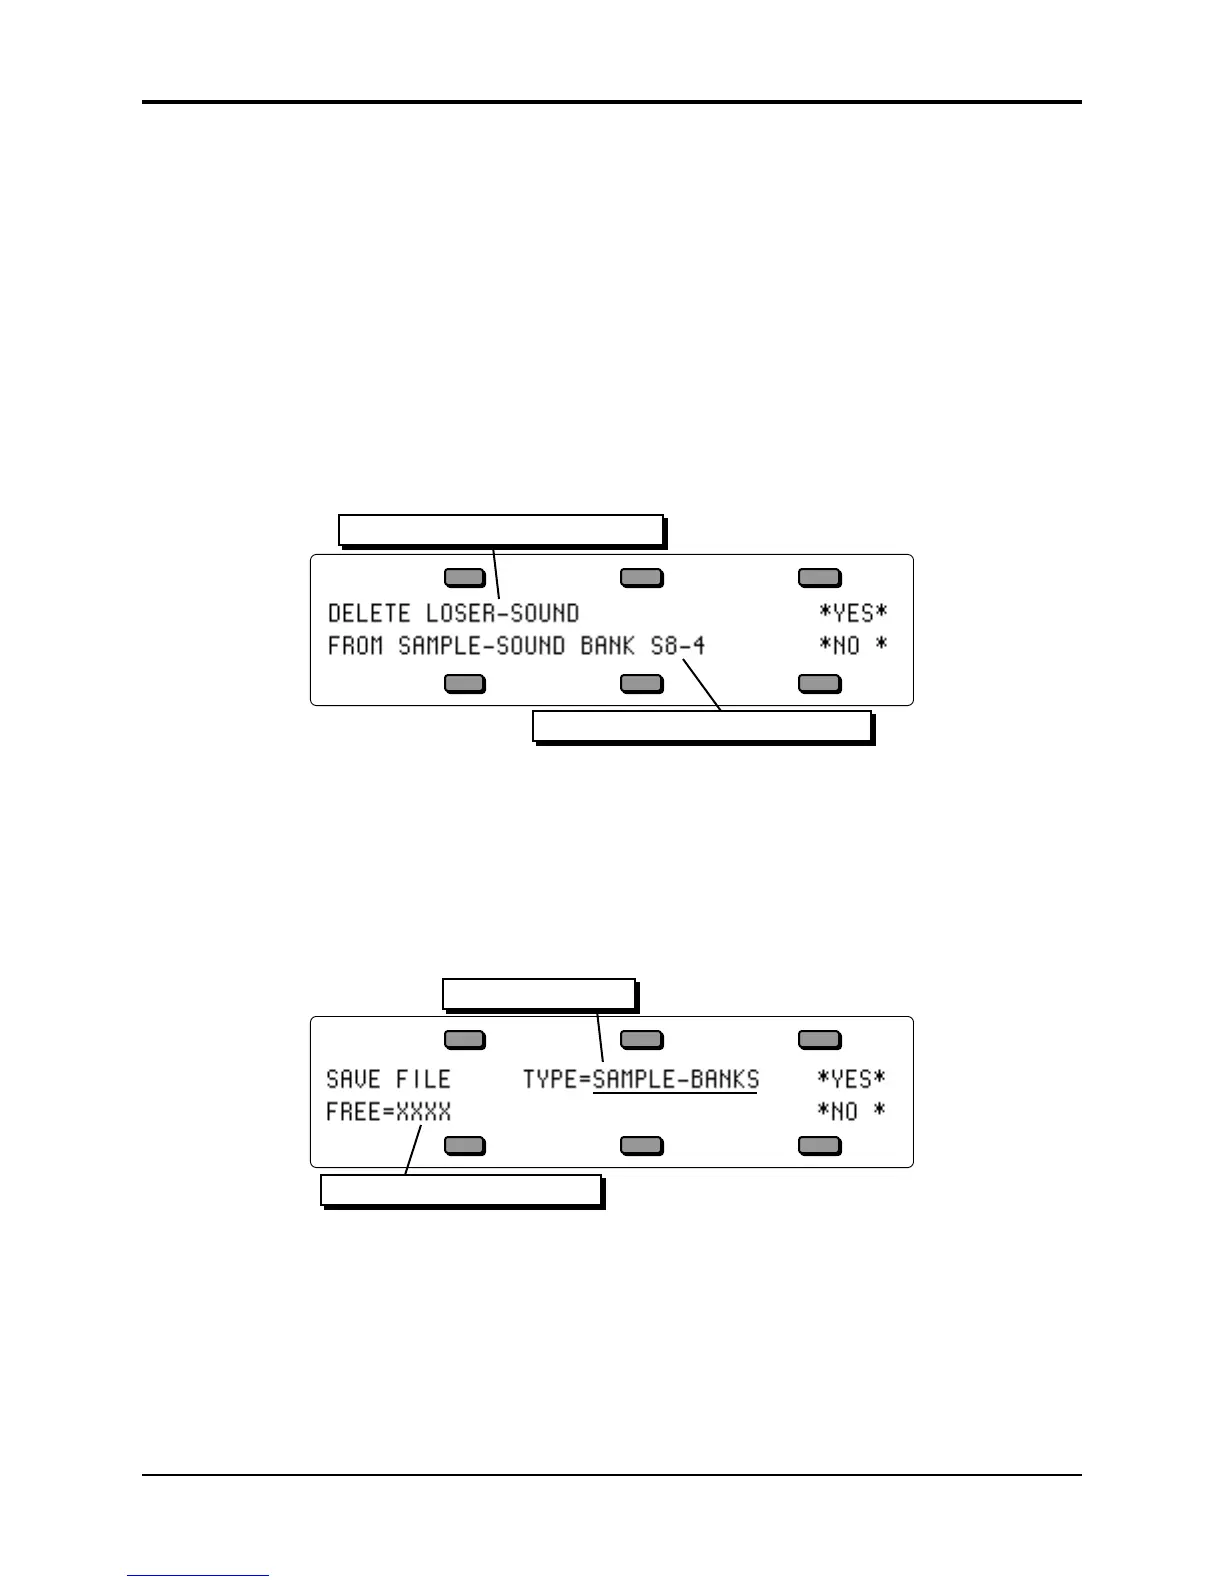
• Press the bottom left soft button beneath SAVE. The display shows the Save File page:
FileType to be saved
amount of free blocks on the disk
• Use the Data Entry Controls to select TYPE=SAMPLE-BANKS.
• Press the soft button above *YES*.
• At this point you can use the Data Entry Controls and the LEFT and RIGHT CURSOR controls
to name the SAMPLE-BANKS file. When you’ve written a name for the file,
• Press the soft button above *YES*. The display momentarily shows SAVING <file name>,
then DISK COMMAND COMPLETED, then reverts back to the SAVE FILE page.
• You have just successfully saved a Sample-Banks file.
 Loading...