17
Maintenance And Service
b) Remove the rubber regulator diaphragm that is situated between the servo regulator and the valve
body. The new servo regulator already has this diaphragm installed.
c) Install the LP servo regulator, with the new longer T-20 screws included in the kit and connect the
harness to the IFC.
8. Reinstall the burner, re grate, log set, and glass door. Also refer to
seconDary InstallatIon - fIre
grate anD log set InstallatIon in your Owner’s Manual. When re-installing the burner, ensure that
the burner to pilot hood and shield relationship is similar to what is shown in Figure 21.
9. Reconnect the main gas line if it was disconnected and open the shut-off valve at the gas line to the
unit.
10. Reconnect the electrical power to the unit.
11. Use a small brush to apply a warm soapy water solution to all gas connections (use a half dish soap
and half warm water). If a gas leak is present, bubbling will occur. Gas leaks can be repaired by
using an approved pipe thread sealant or approved Teon tape. NEVER USE AN OPEN FLAME WHEN
TESTING FOR LEAKS.
12. Relight the pilot and conrm the ame properly covers the ame sensor (see Figure 21). Should the
pilot require adjustment, turn the adjustment screw (gure 48, page 39) clockwise to decrease or
counterclockwise to increase until the correct ame is achieved.
Conversion Kit Installation:
1. Turn the unit off by pressing the ON/OFF Key on the remote and shut off gas supply at the shut-off
valve upstream of the unit. CAUTION: The gas supply must be shut off prior to disconnecting the
electrical power and before proceeding with the conversion. Allow the valve and unit to cool down
to room temperature.
2. Remove the glass door as shown in the
maIntenance anD serVIce - glass Door remoVal.
3. Carefully remove the log set and re grate.
4. Remove the burner as shown in the
maIntenance anD serVIce - Burner remoVal.
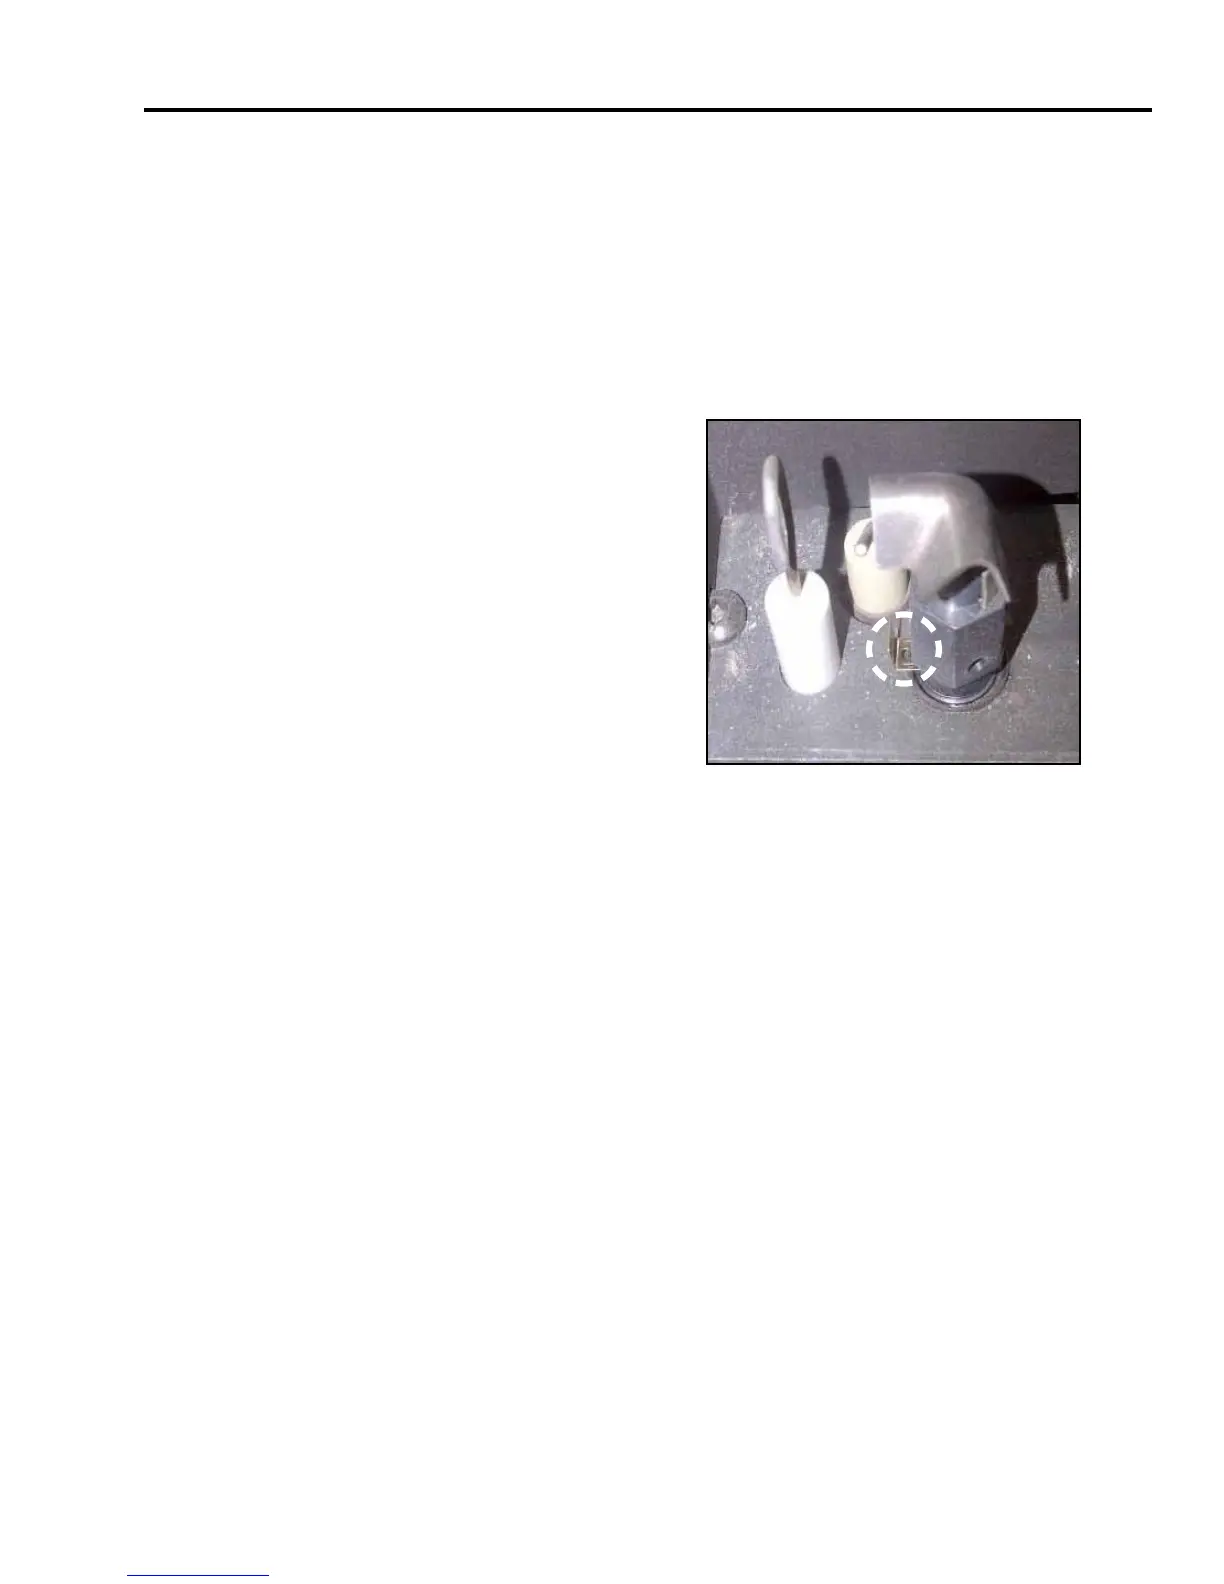
5. Convert the pilot injector (see Figure 20):
a) Using a
7
/16” wrench, turn the pilot head a
1
/4 turn counter-clockwise
b) Push the slider with your nger or
at head screwdriver
- Natural Gas is marked NAT.
- Propane gas is marked LP with an
indicating hole between L and P.
It is also marked red.
c) Turn the pilot head a
1
/4 turn clockwise
back to its original position.
6. Convert the burner orice:
a) Remove the main burner orice with a
1
/2” deep socket
b) Put a bead of pipe-thread sealant into the orice mount. DO NOT OVER-TIGHTEN
7. Convert the SIT gas valve:
a) Use a T-20 driver to remove the two screws that hold the servo regulator to the gas valve and
disconnect the wire harness from the IFC.
Figure 20. Pilot Slider set to LP