25
Initial Installation
QUALIFIED INSTALLERS ONLY
DiRect vent:
WARNING: This appliance has been designed to draw room air for proper heat circulation
from the bottom of the unit, and out the top front. Blocking or modifying these openings in
any way can create hazardous situations.
The vent length for the Q1LI must be between 7” (18 cm) and 44ft (13.4 m). This model is vented with
co-axial 4” intake, 6 5/8” exhaust aluminum or stainless steel approved rigid vent leading into a vertical or
horizontal termination cap. The ue collar of this model will t inside of a standard 4” x 6 5/8” vent and must
be either correctly interlocked or fastened, with three screws directly to the vent.
The Q1LI may also be converted to a replace insert with the use of a co-linear vent adapter kit (50-2982) see
InItIal InstallatIon - co-lInear VentIng aDaPter KIt. When converted to co-linear venting the lenth of vent
must be between 8’ (2.44m) and 40’ (12.19m). The insert model is vented with a 3” intake and a 3” exhaust
aluminum or stainless steel approved ex vent leading into a vertical termination cap only. The ue collars of
this model will t inside of a standard 3” vent
and must be fastened directly to the vent with three screws. The exhaust vent and air intake are both located
on the top of the unit.
Check periodically that the vents are unrestricted. Also ensure that all direct vent pipes have been properly
sealed and installed after routine inspection or cleaning. The air intake and exhaust pipes must be installed in
the correct locations on the top of the Q1LI.
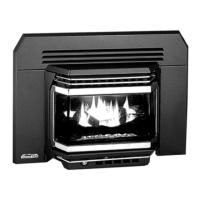
venting fiRepLace inseRts:
When using the co-linear venting adapter kit (50-2982) the Q1LI may be installed and vented into any solid
fuel replace that has been installed in accordance with the National, Provincial/State and local building codes
and has been constructed of noncombustible materials. Please reference the information in Table 8 and Figures
38. An approved chimney liner and rain cap must be used. A throat connector or ashing must be installed to
ensure a tight seal, top performance, safety and efciency. Carefully follow the manufacturer’s instructions that
accompany the chimney liner kit. Use double walled aluminum ex vent (3” ex conversion piece and 4”x 6
5/8” cap) from the following approved products; Simpson Dura-Vent (Direct Vent GS). If necessary, remove the
vent collar plate from the top of the insert and connect it securely to the liner with sheet metal screws. Check
for any tears in the liner at this point. IMPORTANT: The screws that hold the vent collar plate in its approved
position must be installed.
NOTE: If the Q1LI unit is pulled out of its installation, and the vent-air intake system is disconnected
for any reason, ensure that the vent-air intake pipes are re-sealed with high-temperature sealant and
reconnected with three (3) sheet metal screws evenly spaced.