EasyManuals Logo

Epson LS20 Series User Manual

Epson LS20 Series
176 pages
To Next Page IconTo Next Page
To Previous Page IconTo Previous Page
Page #124 background imageLoading...
Page #124 background image
Maintenance 7. Arm #3
112 LS20 Rev.4
(7)
Remove
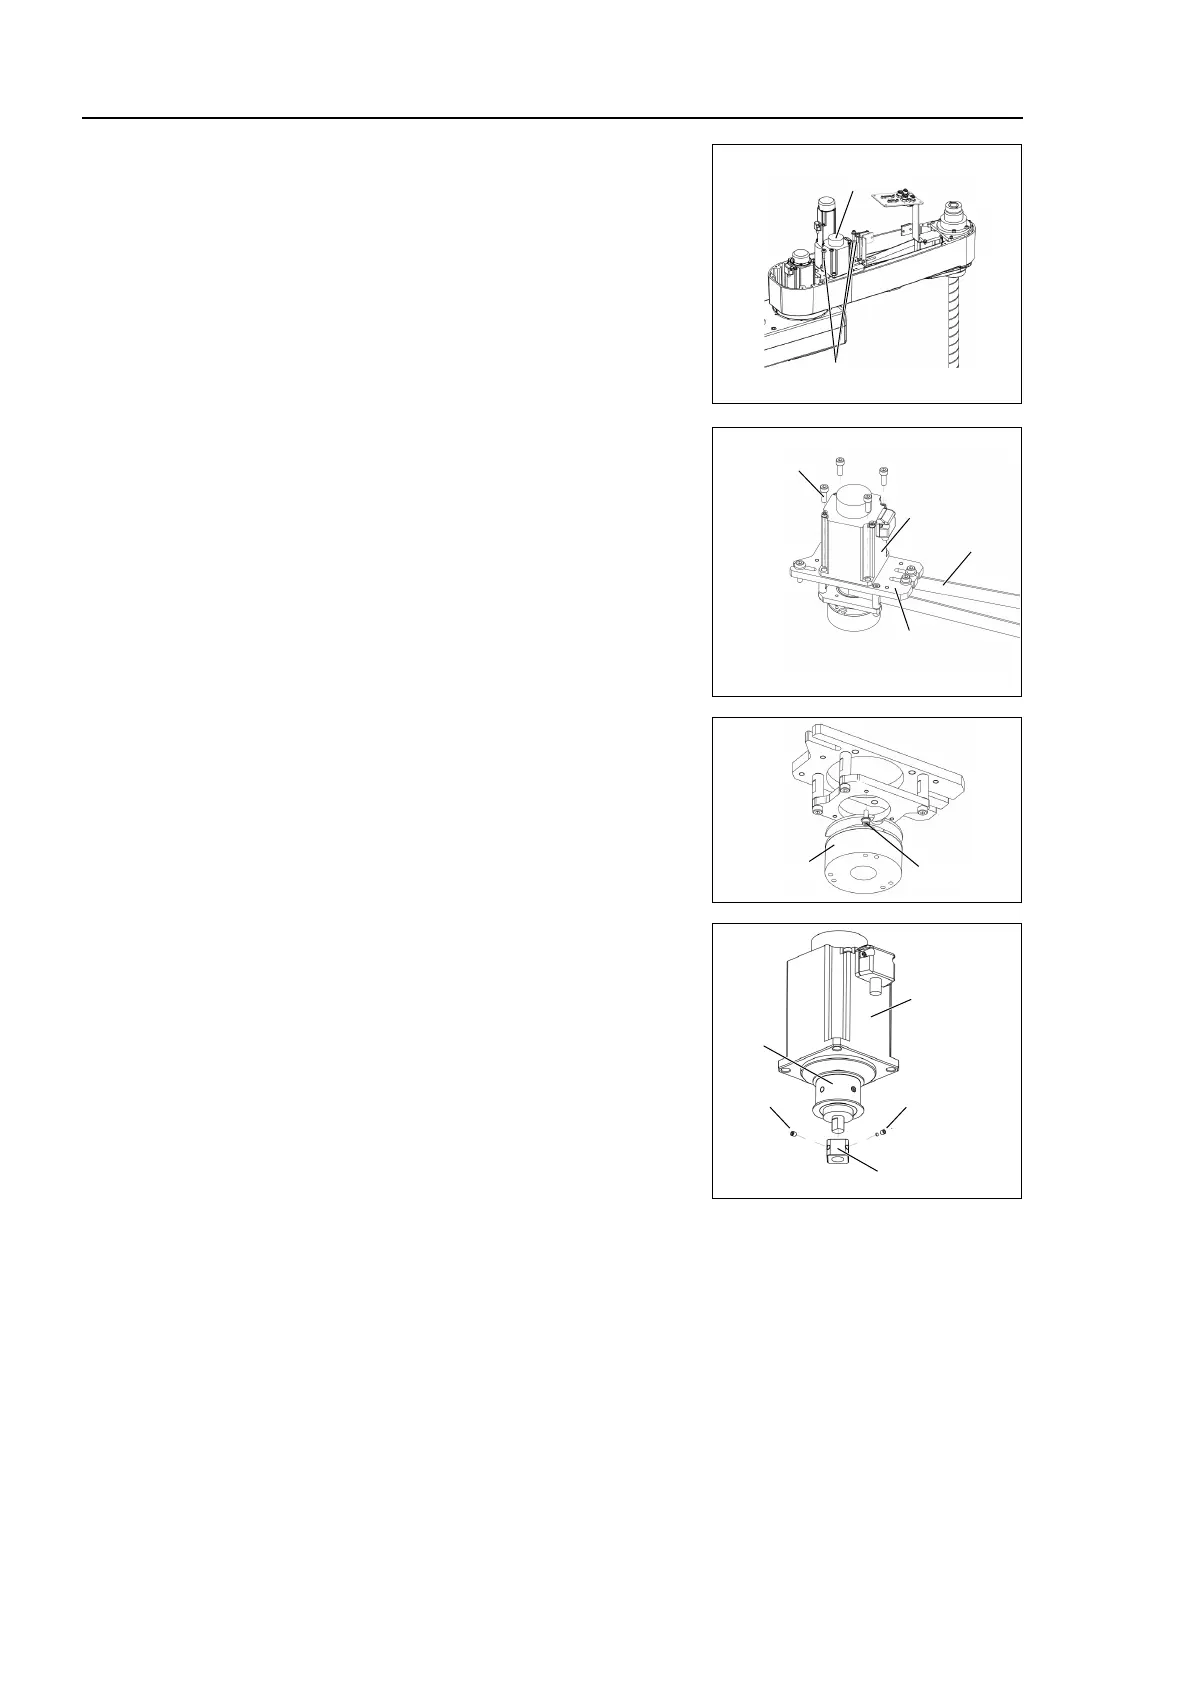
the bolts fixing the Joint #3 motor unit.
The washers for slotted holes will be used again
when installing the Z belt.
Be careful not to
lose them.
Joint #3
Motor Unit
3-M5×20+washer for
slotted hole
(8)
Remove the Joint #3 motor from the motor
plate.
The belt is placed around the pulley. To
remove the Joint #3 motor, tilt the motor slightly
and pull it upward while avoiding the belt.
Joint #3 Motor
Motor Plate
4-M5×15
Z belt
(9)
Remove the brake from the brake plate.
Brake
3-M3×8
(10)
Loosen the screws of the brake hub and remove
the brake hub from the pulley shaft of the Joint
#3 motor unit.
There is a brass bushing on one of the
set
screws
. Be careful not to lose it.
Joint #3
Motor
M3×4
Set Screw
+M3 Bushing
Pulley
Brake Hub
M3×4
Set Screw

Table of Contents

Questions and Answers:

Question and Answer IconNeed help?

Do you have a question about the Epson LS20 Series and is the answer not in the manual?

Epson LS20 Series Specifications

General IconGeneral
BrandEpson
ModelLS20 Series
CategoryRobotics
LanguageEnglish

Related product manuals