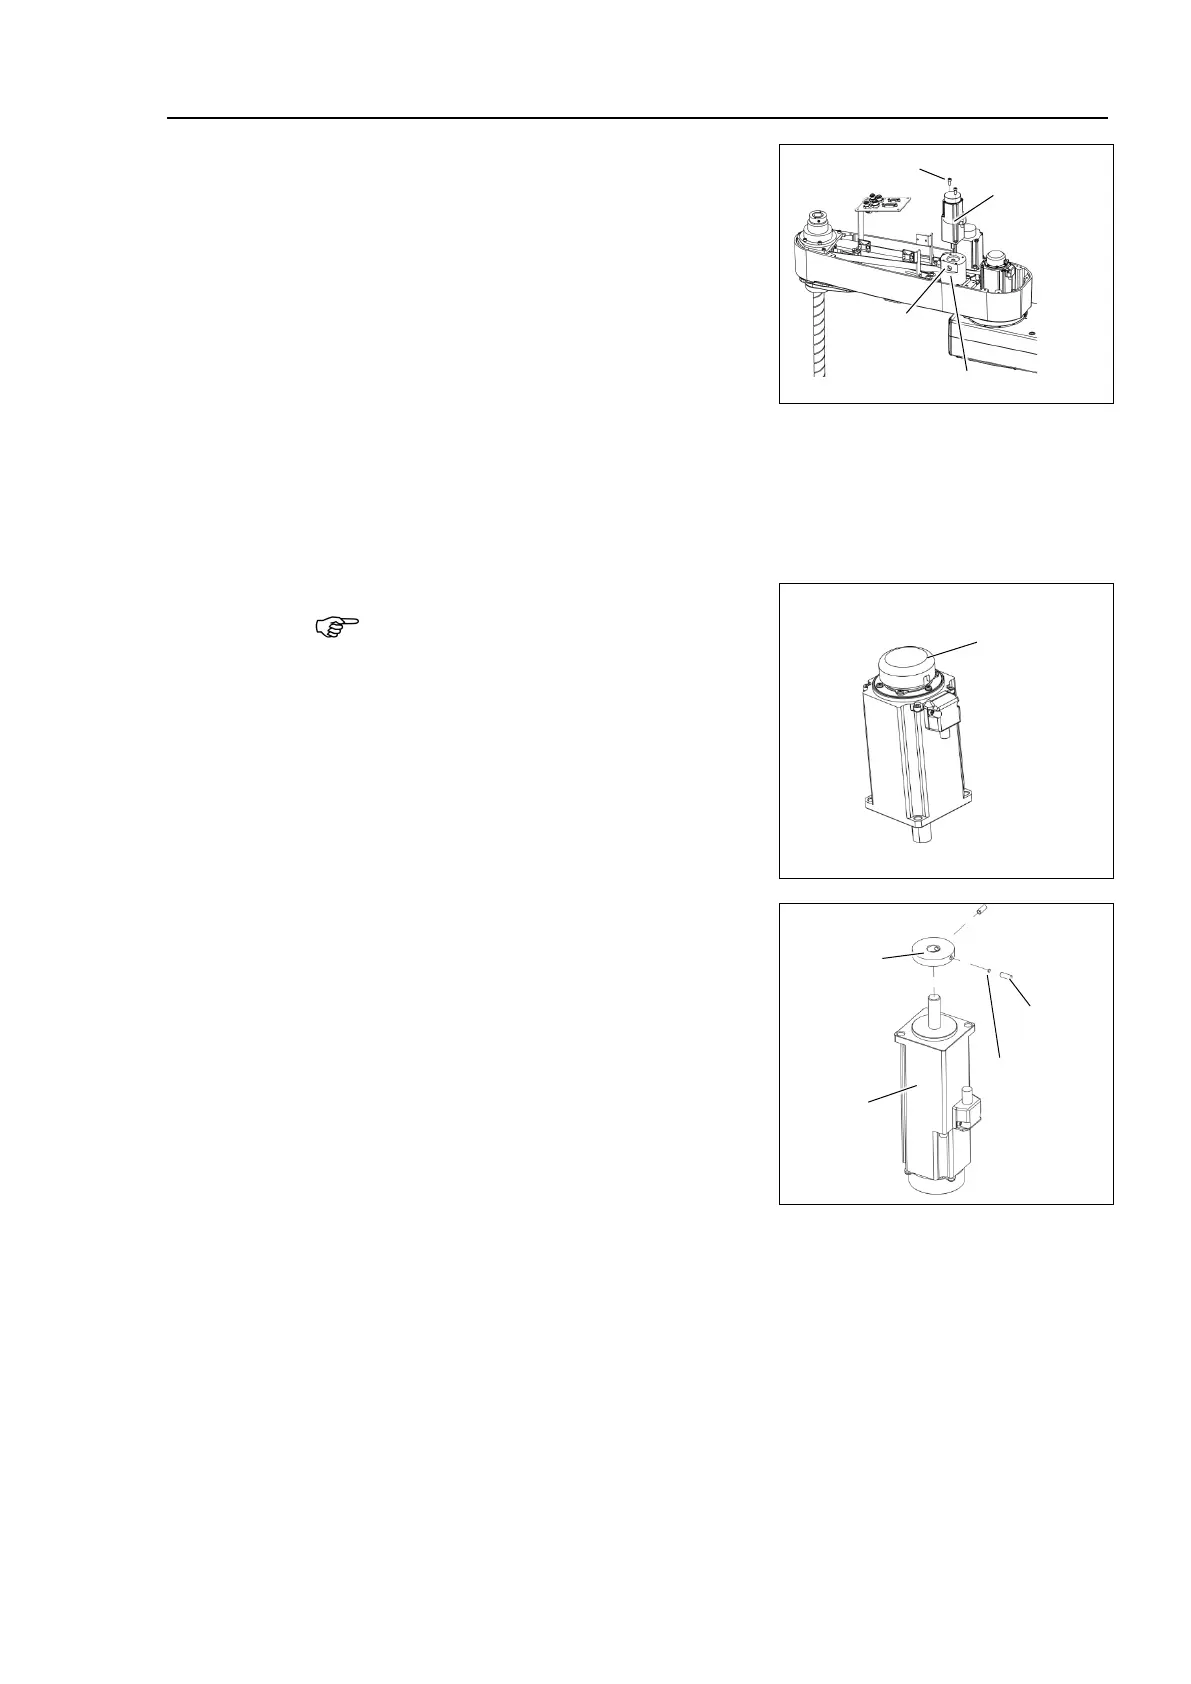
Maintenance 8. Arm #4
LS20 Rev.4 117
)
motor unit from the
Remove the bolts securing the Joint #4
motor on the reduction gear unit.
he hole for fixing the
motor shaft on the side of the reduction gear,
and
loosen the screw. If the screw position
does not match, turn the motor slightly and
move until the screw fixing the motor shaft
can be seen.
Hole for fixing
the motor shaft
loosening the screw, mount the cover to the hole.
upward to remove.
When replacing the motor of the Joint #4,
remove the cap from the old motor and
install it to the new one.
If the Manipulator is operated while the cap
is not installed, the motor may be
damaged
due to entering of the foreign materials into
the rotating part of
the motor sensor and
interference of the rotating part and the
cables.
)
Remove the ring from the Joint #4 motor.
are brass bushings on the set screws.
Be sure to keep the bushing
s.

 Loading...


