Maintenance 8. Arm #4
118 LS20 Rev.4
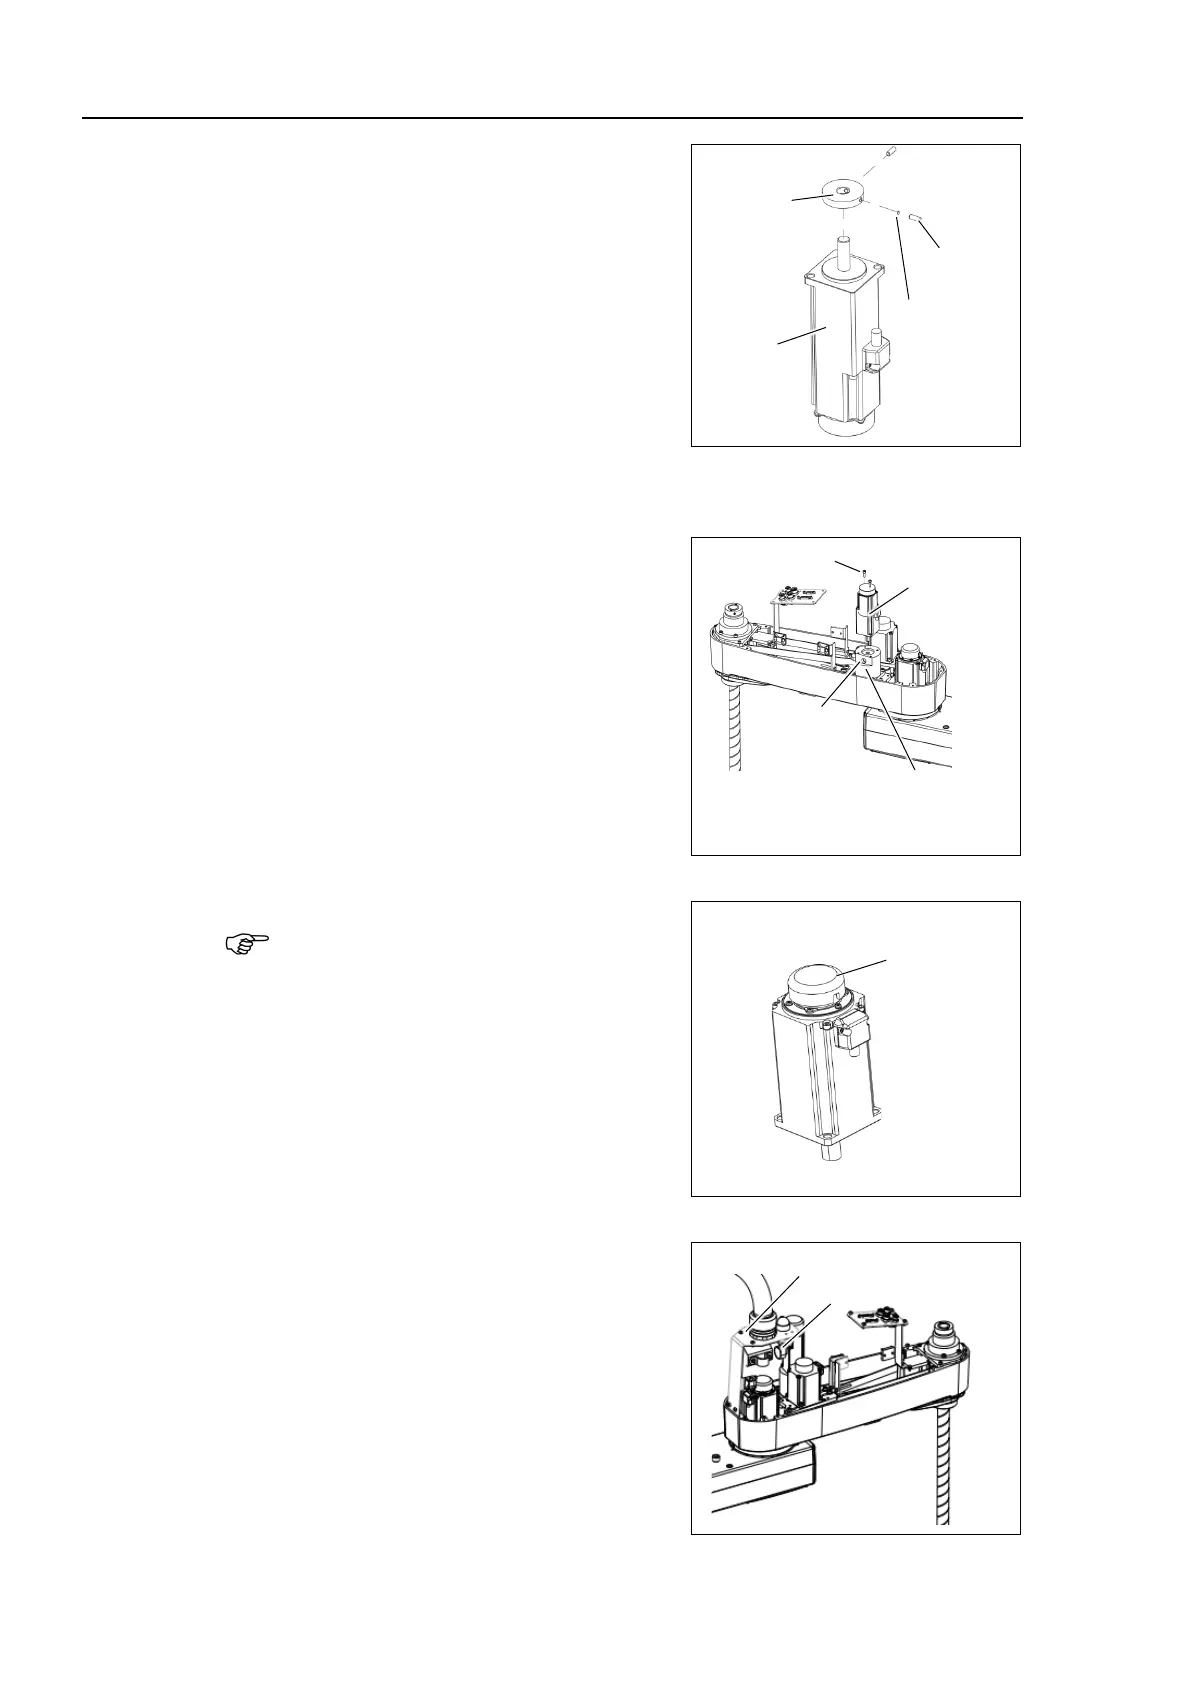
Mount the ring to the Joint #4 motor.
Install the ring leaving 0.5 mm from the
motor.
Note that if there is no space between the
motor and the ring,
friction may occur as the
s and it may cause damage on it.
screws vertically on the flat face of the motor shaft.
with the bushing in order not to damage the motor shaft.
Mount the Joint #4 motor to the reduction
gear unit.
Mount the motor so that the motor cable can
be rear side when seeing from the front side
of the Arm #2.
Hole for fixing
the motor shaft
Fix the motor shaft to the reduction gear unit
Remove the cover of the hole for fixing the
motor shaft, and then tighten the screw to fix
the motor shaft to the reduction gear unit.
After fixing the shaft, mount the
cover for the hole.
When replacing the motor of the Joint #4,
remove the cap from the old motor and
install it to the new one.
If the Manipulator is operated while the cap
is not installed, the motor may be
damaged
due to entering of the foreign materials into
the rotating part of
the motor sensor and
interference of the rotating part and the
cables.
Connect the connectors: X241, X41 and X42.
Install the clip band removed in
the removal
step (5) and bind the cables to fix.
Do not
bend or pull the cables forcibly to allow
strain on the cables.

 Loading...


