32
Setting Up the Projector
Connecting a Component Video Source
If your video equipment has component video connectors (three
connectors labeled either Y/Cb/Cr or Y/Pb/Pr), you can purchase a
component-to-VGA video cable from Epson (see page 16) or an
electronics dealer.
1. Connect the component end of the cable (3 male RCA) to the
Y/Cb/Cr (or Y/Pb/Pr) connectors on your device.
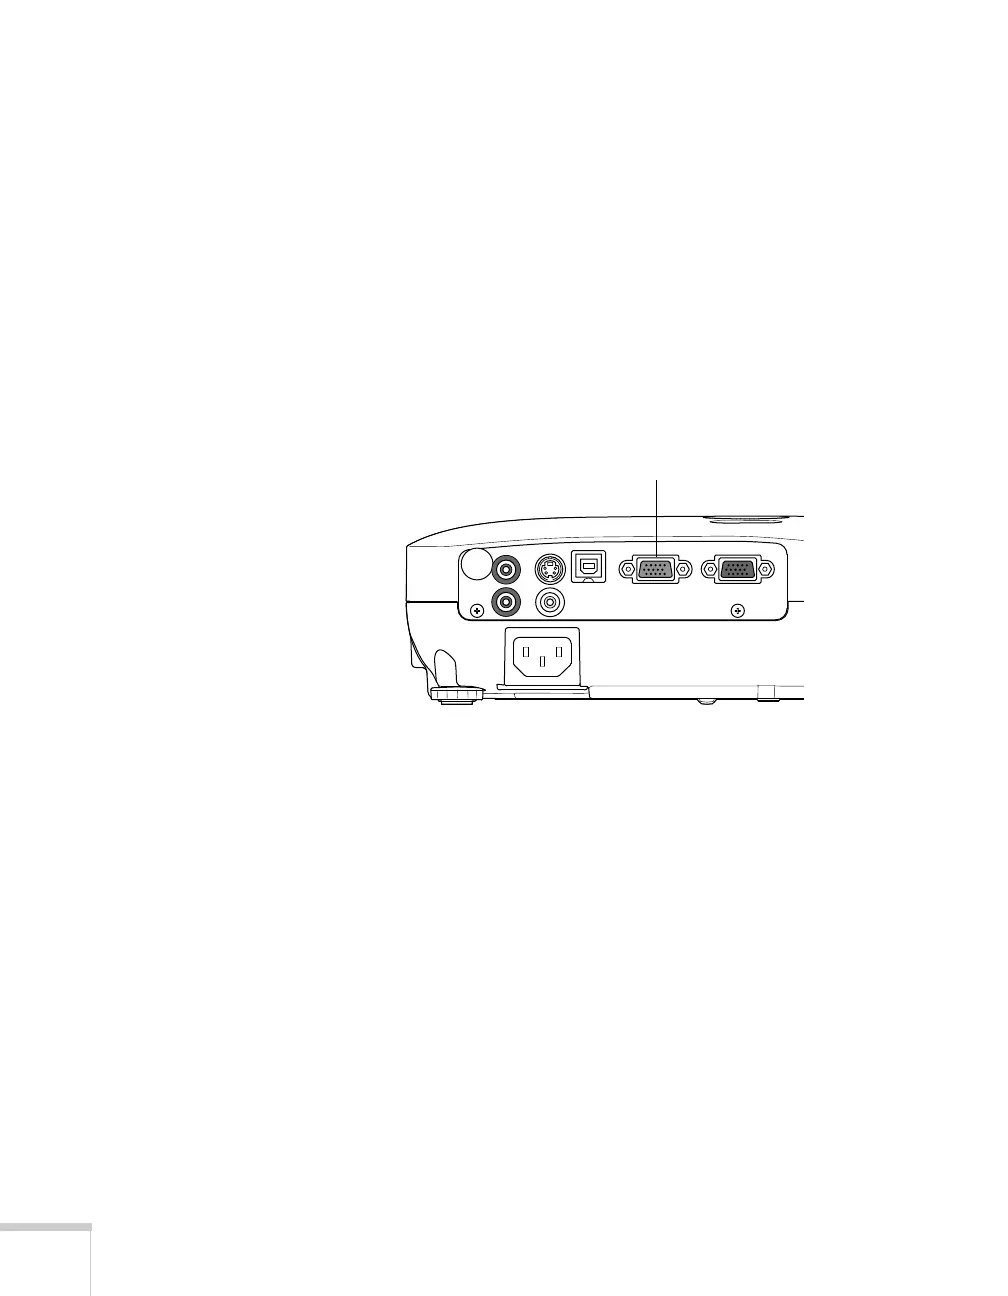
2. Connect the other end of the cable (HD15 male) to the
Computer (Component Video)
port on your projector using an
optional component-to-VGA video cable or adapter.
3. You may need to change the
Input Signal
setting in the
projector’s Signal menu to
Auto
(see page 60).
4. If you want to play sound through the projector, see page 35 for
instructions on connecting an audio cable.
When you’ve finished making connections, see page 37 for
instructions on turning on the projector and Chapter 2 for
instructions on displaying and adjusting the image.
Computer (Component
Video) port