EPSON Stylus C67/C68/D68 Revision A
DISASSEMBLY/ASSEMBLY Disassembly Procedures 72
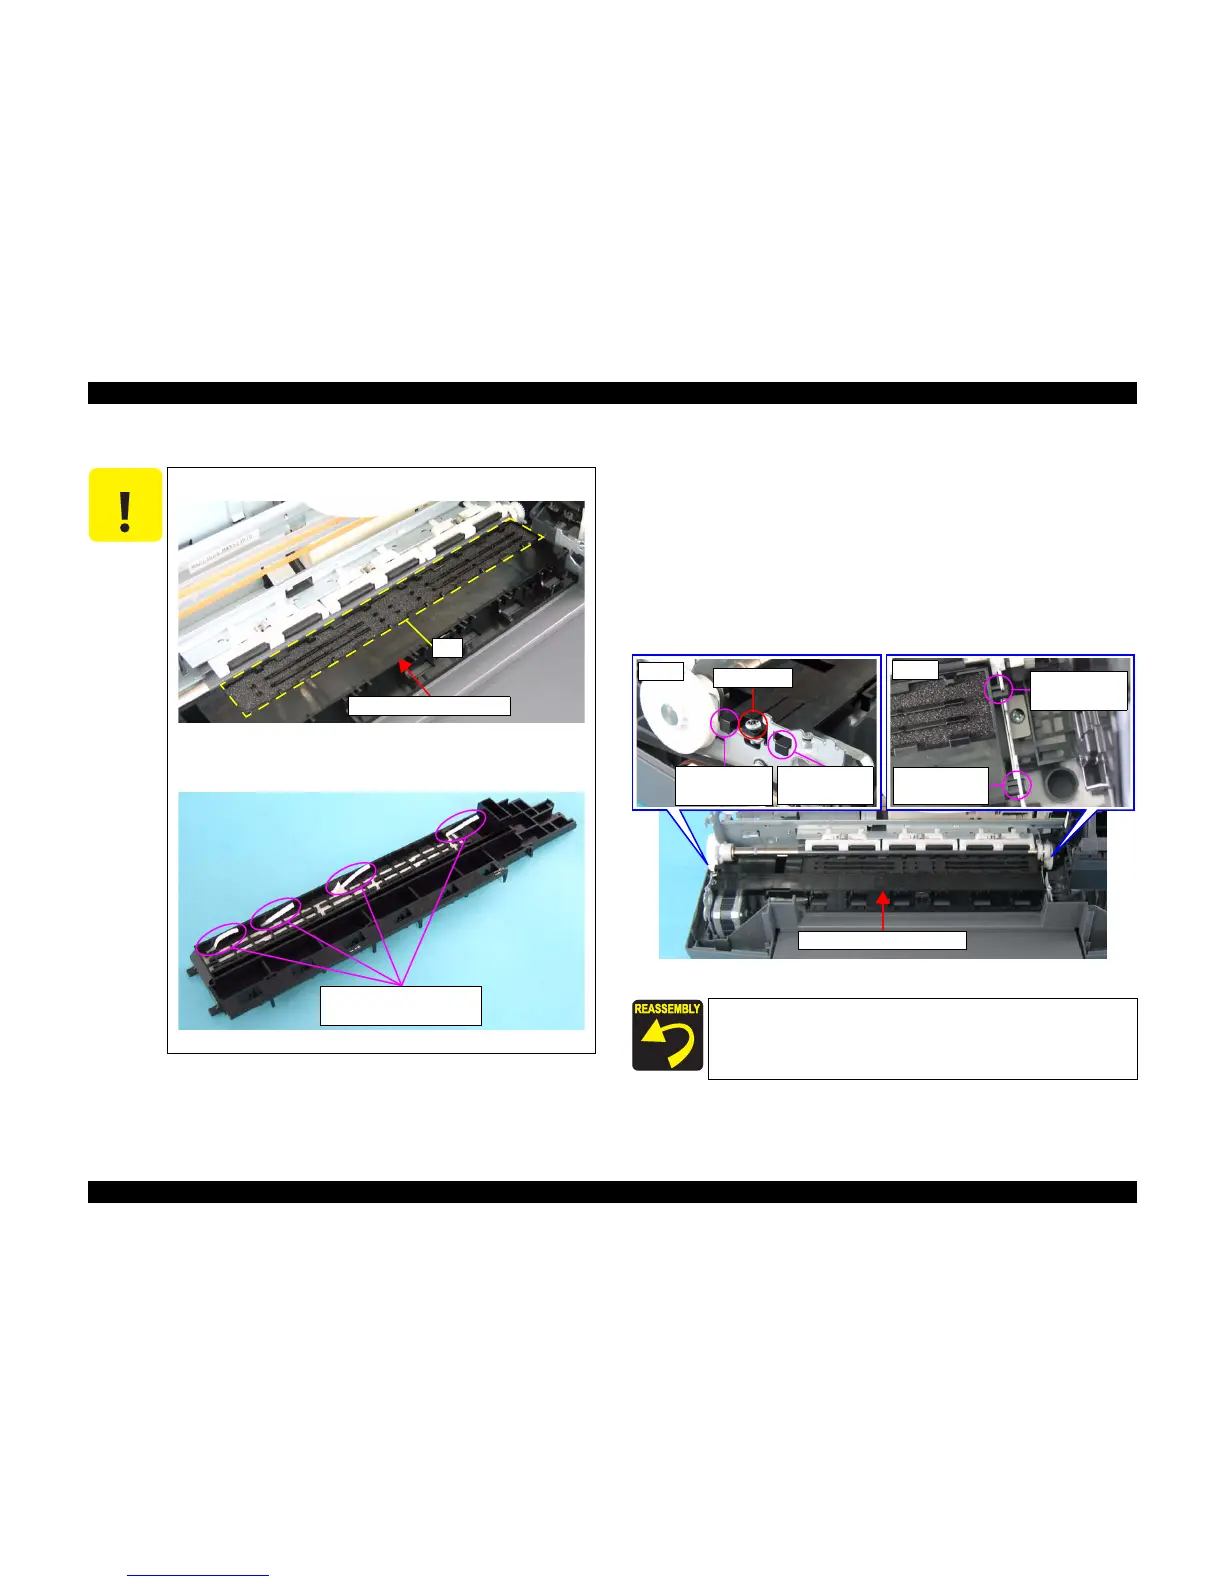
4.3.3.16 Paper Guide, Front Assy.
1) Remove the Eject Roller. (p70)
2) Remove the screw that secures the Paper Guide, Front Assy. to the Main Unit.
• C.B.S. 3 x 8: 1
3) Follow the steps below when removing the Paper Guide, Front Assy.
1. Lift up the left side of the Paper Guide, Front Assy.
2. Slide the Paper Guide, Front Assy. toward left, and release the two
convex portions on the right.
3. Lift up the right side of the Paper Guide, Front Assy, slide it toward
right, and remove the Paper Guide, Front Assy.
Figure 4-69. Removing Paper Guide, Front Assy.
C A U T I O N
Never touch the rib on the Paper Guide, Front Assy.
Figure 4-67. Rib on Paper Guide, Front Assy.
Be careful not to bent the four Paper Guide, Front Absorbent
Protections.
Figure 4-68. Paper Guide, Front Absorbent Protections
Rib
Paper Guide, Front Assy.
Paper Guide, Front
Absorbent Protections
When installing the Paper Guide, Front Assy. to the Main Unit,
make sure to match each convex portion with the notches and the
holes as shown in Figure 4-69.
Paper Guide, Front Assy.
Convex Portion
and Notch
C.B.S. 3 x 8
Left
Convex Portion
and Hole
Right
Convex Portion
and Notch
Convex Portion
and Hole

 Loading...


