1.
Access Web
Cong
, and then select the Network Security tab. Next, select SSL/TLS >
Certicate
or IPsec/IP
Filtering > Client Certicate or IEEE802.1X > Client Certicate.
Whatever you choose, you can obtain the same
certicate
and use it in common.
2.
Click Generate of CSR.
A CSR creating page is opened.
3.
Enter a value for each item.
Note:
Available key length and abbreviations vary by a certicate authority. Create a request according to rules of each
certicate
authority.
4.
Click OK.
A completion message is displayed.
5.
Select the Network Security tab. Next, select SSL/TLS > Certicate, or IPsec/IP Filtering > Client
Certicate or IEEE802.1X > Client Certicate.
6.
Click one of the download buttons of CSR according to a specied format by each certicate authority to
download a CSR to a computer.
c
Important:
Do not generate a CSR again. If you do so, you may not be able to import an issued CA-signed
Certicate
.
7.
Send the CSR to a certicate authority and obtain a CA-signed Certicate.
Follow the rules of each certicate authority on sending method and form.
8.
Save the issued CA-signed
Certicate
to a computer connected to the printer.
Obtaining a CA-signed Certicate is complete when you save a certicate to a destination.
Related Information
& “Application for
Conguring
Printer Operations (Web
Cong
)” on page 348
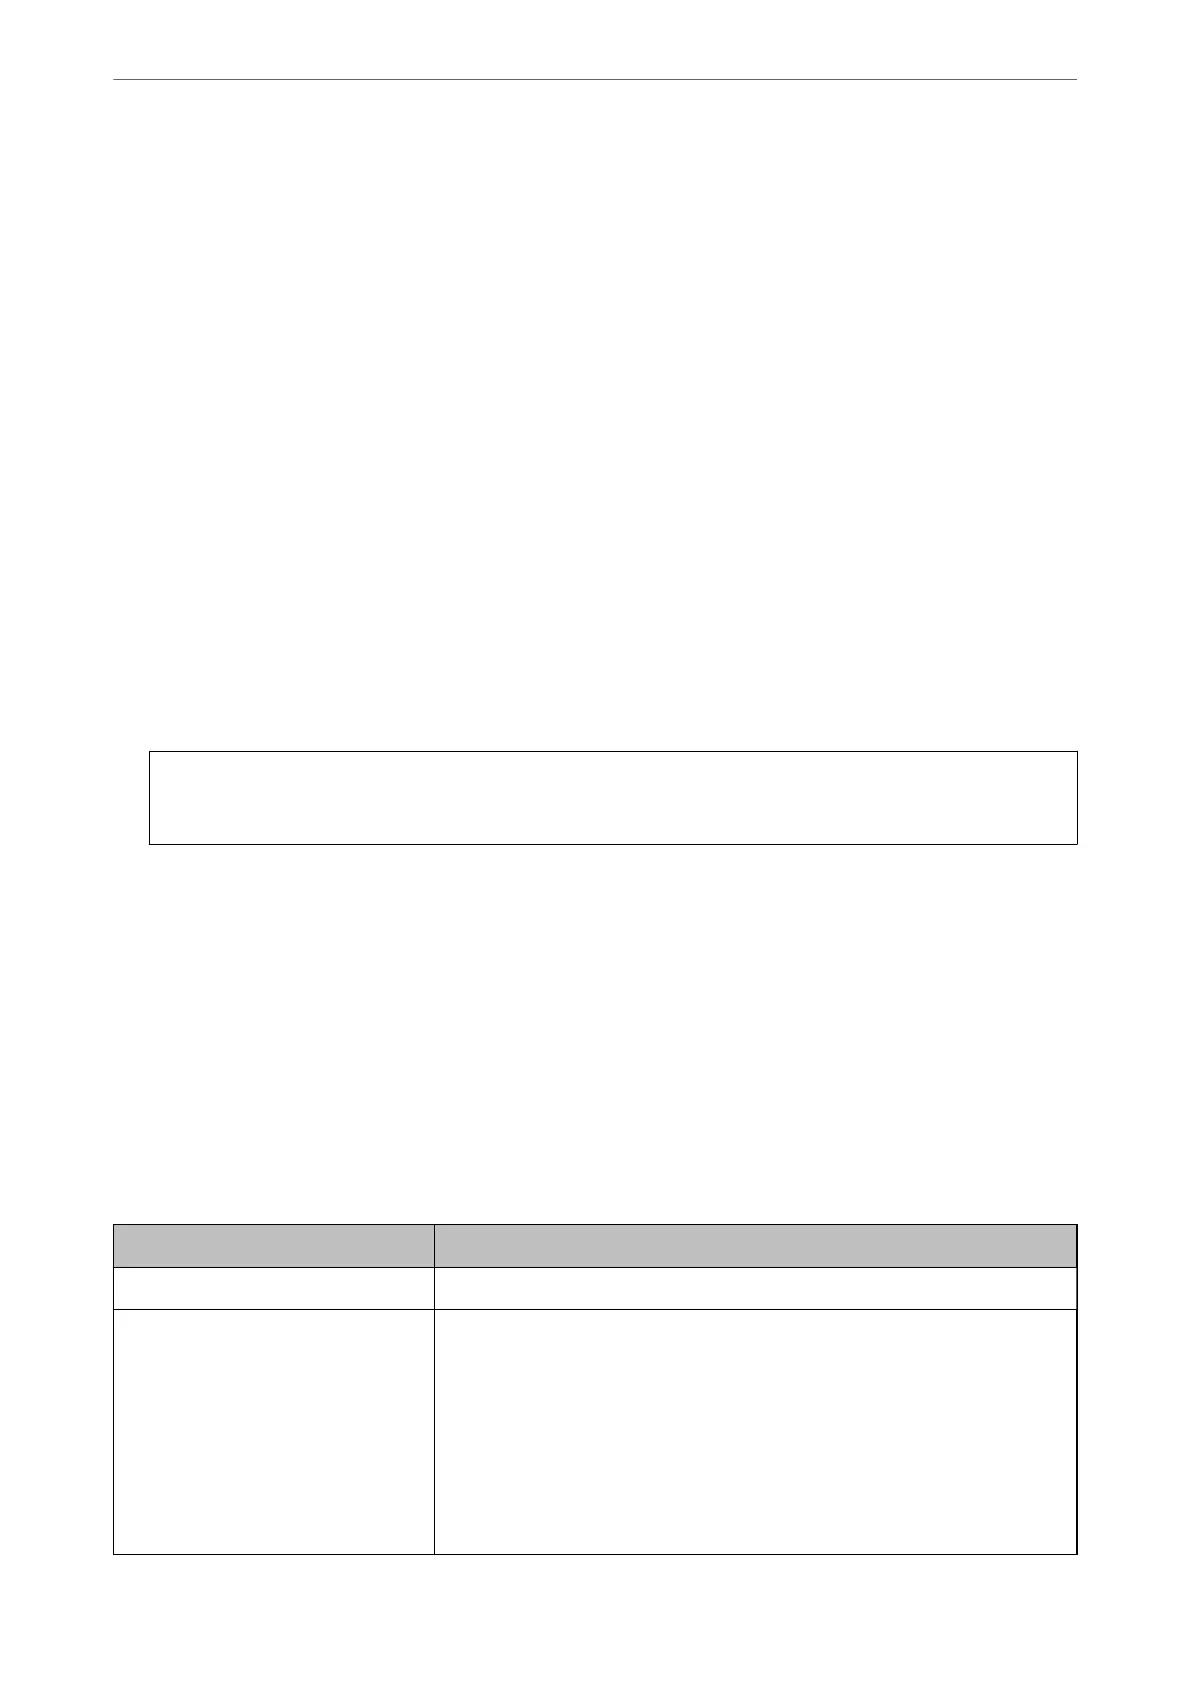
CSR Setting Items
Items Settings and Explanation
Key Length Select a key length for a CSR.
Common Name You can enter between 1 and 128 characters. If this is an IP address, it should be a
static IP address. You can enter 1 to 5 IPv4 addresses, IPv6 addresses, host names,
FQDNs by separating them with commas.
The rst element is stored to the common name, and other elements are stored to
the alias eld of the certicate subject.
Example:
Printer's IP address : 192.0.2.123, Printer name : EPSONA1B2C3
Common Name : EPSONA1B2C3,EPSONA1B2C3.local,192.0.2.123
Administrator Information
>
Advanced Security Settings
>
Using a Digital Certicate
500

 Loading...