Clarity Edge Install Guide
1.
2.
3.
4.
Setting up the Cameras (Road and Driver facing)
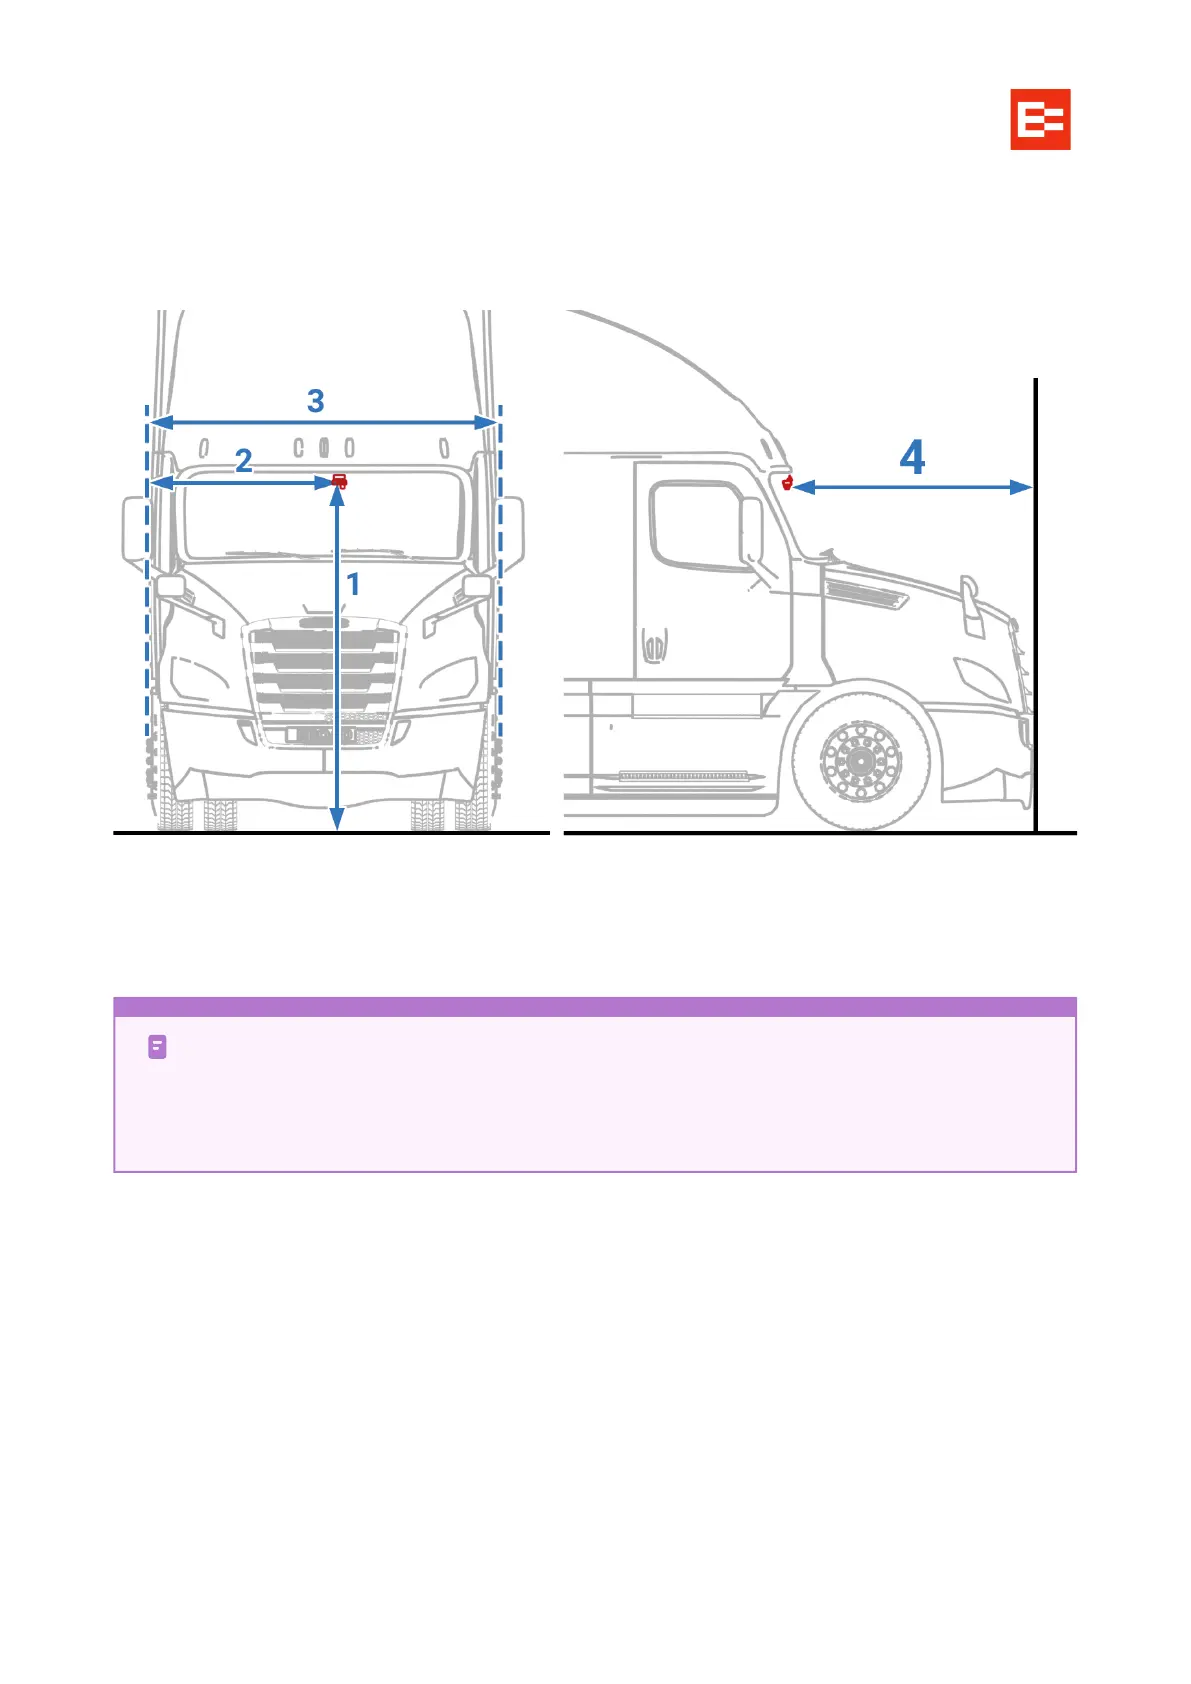
To calibrate the forward facing camera, you need to first accurately measure the following distances from
the road-facing camera lens position and ensure the ezInstaller App is loaded onto your phone.
HEIGHT: the vertical height (accurate to cm/inch) from the ground to the lens for road condition
monitoring of Clarity AI with a tower ruler or tape. This is the ADAS lens installation height.
LEFT MARGIN: the horizontal distance from the lens for road condition monitoring of Clarity AI to the
outermost edge of the LEFT tire.
FRONT-END WIDTH: the distance between the outermost edges of opposite tires. (Side mirrors are
NOT appropriate points, even if they extend beyond the cab width.)
FRONT LENGTH: the horizontal distance from the camera lens to the front most point of the vehicle.
Tilt angle
The app will allow you to adjust the unit’s camera for optimum performance. Once the correct angle is found
tighten the mounting bracket screw to lock the position in place.
LEFT is left from viewing the vehicle from the outside, front. Always. It doesn’t matter which
side the steering column is: left is from the outside front.
Side mirrors are NOT considered in measuring width or margin, even if they extend past the
main body sides.