IVX 20 Hardware overview/installation
B.11
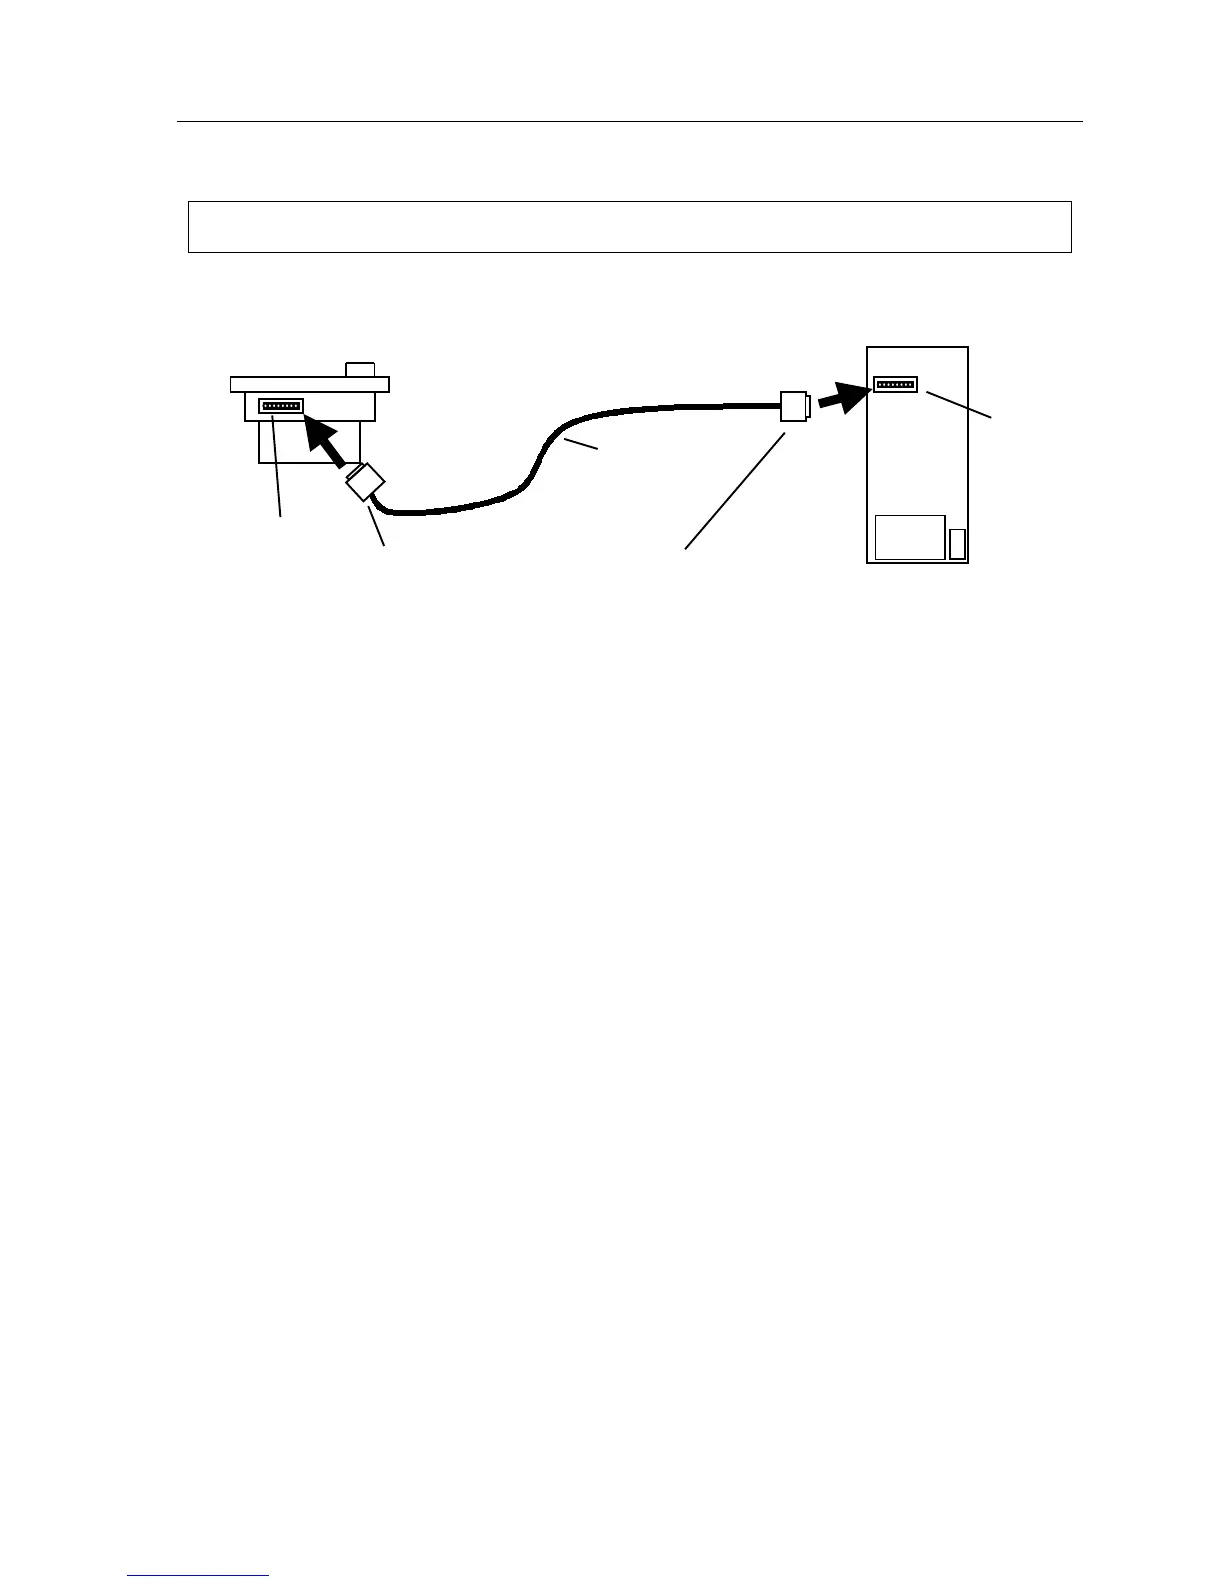
Nine-pin
serial connection
P
(rear view)
Female plug Male plug
TAPI Phone installation
Important: These installation instructions apply only to the IVX 128/IVX 20 TAPI Phone.
1.
With the PC turned off,
connect the provided serial cable to COM port 1 (or other available COM
port) of the PC. Attach the other end of the cable to the nine-pin serial port on the back of the
IVX 128/IVX 20 TAPI Phone.
Note: The cable supplied with your TAPI Phone may not fit the back of the PC. If so, you will
need to purchase locally a cable (or an adapter) for the PC.
Note: For Windows 98, skip to step 5.
2.
Turn on the PC and start the Windows Explorer (not Internet Explorer) program.
Select the C: drive and open the System folder within the Windows folder. This is the subdirec-
tory c:\windows\system.
Within c:\windows\system, locate the file unimodem.vxd. This is the PC’s modem driver. Right-
click on this file.
From the pop-up menu that appears, select Properties.
When the Properties box appears, click on the Version tab.
If the unimodem.vxd file version is not at least version 4.10.431, abort this procedure; instead,
refer to “Important: If you must update the modem driver” (page B.13) for special instructions
to follow before returning to and performing this procedure.
3.
While still viewing the contents of c:\windows\system, locate and single-click on the file tele-
phon.cp$.
Note: If you see a file called telephon.cpl (and not one called telephon.cp$), skip to step 5.
4.
Press F2. This lets you edit the file’s name. Type telephon.cpl and press Enter to rename the file.
5.
Click on Start ➜ Settings ➜ Control Panel.
Double-click on Telephony.
IVX 128/IVX 20
TAPI Phone
(rear view)
COM
port
RS-232C
serial cable