ETAtouch controller Getting to know the control system
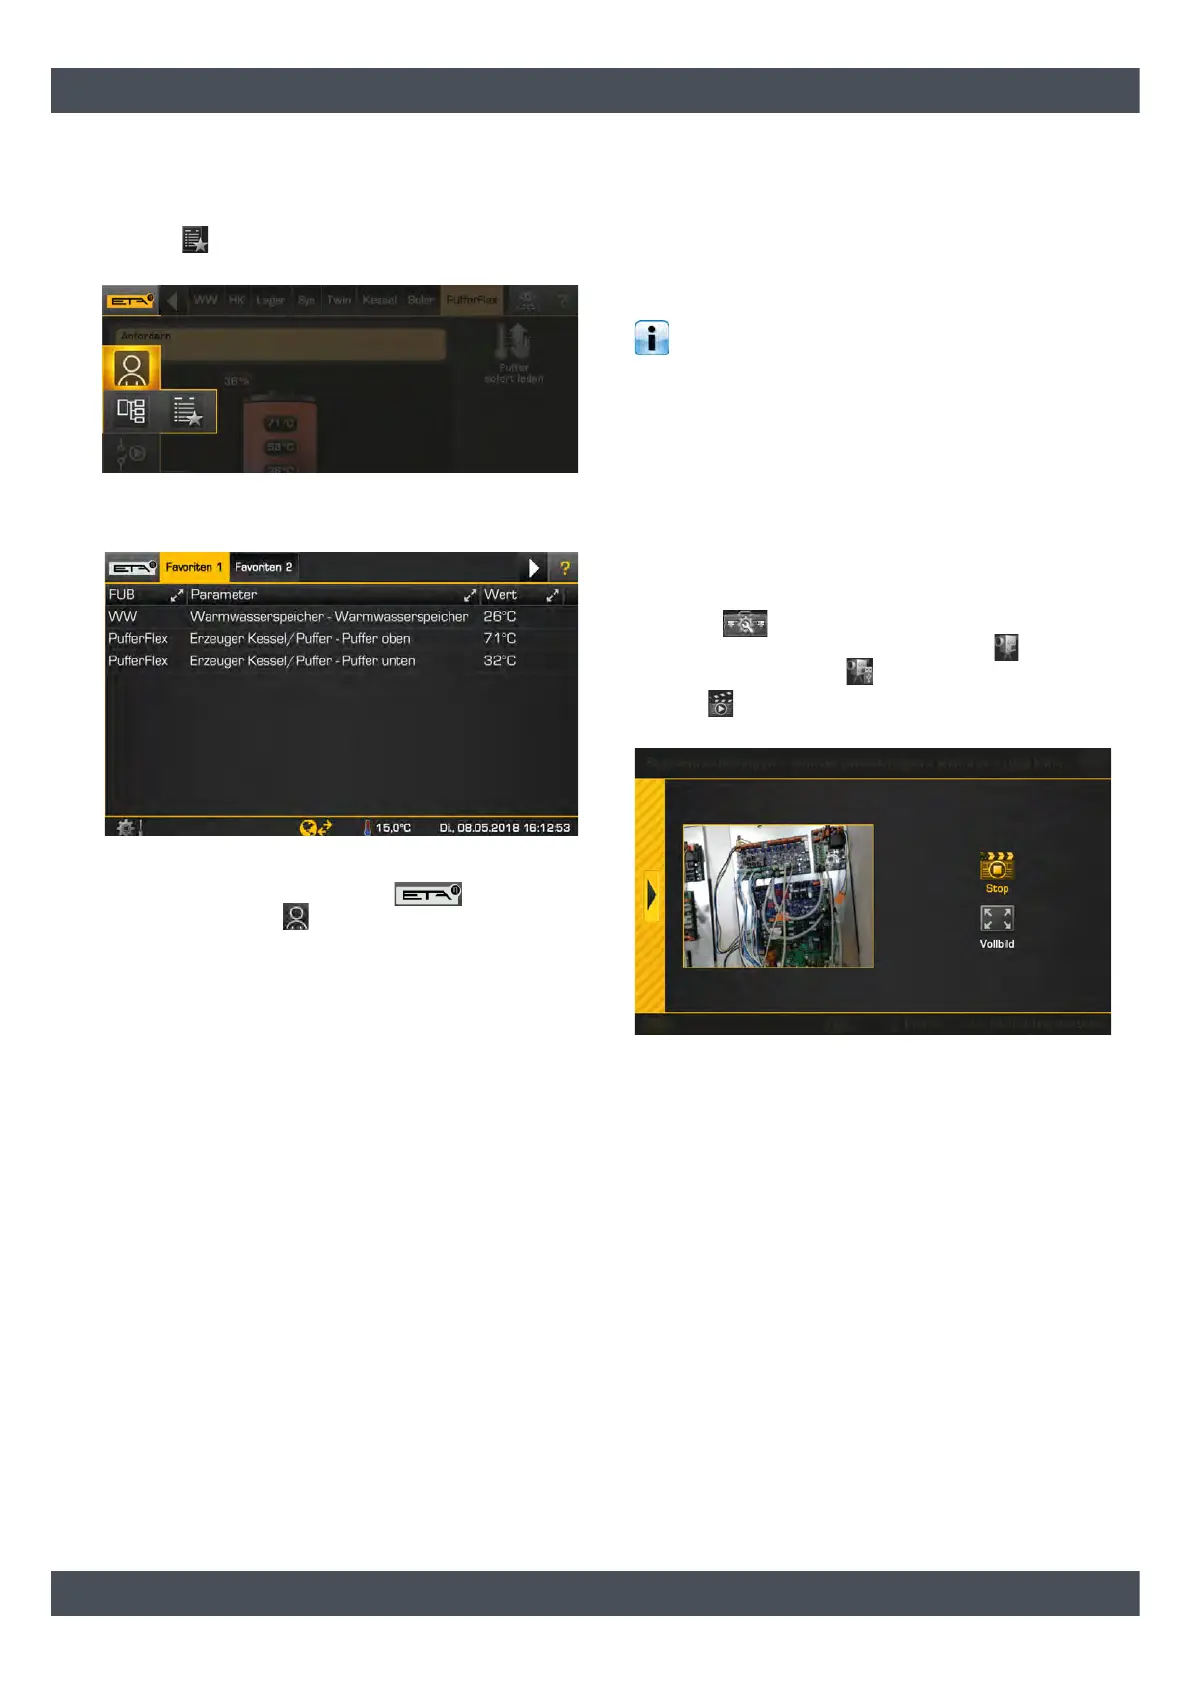
Displaying the values of the favourites parameters
If parameters are added to favourites, the symbol for
the favourites also appears next to the text menu
symbol . Tap on this to see the individual
parameters.
Fig. 7-42: Display favourites
An overview screen opens.
Fig. 7-43: Overview
To close this overview tap the symbol and
select the user view , for example.
7.1.9 USB camera
Connecting the USB camera to the control system
There is the option of connecting a USB camera to a
free USB port of the control panel. You can use this to
monitor the stock of your fuel store, for example.
So that the USB camera is recognised by the
control system it must be suitable for "Windows
XP" or "Windows Vista". For example: "Microsoft
LifeCam Studio", "Logitech HD Pro Webcam C920" or
"SpeedLink Reflect LED Webcam". A maximum line
length of 40 m is possible when a USB 2.0 (or later)
extension cable is used with signal amplification
(active).
Displaying the camera image
1. Connect the camera to a free USB port on the
ETAtouch control panel.
2. Open system configuration and switch to the
[Global Settings] menu. Press the [Camera]
button and then the [USB cable] button.
3. The button starts and stops the transmission of
the camera image.
Fig. 7-44: Displaying the camera image