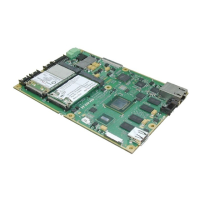
Getting started with your APOLLO
Issue G 17
Connecting a floppy disk drive
The APOLLO supports one slimline floppy drive via a flat flex connector. A 26-way flat flex
cable is used to provide a direct connection between the APOLLO board connector (see
J27 – Slimline floppy drive interface
on page 50) and the slimline floppy drive. Power for
the floppy drive is provided over the cable.
The BIOS default configuration assumes that a 1.44MB floppy disk is connected.
You can use the PhoenixBIOS setup to change this to other floppy drive formats.
See page 54
for details.
Connecting a hard disk drive
The APOLLO provides a single primary IDE controller, enabling up to two IDE devices to
be connected. For optimum performance, ATA66 drives and above should use an 80-way
IDE ribbon cable with 40-way connectors. An 80-way cable has additional ground lines to
improve the signal integrity at the higher ATA66 and ATA100 operating speeds.
If you add two drives to a single channel, one should be set up as a ‘master’ and the
other as a ‘slave’. The BIOS automatically detects the hard disk drive(s) during the POST
processes and configures the hardware correctly. The PhoenixBIOS allows either a
master or slave device to be the boot device. See page 54
for further details.
For further details about the IDE interface
, see page 103.
The standard APOLLO cable kit provides an 80-way IDE ribbon cable for use with
ATA66 and ATA100 drives.
Connecting a CD-ROM (IDE type)
If a CD-ROM drive is required in the system, it may be connected in place of a secondary
drive (as detailed above). The CD-ROM should be configured as a ‘slave’ device.
Drivers are required to support a CD-ROM drive under DOS. If a bootable CD is inserted
in the drive, the BIOS can be configured to automatically boot from this CD.