3
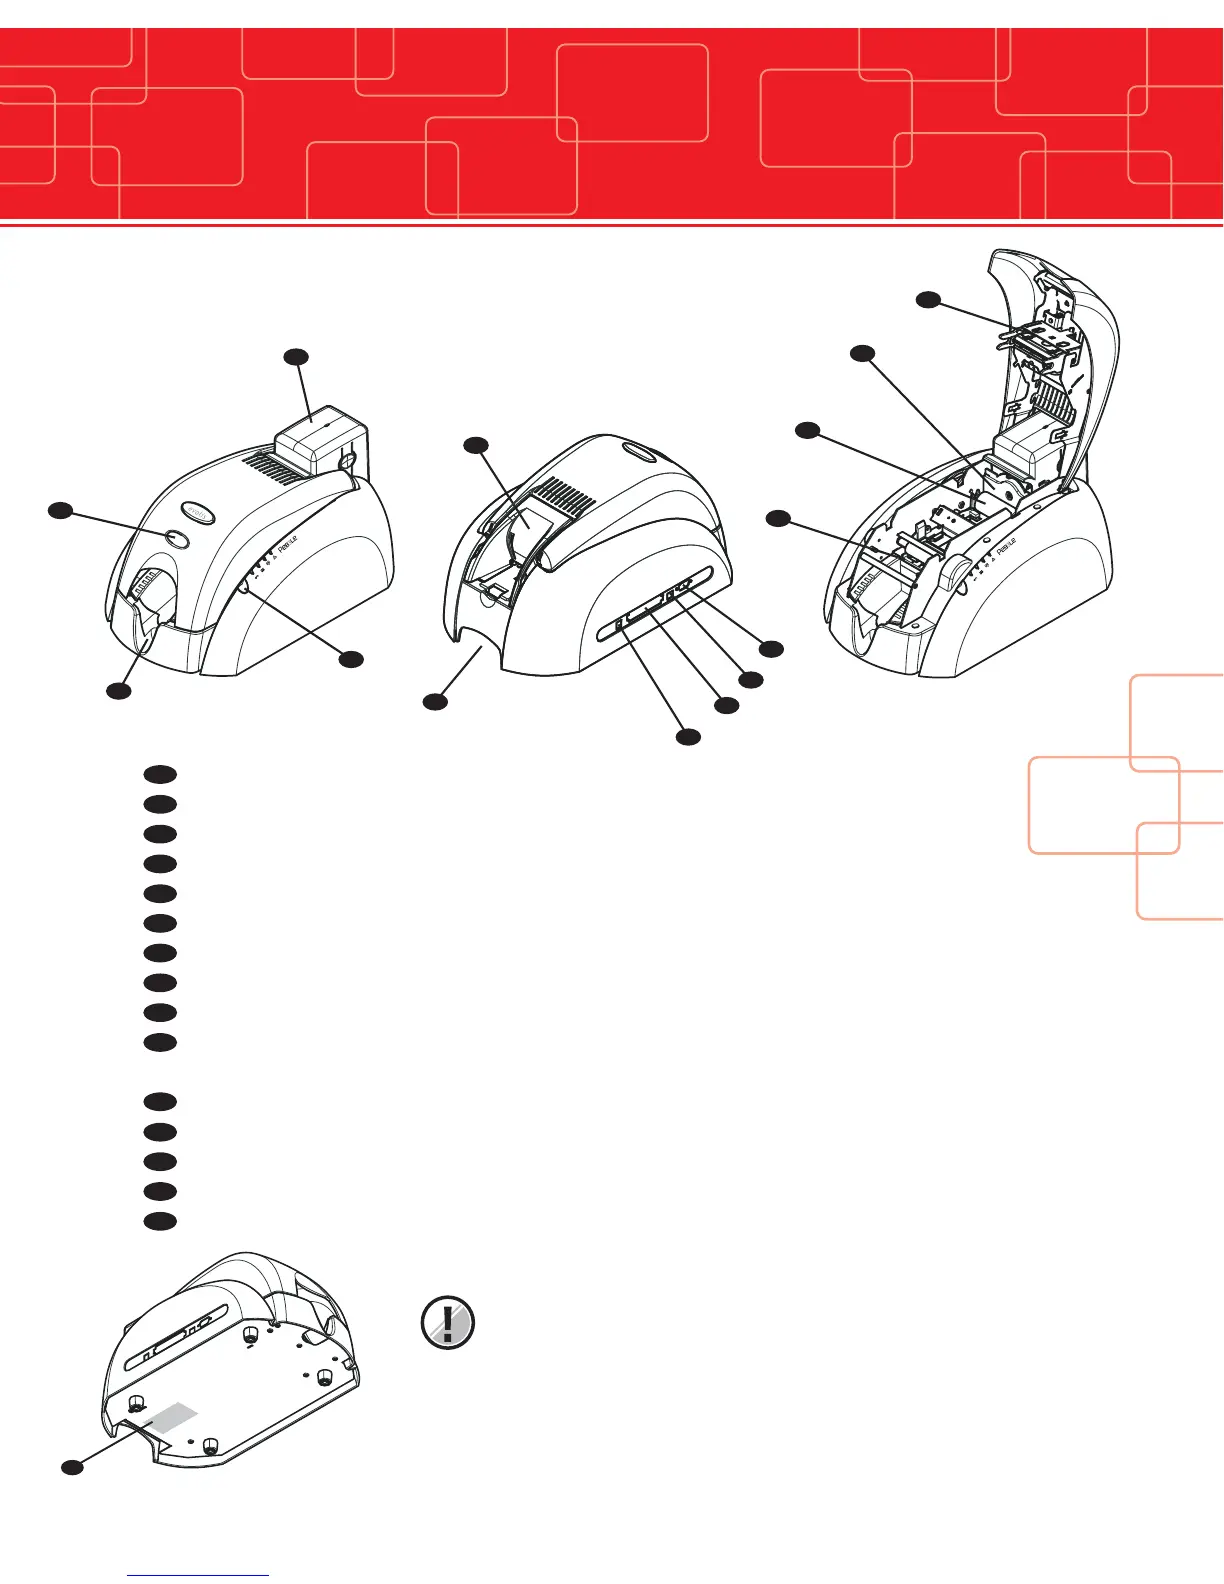
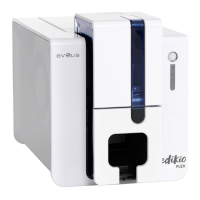
Output hopper Collects the printed and/or encoded cards
Cover lever Enables the printer cover to be opened and closed
Card feeder Receives the cards for printing
Control panel Shows the printer activity
Manual feed tray Enables the cards to be inserted one by one (optional)
Carrying handle Enables the printer to be carried
Electrical connector Enables the printer to be connected to its power supply
Centronics parallel port (std) Enables data to be received and sent from and to the computer
USB port (std) Enables data to be received and sent from and to the computer
DB-9 connector (optional) Enables data to be received and sent from and to the computer
or a coupler to be connected for chip cards personalization
Magnetic encoder Enables cards with magnetic tracks 1, 2 and 3 to be encoded
Cleaning roller Removes all dust before the cards are printed
Card thickness gauge Enables the thickness of the card to be adjusted from 0.25 mm to 1 mm
Thermal print head Enables the cards to be printed in 300 dpi
Identification label Indicates the model and the serial number of the printer
IMPORTANT !
The printer must be placed on a flat surface, in a dust free environment.
It is essential to be able to access the printer from all sides for its installation.
A
B
C
D
E
F
G
H
I
J
K
L
M
N
O
L