V10k automatic 4. Installation
15
EN
• for 115 V positioners: ø 22 mm
1 To open the cover:
Remove the knob (Allen key 2 mm),
2 Unscrew the upper part of the housing.
Lift the lateral brackets and pull the cover
away.
3 Connect the positioner.
Make sure that the gear case of the posi-
tioner is safely connected to protection
ground.
4 In order to separate the positioner from
the mains during service or repair, install a
2 pole switch between the control unit
and the positioner not far from the posi-
tioner.
5 Check the function.
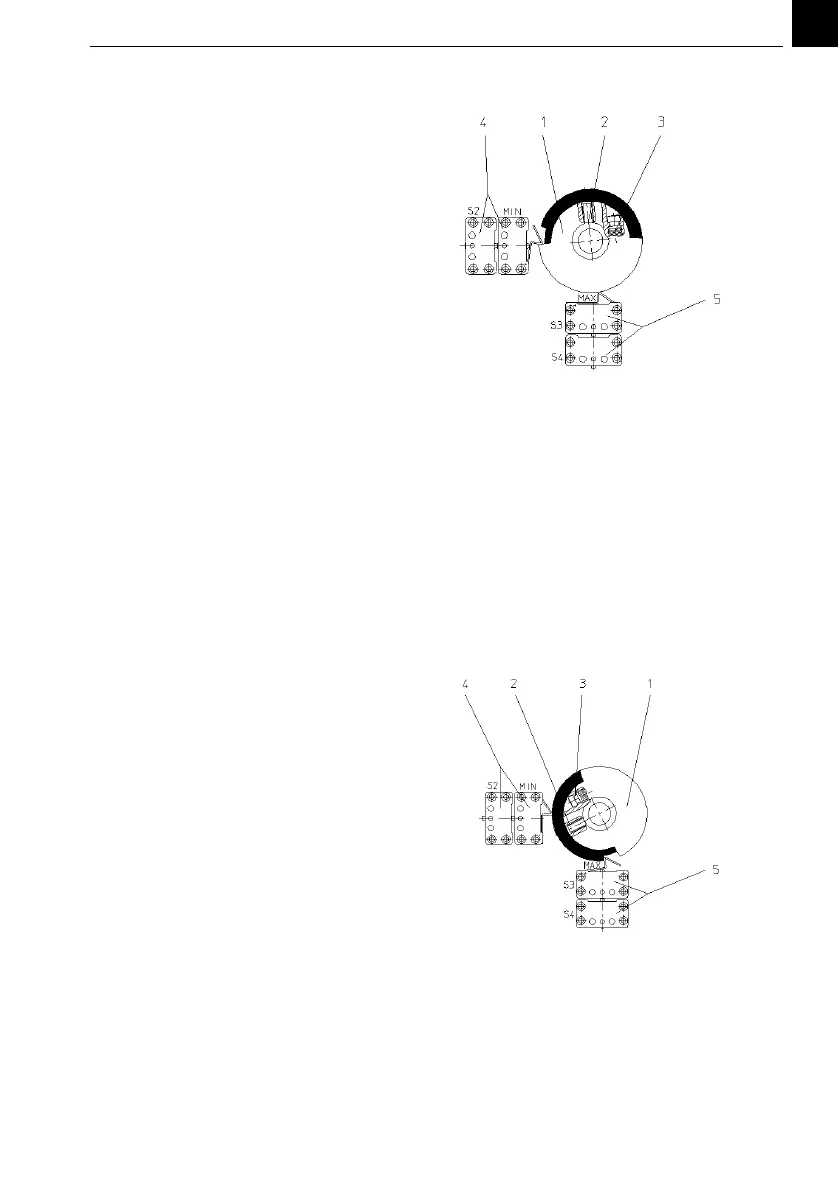
4.5.3 Adjusting the positioner
The positioner is supplied pre-adjusted to the
chlorinator. Adjusting can become necessary
e.g. if the system should be adjusted to a diffe-
rent '0'-position or after repair.
The lower limit can be shifted upwards up to
60% of the range (e.g. for basic chlorination).
Preparation
1 Switch off the mains to the positioner and
to the limit switches and ensure that the
wires are free of voltage.
2 Disengage the motor by pulling the knob
out.
3 Remove the knob (set screw, Allan key 2
mm)
4 Unscrew the cover, lift the side clips and
remove the cover.
5 Replace the knob or turn the knob shaft
with a screw driver.
Adjust the MIN limit
1 Move the connecting rod fully outside
and then 2 mm back.
2 Loosen the set screw (pos. 2) of the cam
disk (pos. 1).
The corresponding key is fixed in the
cover.
3 Turn the cam disk until both MIN-limit
switches (pos. 4) are switched by the
upper part of the cam disk.
4 Press the cam disk to the stop and fasten
the setscrew without turning the cam
disk.
Adjust the MAX limit
1 Move the connecting rod fully inside and
then 2 mm back.
2 Turn the lower part of the cam disk by
turning the set screw (Pos. 3) so far that
both MAX switches (Pos. 5) are switching.
Don't loosen or turn the whole cam disk.
3 Check by moving the connecting rod.