Operation
EXAKT 35 / 50 Edition 04/09.2002
17
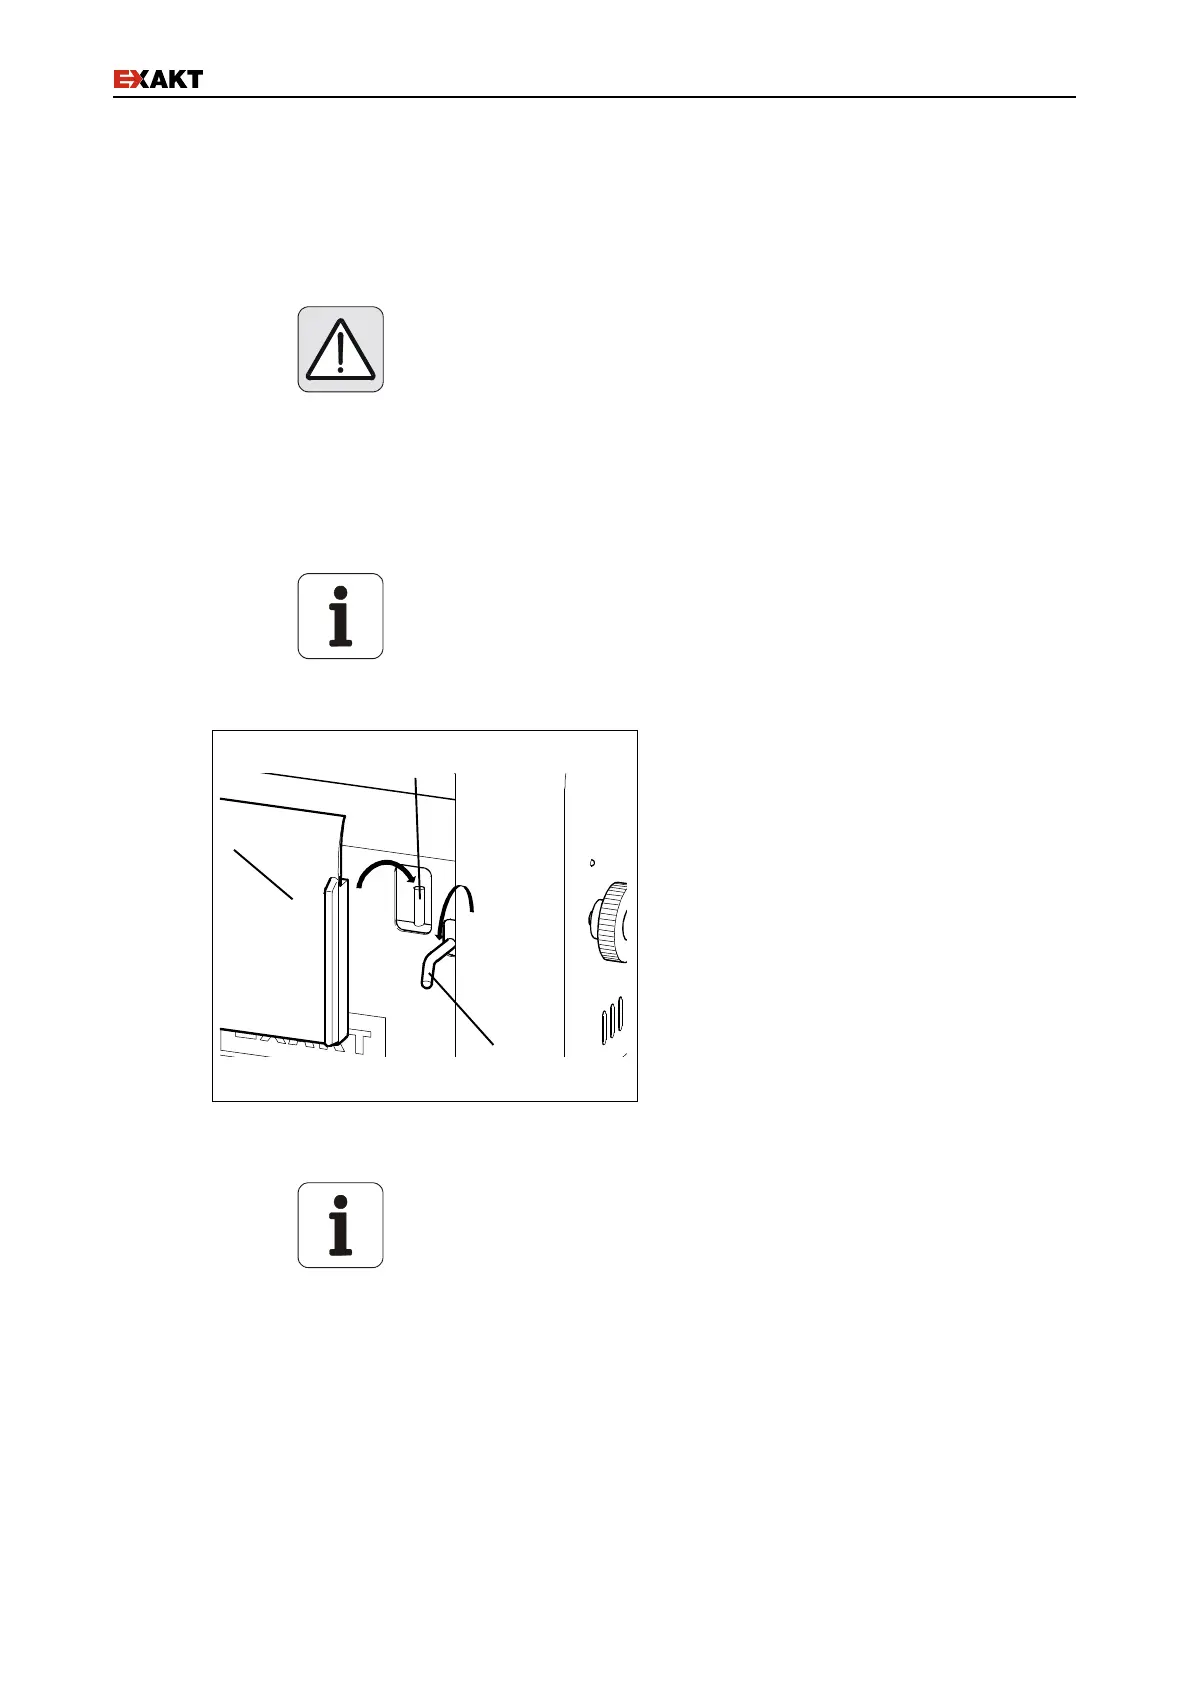
6.3 Installing / removing the scraper
The scraper is attached to a levered pin system. This system is
spring-tensioned and presses the scraper evenly against the
roller.
Warning – Risk of personal injury. The edges of the scraper
socket (for one piece scrapers) and scraper knife (for a
Universal Scraper) are very sharp.
!" When positioning the scraper system against the front roller
do not put fingers or other body parts or materials between
the edge of the scraper/knife and the roller.
!" When handling the scraper system during mounting,
removal or cleaning be aware that the scraping edge is very
sharp!.
Note
If material builds up around the seating pin (Fig. 10/c), the
scraper will not seat properly. Consequently, the product cannot
be removed correctly (see also the maintenance section).
!" Push the lever down (Fig. 10/a) to
expose the pins (Fig. 10/c).
!" Seat the scraper (Fig. 10/b) evenly on
the two pins (Fig. 10/c).
!" Carefully release the lever back into its
original position.
Fig. 10: Scraper swivelling system
Note
The scrapers are designed to be used with specific models and
may not be replaced by scrapers for other models.
The product will not be properly removed if scrapers from other
models are used.
!" When a new scraper is used for the first time, the initial
scraping behaviour might not be optimal. However, after a
short time the scraper is ground against the roller and
adapts to the system improving the scraping behavior.
b
a
c