Optical Switch 25
3 Operating the Optical Switch
The Optical Switch comes in different models, depending on the number
of ports and switch configurations it has. To use its different models more
efficiently, follow the instructions provided in this section.
Before using the Optical Switch in a test setup, you must first connect the
ports to other test components and select a switching configuration.
Note: You can configure your switch before connecting it to your test setup.
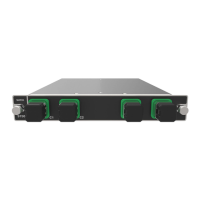
Installing the RTUe-9110/RTUe-9120 External
Switch in a Rack
The external switch is designed to be installed in 19-inch racks with the
provided mounting brackets and in 21-inch (ETSI) racks with both the
provided mounting brackets and adapters. It will not fit into 23-inch
racks.
The height of the external switch is half a rack unit (0.5U) high or
22,23 mm (0.87 in.).
When operating the switch, select a location that provides at least:
75 mm (3 in.) of rear clearance
75 mm (3 in.) of front clearance
Note: There is no need to leave an empty slot between switches when you stack
them one on top of the other inside a rack.
CAUTION
Your Optical Switch contains sensitive precision optical
components. To ensure reliable, long-term service, observe proper
handling and operating instructions. At no time should the module
be subject to shock or impact.