Page 22 © Boule Medical AB, March 2018. Article no. 1504496
2. Installation and Reagent Setup
Installation Checklist and Menu
Changing Reagents
The interlocked reagent system displays indicator and warning messages to alert the operator when
reagents are running low and need to be changed. When this occurs perform the following:
X Changing Reagents
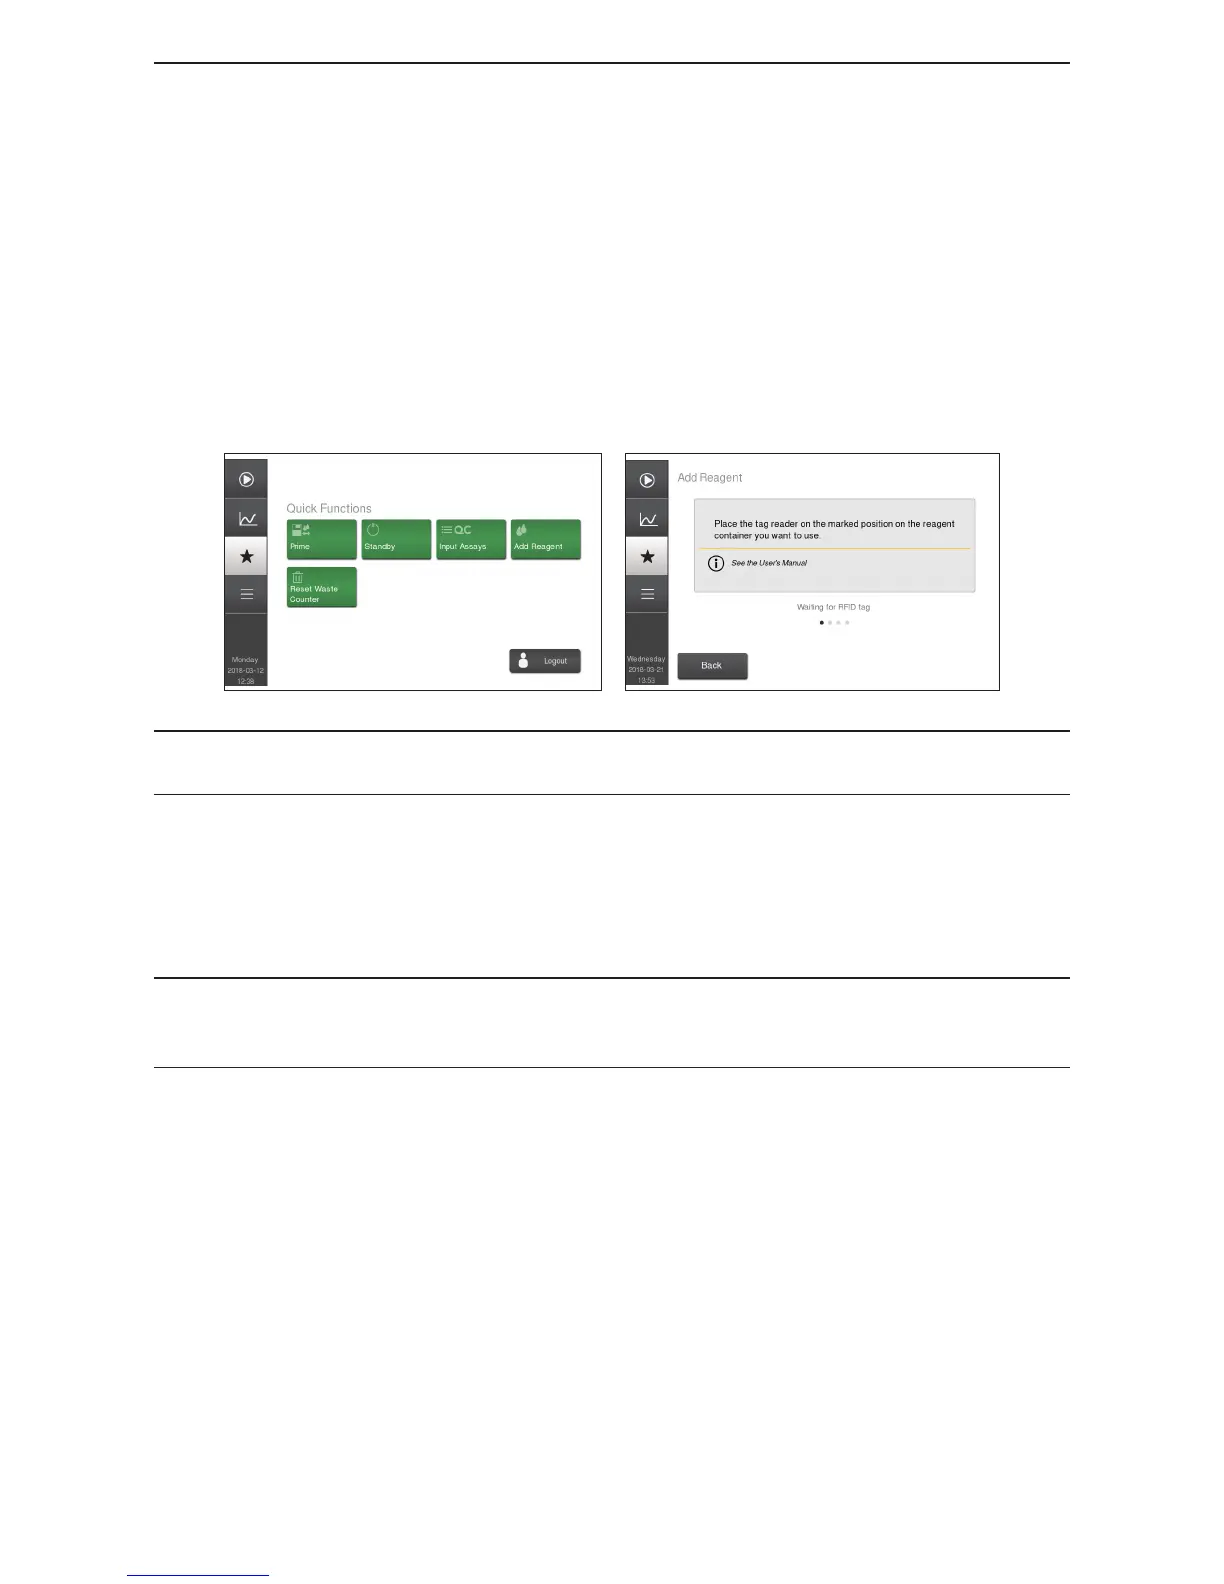
1 Select Quick Functions Menu and then select Add Reagent.
2 Scan in RFID tags on reagent box, and when all reagent RFID tags are entered a screen will
display that reagent RFID tags have been accepted.
3 Select Exit to return to the Quick Functions Menu.
Figure 20: Reagent Setup
Figure 21: Enter New Reagents via RFID tag reader
Note: To view current/activated reagent container select Main Menu, then Setup, and then
Reagents.
4 Remove the cap and seal on the new reagent container.
5 Transfer the reagent tube assembly from the used container to the new reagent container.
6 The analyzer is now ready to resume operation or analyze samples. No priming or ll cycle
is necessary when putting on a new reagent container, if indicator and warning messages are
followed.
A reagent alarm will display when at least one of the reagent containers is running low, empty,
or expired. Once alarm is displayed it will continue to display after each sample run until the
indicated container is changed.