© Boule Medical AB, March 2018. Article no. 1504496 Page 27
3. Operation (Sample Analysis)
Analyzing Sample (Micro Pipette Adapter, MPA)
Analyzing Sample (Micro Pipette Adapter, MPA)
The following steps will guide the operator through analyzing a whole blood sample with the use of
the Micro Pipette Adapter (MPA). Note: EOS parameter is not available through MPA mode.
ONLY Boule supplied, plastic, high precision EDTA micropipettes should be used when
running MPA. Glass micropipettes can cause damage to analyzer if inserted incorrectly.
Read section 4 on “Capillary Blood Sample Collection” before commencing.
X Analyze Capillary Sample (Micro Pipette Adapter, MPA)
1 Enter Sample Information Follow instructions 1–5 under “Analyzing Sample (Open
Tub e)” to enter sample and ID information.
2 Preparing MPA device Pull out the MPA device. (The analyzer will give an
instruction to put back the loaded MPA device to start the
analysis cycle).
Remove the previous sample micropipette. (If applicable)
Place the adapter on the table.
3 Sample Collection
Once again, see section 4, “Capillary Blood Sample
Collection” for this step.
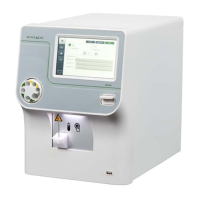
Figure 32: Micropipette insertion into MPA
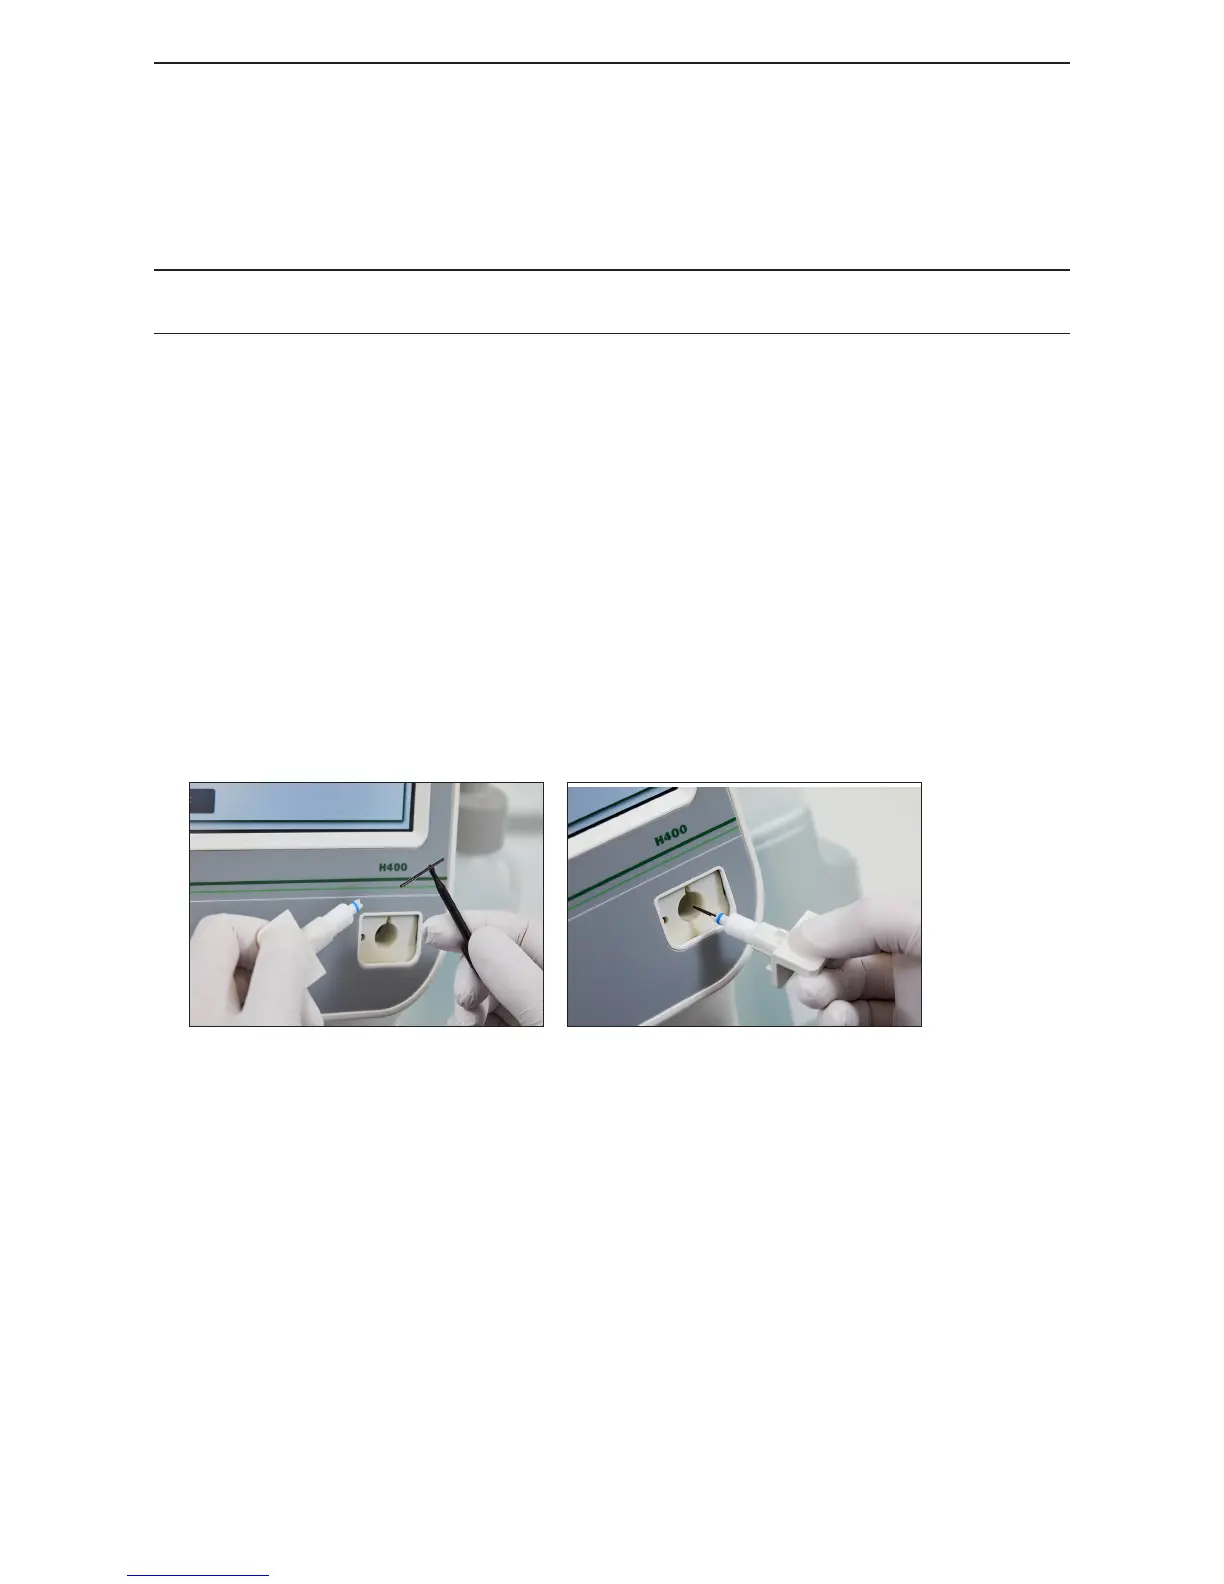
Figure 33: MPA insertion into analyzer
4 Micropipette insertion to
device and analyzer
Insert the micropipette into the MPA device as shown
above, using the micropipette holder.
Insert the MPA device into the analyzer which automatically
starts the analyzing sequence.
5 Sample Measurement The analyzer now switches to the sample analysis screen.
Sample ID1/ID2 and prole can be changed up until results
are displayed.
If any changes are made, press to save, and then
Conrm. Results will not be shown until change is
conrmed.
6 Results Displayed Sample results will be displayed.
 Loading...