© Boule Medical AB, March 2018. Article no. 1504496 Page 17
2. Installation and Reagent Setup
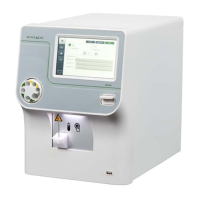
Analyzer Placement and Environment
Analyzer Placement and Environment
The analyzer should be placed in a laboratory environment according to the guidelines below:
Place the analyzer on a clean horizontal surface.
Avoid direct exposure to sunlight.
Make sure the analyzer has access to proper ventilation: 5 cm of free space above it and 10 cm
of free space behind it.
Indoor Use with grounded mains supply
Evaluate the electromagnetic environment prior to installation.
Temperature: 18 – 32 °C
Humidity: 10% – 90%
Installation Checklist and Menu
Follow the quick Installation Checklist and Installation Menu step by step for best installation results.
Installation Checklist
Complete Unpack and Check Components / Analyzer Placement and Environment instructions.
Connect power adapter to the power supply port on the back of the analyzer, but do not plug in power cord yet.
Connect the RFID reader to one of the USB host ports on the back of the analyzer.
Connect the printer to either the USB host port or USB device port (depending on printer type) on the back of
the analyzer (if applicable).
Connect the analyzer to computer system using either one of the USB host ports or USB device port
(depending on computer connection type) on the back of the analyzer (if applicable).
Install the reagent bottle tray. Remove foam from tray.
Connect the waste tube to the analyzer and plumb to waste container or drain.
Connect the Lyse reagent tube assembly (yellow) and electronic sensor to the analyzer.
Connect the Diluent reagent tube assembly (red) and electronic sensor to the analyzer.
Connect the Cleaner reagent tube assembly (blue) and electronic sensor to the analyzer.
Connect the EOS reagent tube assembly (green) and electronic sensor to the analyzer.
Plug one end of the power cord to the power adapter and the other to a surge protected power outlet, then turn
power switch to ON position.
After system initialization, follow Installation Menu instructions below.
Post-Installation Recommendations
After initial setup, it is recommended to print all analyzer settings and keep for personal records. Select
System Info from Main Menu and then Print All Settings.
Sample analysis modes (Open Tube and MPA) are factory calibrated. However, calibration should always be
checked upon installation. See section 5 for more details.
 Loading...