Network Button Panels • Hardware Features and Installation 12
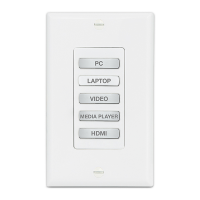
4. Insert a button or button pair as follows:
a. Insert a new button or button pair from the
back into the appropriate opening in
the original or the replacement bezel.
b. Align the two pegs in the upper left
and lower right corners of the button
or button pair (see figure 9) with the
corresponding holes in the bezel.
Press the button or buttons into
the bezel so the buttons and pegs
are seated into the holes and bezel
opening.
c. Repeat steps 4a and 4b for any
additional buttons to be replaced or
installed.
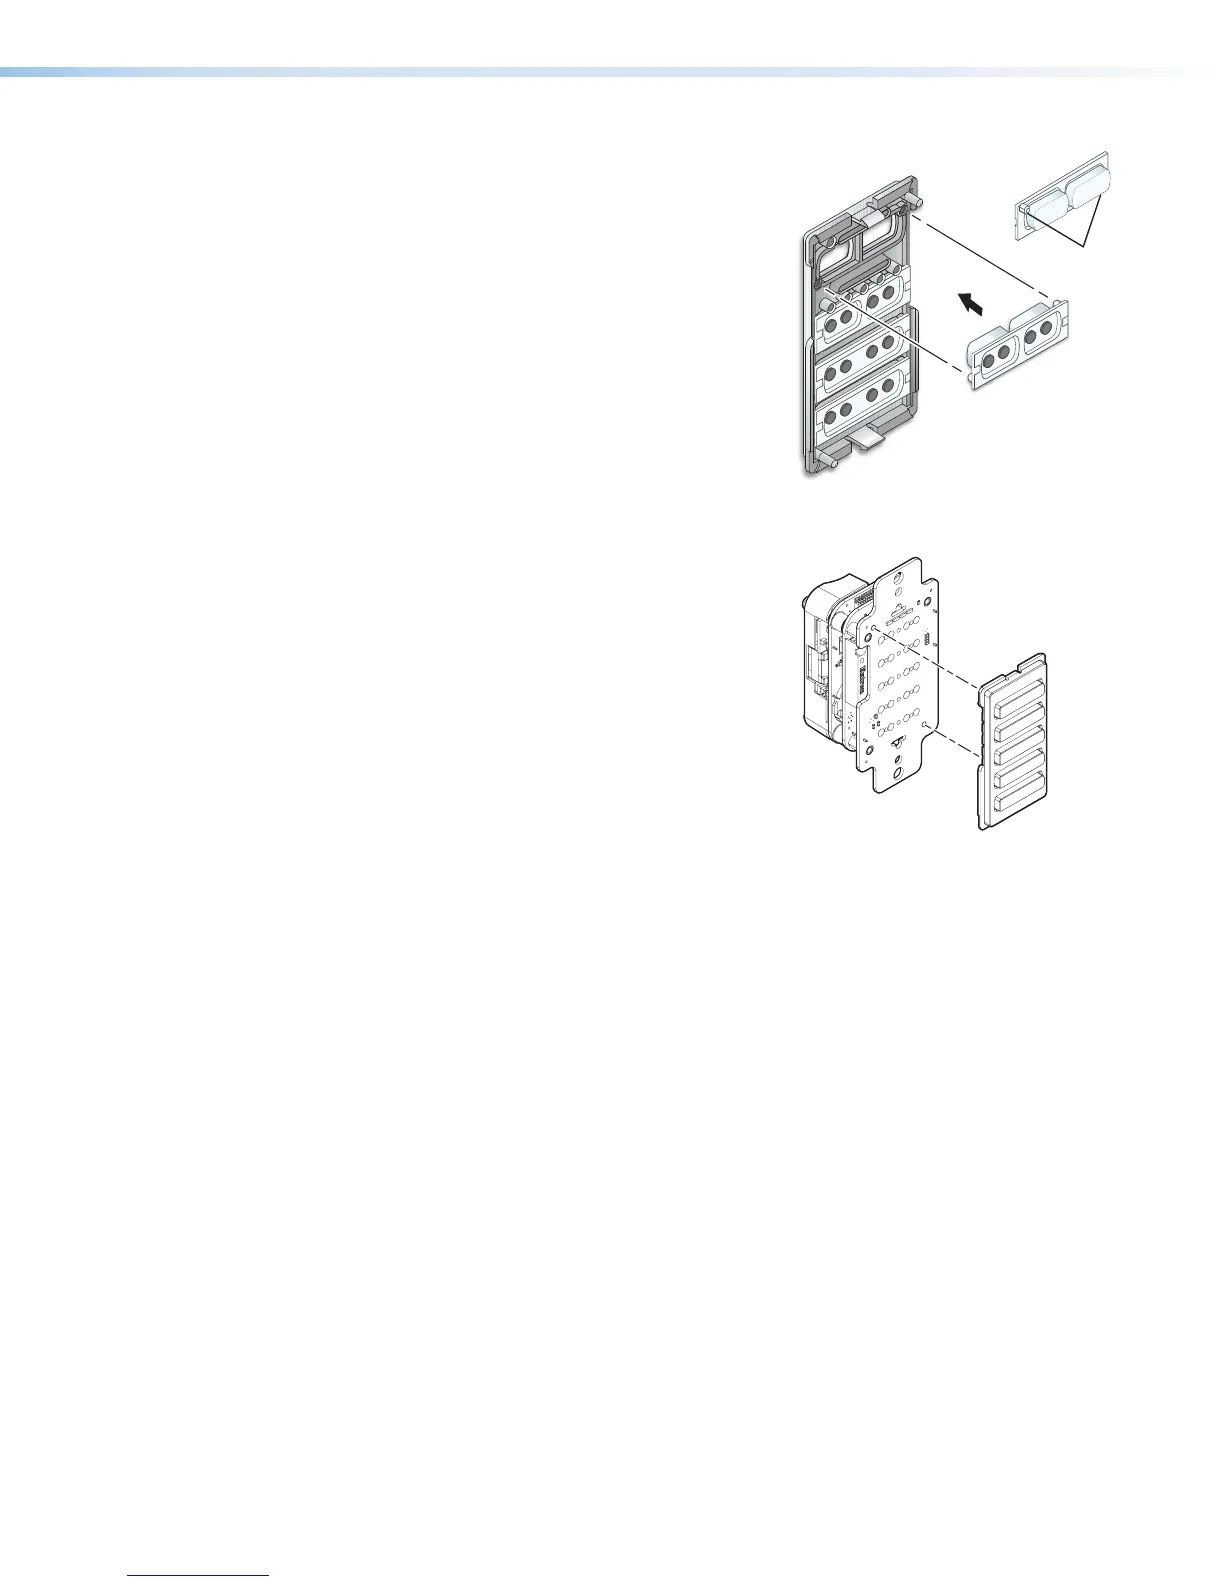
5. Reattach the original bezel or attach the
replacement bezel to the NBP as follows:
a. Align the tabs (at top and bottom) and
pegs (at upper left and lower right
corners) on the back of the bezel with
the slots and holes on front of the
mounting plate.
b. Gently but firmly press the bezel against
the mounting plate until the tabs and
pegs are inserted into the slots and
holes, and the tabs click into place.
OFF
ON
Pegs (2)
Figure 9. Inserting Buttons
e
e
R
LAPTOP
HDMI
PC
MEDIA PLAYER
VIDEO
Bezel
NBP 105 D
Figure 10. Aligning and
Reattaching the Bezel