Network Button Panels • Hardware Features and Installation 17
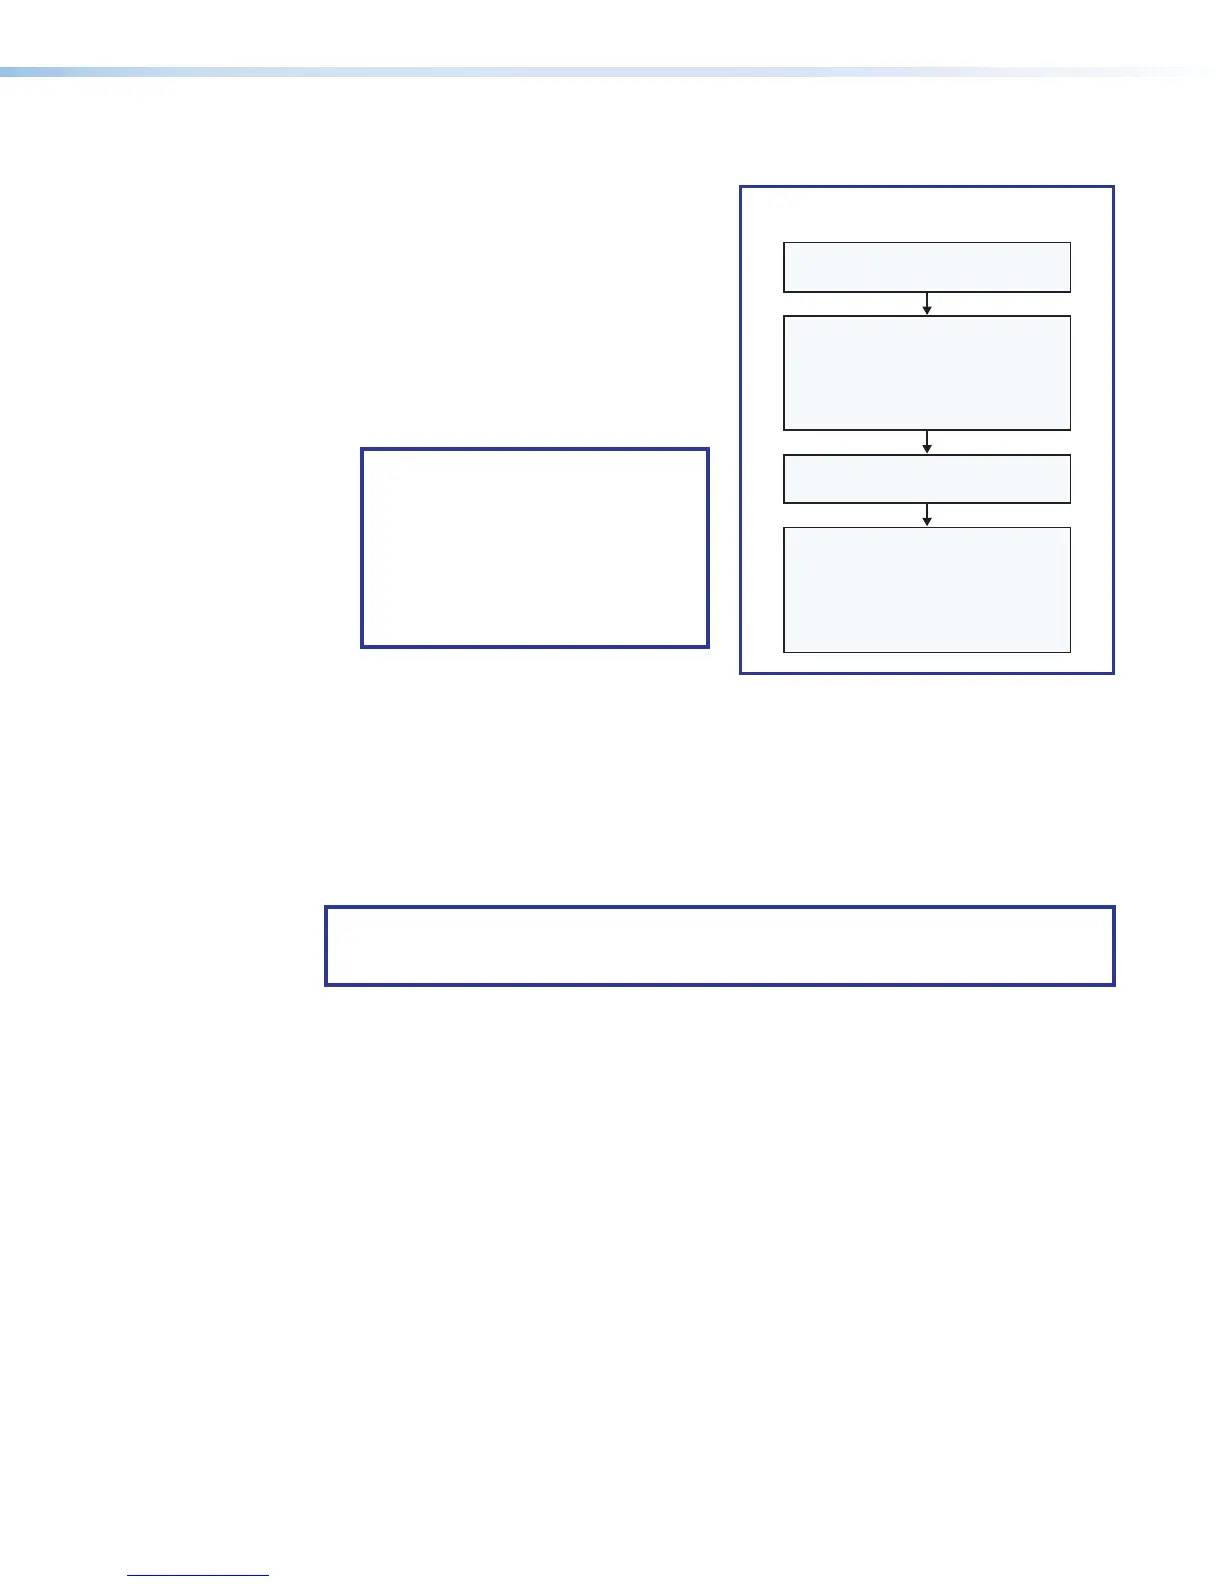
Installation Step 5: Set up the NBP for Network Communication
1. Connect the NBP button panel and
the PC to be used for setup to the
same Ethernet subnetwork.
2. Start Toolbelt and use it to set the IP
address, subnet, gateway IP address,
DHCP status, and related settings.
Network setup is essential prior to
configuration.
Use the flowchart at right as a guide
to setting up the unit for network use.
NOTE: When setting up DHCP
during network configuration or if
using a host name instead of an
IP address the user must enter a
qualified host name
(Username.HostName.Domain).
For example:
somename.somedomain.com.
Installation Step 6: Configure the System
Use Global Configurator (GCPlus or GCProfessional) to configure the IPCPPro control
processor, IPLPro control processor, or HCR receiver. Alternatively, use Global Scripter
to program the IPCPPro or IPLPro control processor. That configuration sets the control
and monitoring behavior for all the AV devices and control accessories (such as the NBP
button panels) in the system. An outline of the main configuration and programming steps is
included in the user guide for the control device.
NOTE: See the Toolbelt Help File, Global Configurator Help File, and Global Scripter Help
File as needed for step-by-step instructions and detailed information. The help file for GC
includes an introduction to the software, and how to start a project and configuration.
When configuration or programming is completed, save the project or program script, then
build and upload the system configuration to the control processor or receiver.
Installation Step 7: Test and Troubleshoot
1. Test the system (see the IPCPPro Series User Guide, IPLPro Series User Guide, or
HC400 Series User Guide for an outline of the system testing and troubleshooting
procedure).
2. Make adjustments to wiring or configuration as needed. Remember that the rear panel
port on the button panel is not accessible after the NBP is mounted.
Open the Toolbelt software.
Start Device Discovery.
Toolbelt displays a list of all
Extron control devices connected
to the network.
Using the MAC address, locate the
desired device in the list and select it.
Network Communication Setup
Connect the NBP and PC to the same
network. Apply power to all devices.
Use the Set IP feature in Toolbelt or
use the Toolbelt
Manage > Network
Settings tab feature to enter the
IP address, subnet address, and
gateway, then congure other
network settings as needed.
Figure 16. Network Setup