ShareLink Pro 500 • Operation Using a Computer 12
11
22
Figure 9. Software Download Link
3. Locate the ShareLink Pro software and click the Download link (
2
).
4. Submit any required information to start the download. Note where the file is saved.
5. Open the saved executable (.exe) file.
6. Follow the instructions that appear on the screen to install the program.
Using the ShareLink Pro 500 Software
Connecting to the ShareLink Pro
If the software is not yet connected to the ShareLink Pro device, follow these steps:
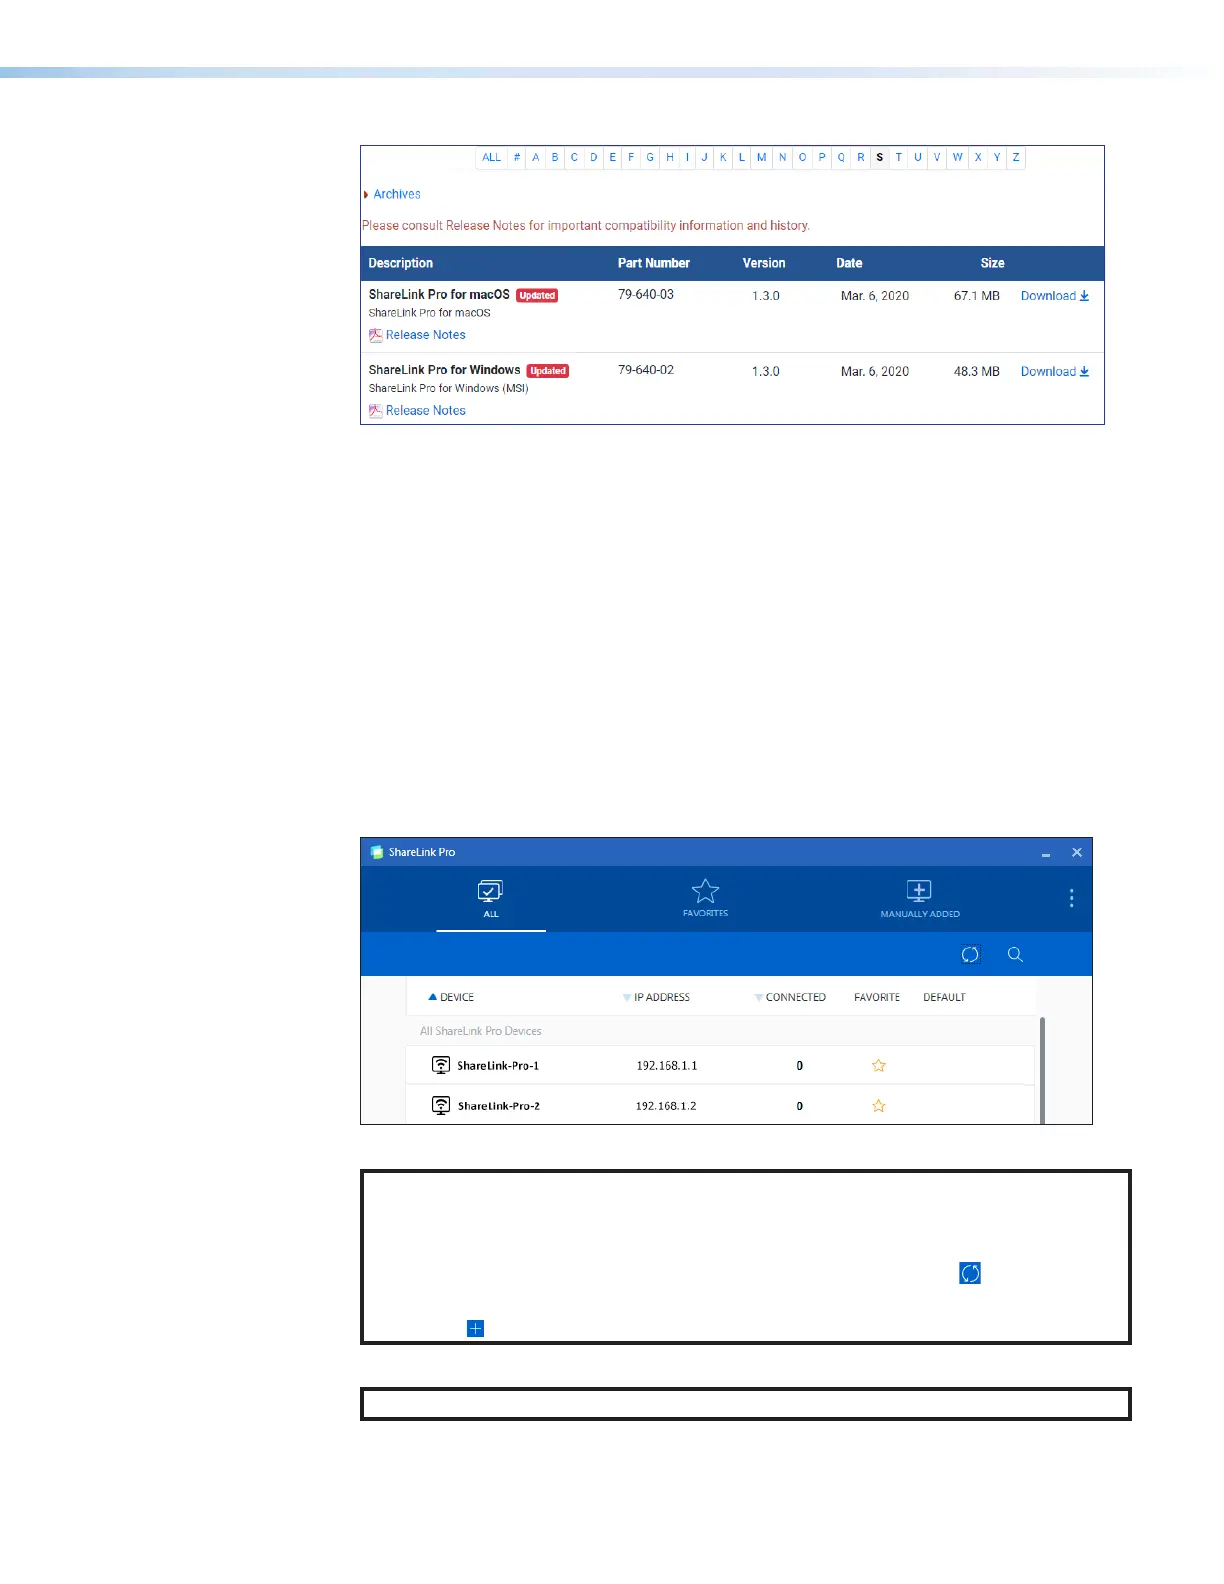
1. Open the ShareLink Pro 500 software. The software searches for available devices on
your network and lists them in the All panel.
2. Click the desired ShareLink Pro 500 device (see the standby screen for the device name).
Figure 10. ShareLink Pro Devices List
NOTE:
• The ShareLink Pro software automatically discovers ShareLink Pro units in the
same subnet as the client device.
• If your ShareLink Pro unit is not listed, click the refresh button ( ).
• If the device is still not listed, go to the Manually Added tab and select the
add ( ) icon. Enter the hostname or IP address as instructed on the app screen.
3. When prompted, enter the login code and click Connect.
NOTE: The login code is shown on the standby screen (see figure 6 on page 9).
When connection is established, the Share screen appears (see figure 11 on the next page).