EasyManua.ls Logo

Fargo DTC4250e User Manual

Fargo DTC4250e
145 pages
To Next Page IconTo Next Page
Page #1 background imageLoading...
Page #1 background image
15370 Barranca Parkway
Irvine, CA 92618-2215
USA
FARGO
®
DTC1000Me-DTC1250e-DTC4250e-DTC4500e
Card Printer Service Manual
PLT-01543 Rev 1.0
November 2013
© 2013 HID Global Corporation/ASSA ABLOY AB. All rights reserved.

Table of Contents

Question and Answer IconNeed help?

Do you have a question about the Fargo DTC4250e and is the answer not in the manual?

Fargo DTC4250e Specifications

General IconGeneral
Print MethodDye-sublimation / resin thermal transfer
Resolution300 dpi
Memory32 MB RAM
Print SpeedUp to 225 cards per hour (YMCKO)
Card Capacity100 cards input, 100 cards output
Card SizesCR-80 (85.6mm x 54mm)
Card Thickness0.009" - 0.040" / 0.229mm - 1.016mm
ConnectivityUSB 2.0, Ethernet
Operating SystemsWindows 7, 8, 10
Dimensions9.8"H x 18.1"W x 9.2"D
Power Requirements100-240 VAC, 50/60 Hz

Summary

Introduction to DTC Card Printer Service

Safety Messages and Precautions

Tools for DTC Card Printer Repair

Cover Removal Procedures

Remove/Replace Printer Covers DTC 1000Me-1250e Single Side

Procedure to remove and replace the outer covers of the DTC 1000Me/1250e single-sided printers.

DTC Flipper SHORT Dual-Sided Printing Module Removal

Steps to remove the dual-sided printing module from DTC printers.

DTC1250e DUAL - DTC4250e Single Printer Cover Removal

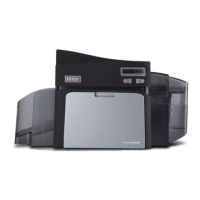
Procedure for removing covers of DTC1250e Dual and DTC4250e single printers.

DTC4500e Single Side Printer Cover Removal

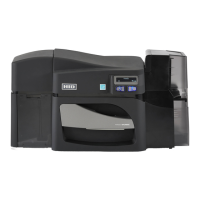
Steps to remove the single-side printer covers for the DTC4500e model.

DTC4500e Lamination Module Cover Removal

Procedure for removing the cover of the lamination module on DTC4500e printers.

Complete Lamination Module Removal

Detailed steps for the complete removal of the lamination module from the printer.

Parts Replacement - Printer Components

Remove/Replace the Mainboard

Instructions for removing and replacing the printer's main circuit board.

Remove/Replace Display Assembly

Guide to removing and replacing the printer's display assembly.

Remove/Replace Stepper Motor, Belt, Pulley

Procedure for replacing the stepper motor, belt, and pulley components.

Remove/Replace Mag Roller

Steps for removing and replacing the magnetic roller in the printer.

Remove/Replace Output Roller & Pinch Roller

Instructions for replacing the output roller and pinch roller/spring assembly.

Remove/Replace Platen Roller & Pulley/Gear

Procedure for removing and replacing the platen roller and its associated pulley/gear.

Remove/Replace Lift Pinch Roller Assembly & Bracket

Guide for replacing the lift pinch roller assembly and its bracket.

Remove/Replace Cleaning Roller, Input Feed Lever, Gear

Steps for replacing the cleaning roller, input feed lever, and input lever gear.

Remove/Replace Supply Spindle RFID Motor

Procedure to remove and replace the supply spindle's RFID motor.

Remove/Replace Ribbon Take-Up Motor

Instructions for removing and replacing the ribbon take-up motor.

Remove/Replace Encoder Sensor for RFID Supply Spindle

Steps to remove and replace the encoder sensor for the RFID supply spindle.

Remove/Replace PCB Board

Procedure for removing and replacing the PCB board associated with the supply spindle.

Remove/Replace Ribbon Sensor

Guide to removing and replacing the ribbon sensor.

Remove/Replace Card Path/Cover Sensor

Steps for replacing the sensor that monitors the card path or cover.

Parts Replacement - Dual-Sided Printing Module

Remove/Replace Flipper Cover

Procedure for removing and replacing the cover of the dual-sided printing module.

Remove/Replace Flipper Table

Instructions for removing and replacing the flipper table component.

Remove/Replace Flipper Feed Roller, Pinch Roller, Gears

Guide for replacing flipper feed roller, pinch rollers, and gears.

Remove/Replace Flipper Assembly Stepper Motor

Steps to remove and replace the stepper motor for the flipper assembly.

Remove/Replace Headlift Sensor/Cable

Procedure for replacing the headlift sensor and its associated cable.

Remove/Replace IR Sensors

Steps to remove and replace the infrared sensors.

Remove/Replace PCB Output Controller

Procedure for replacing the output controller PCB.

Parts Replacement - Lamination Module

Remove/Replace Lamination Module Mainboard

Instructions for removing and replacing the mainboard of the lamination module.

Remove/Replace Lamination Head Assembly

Guide to removing and replacing the complete lamination head assemblies.

Remove/Replace Lamination Module Rollers

Steps for removing and replacing the rollers within the lamination module.

Remove/Replace Rewind Motor Assembly, RFID Board, Encoder Sensor

Procedure for replacing the rewind motor assembly, RFID board, and encoder sensor.

Appendix A: DTC Printhead Replacement

DTC Printhead Procedure

Detailed steps for performing the DTC printer head replacement procedure.

Appendix B: Printer Mainboard Connections

Appendix C: Lamination Module Mainboard Connections

Upper Sensing Cables

Identifies and shows connections for upper sensing cables on the lamination module.

Feed & Lower Sensing Cables

Shows connections for feed and lower sensing cables on the lamination module.

Upper Lam Head Cables

Identifies and shows connections for upper lamination head cables.

Lower Lam Head Cables

Identifies and shows connections for lower lamination head cables.

Lower Motor Cables

Shows connections for the lower motor cables on the lamination module.

Upper RFID and Ribbon Cable

Identifies connections for the upper RFID and ribbon cables.

Appendix D: Engineering Drawings

Related product manuals