a.Thecoverisremovedbypressingdownononesideofthecover(indicatedby!),whichcausesthe
othersidetopopup.
b.Graspthesidethatisnowelevatedfrombothsidesandpullthecovercompletelyoutofthebay.
c.Retaintheprotectivecover.
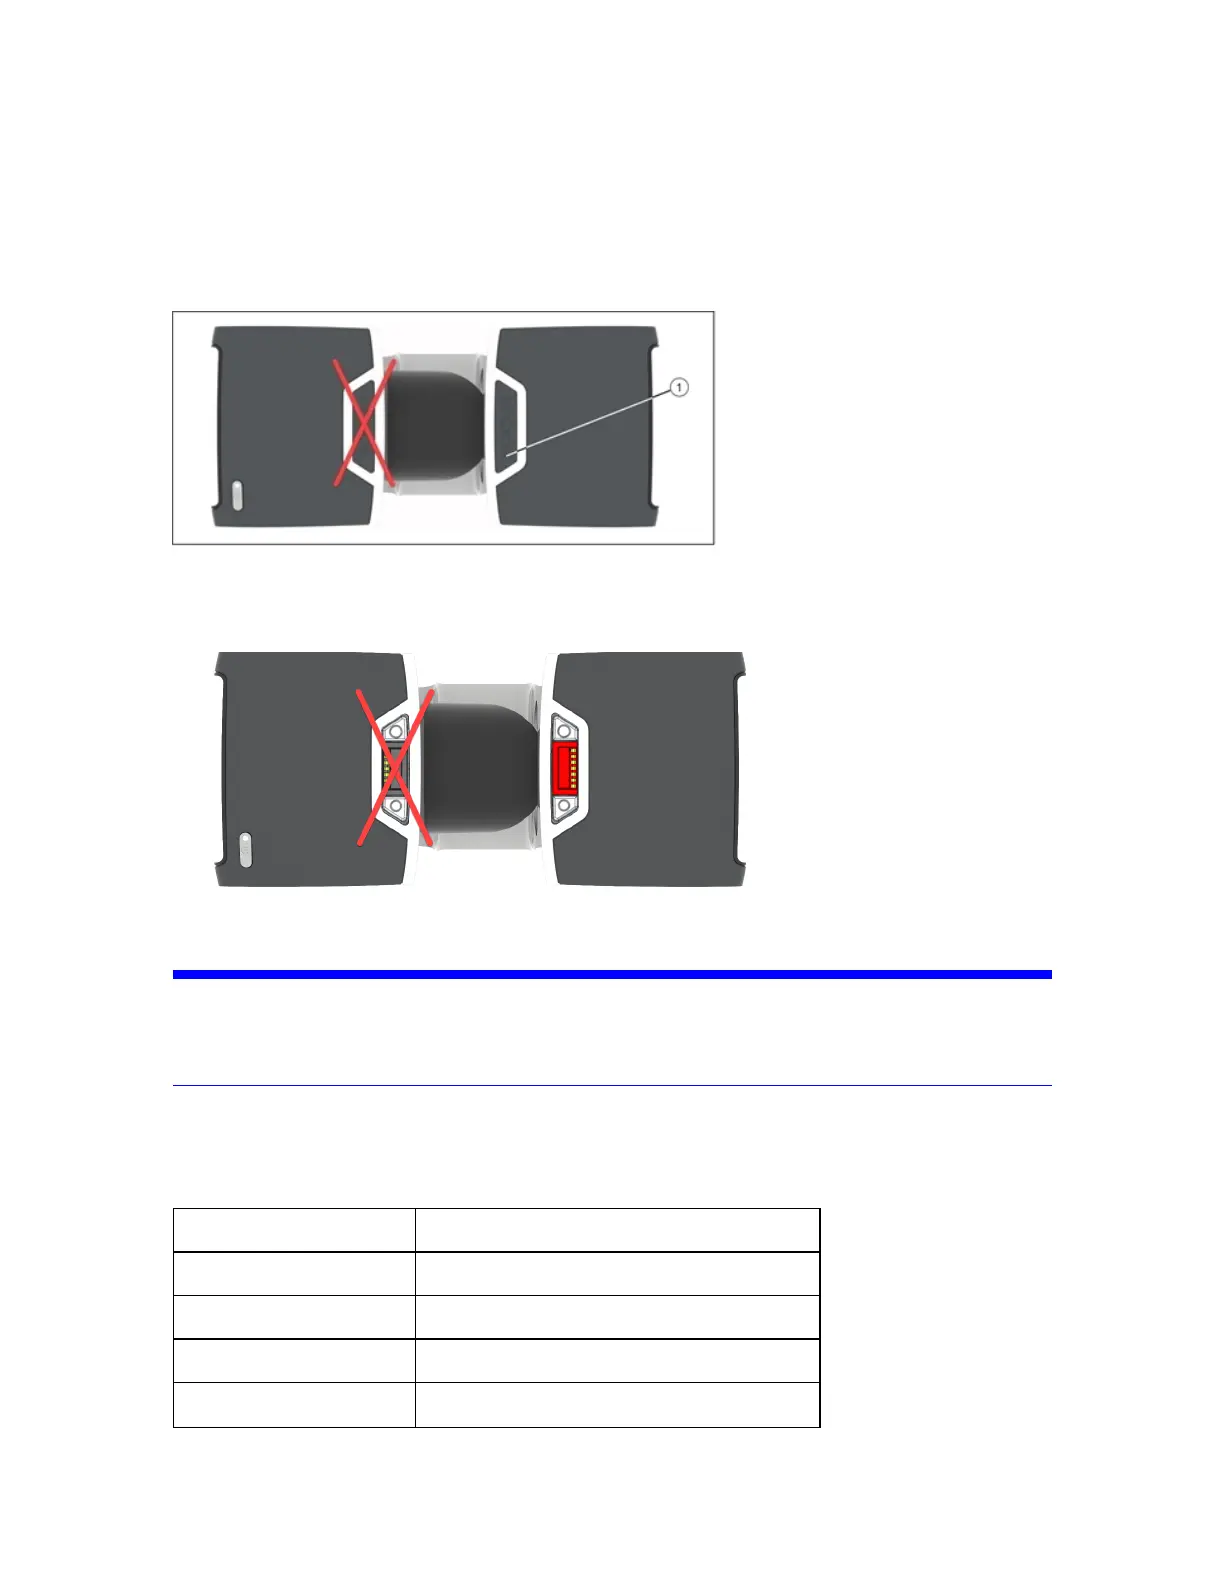
Figure 2-2 : Accessory bay for the status indicator with covers
4.Insertthestatusindicatorintotheaccessorybay.Thecorrectbayiscoloredred.
Figure 2-3 : Accessory bay for the status indicator with covers removed
NOTICE: Donotinsertthestatusindicatorintotheaccessorybayontheleftsideofthescanner.Forcing
thestatusindicatorintotheblackbaymaydamageeitherthestatusindicator,thescanner,or
both.
Thestatusindicatorisnowreadyforuse.Switchonthescanneranduseitasyounormallywould.The
colorandblinkcodesareidenticaltothescanner’sLEDpoweron/offbutton.Remembertoremovethe
statusindicatorbeforeplacingthescannerinitscarryingcase.
LEDstate Scannerstate
Off Scanneroff
Blue Scannerreadytoscan
Blueflashing Scanoperationwithlaseroff
Blueflashingquickly Scannerbootingorshuttingdown
FARO
®
FOCUS® Laser Scanner Accessories Manual
Chapter 2: Status Indicator
FARO FOCUS® LASER SCANNER (00.00) Page10of36