Do you have a question about the Faro FocusM 70 and is the answer not in the manual?
Defines DANGER, WARNING, CAUTION, and NOTICE symbols used in the manual.
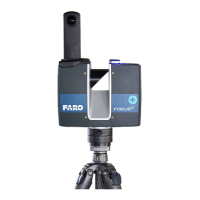
Details the scanner's transport and carry case.
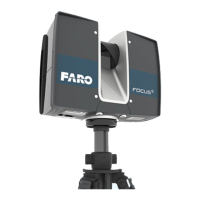
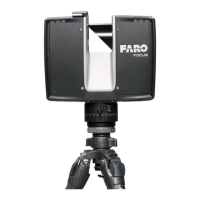
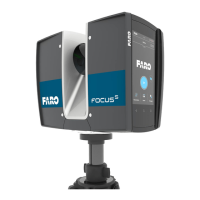
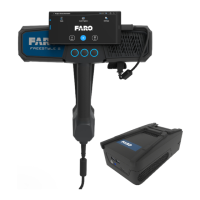
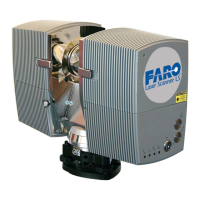
Information about the laser scanner unit itself.
Description of the power supply unit for the scanner.
Details the Power Block battery included with the scanner.
Information on the FARO Quick Release accessory.
Specifies the mirror cleaning liquid provided.
Details the SD card reader accessory.
Description of the Power Dock battery charging cradle.
Information about the SD card cover.
Notes the location of the Quick Start Guide.
Details the optional USB stick contents.
Details the AC power cable included.
Specifies the proper intended use of the FARO Laser Scanner.
Defines improper use and its potential consequences.
Guidelines for competent and trained users of the laser scanner.
General safety precautions and warnings for the laser scanner.
Precautions regarding electrical safety, including high voltages.
Safety guidelines for handling and charging the Power Block battery.
Safety guidelines for using the Power Dock battery charger.
Safety precautions related to the mechanical aspects of the scanner.
Precautions to be taken when transporting the laser scanner equipment.
Guidelines for storing the laser scanner for extended periods.
Procedures and conditions for servicing and repair of the scanner.
Identification and description of the scanner's main components.
Details the components on the display side of the scanner.
Details the components on the battery side of the scanner.
Identifies components on the front view of the scanner.
Identifies components on the bottom view of the scanner.
Description of the Power Dock battery charger and its features.
Explains the LED indicators for the charging cradle.
Instructions on how to charge the Power Block battery.
Procedure for charging the battery directly in the scanner.
Procedure for charging the battery using the Power Dock charger.
Recommendations for optimal battery performance and usage.
Step-by-step guide for setting up the FARO Laser Scanner.
Information and preparation steps for using an SD card.
Details on preparing an SD card for use with the scanner.
Explanation of the SD card's file structure.
Instructions on how to insert the SD card into the scanner.
Procedure for powering on the FARO Laser Scanner.
Guide to configuring initial scanner settings.
Instructions for changing the controller software language.
Guide to setting the date and time on the scanner.
Options for selecting the date format display.
Procedure for manually changing the scanner's date and time.
How to adjust units for length and temperature display.
Steps to enter scanner name and owner details.
Introduction to setting up scanning parameters for capturing scans.
Details on configuring resolution, quality, and scan range.
Table summarizing scanning parameters and net scan times.
Procedure for adjusting horizontal and vertical scan area settings.
Enabling or disabling built-in sensors for scan registration.
Configuration options for color capture and exposure metering.
Details on High Dynamic Range imaging for enhanced luminosity.
How to use Night Mode to improve color photo quality in low light.
Options for filters like Clear Contour, Clear Sky, and Distance Range.
Adjusting scan resolution and quality settings.
Instructions on how to initiate a scan using the controller software.
Explanation of LED status indicators on the scanner.
Procedure for properly shutting down the scanner.
Steps for powering off the scanner after shutdown.
Overview of the main elements of the controller software interface.
Details the icons and information displayed in the status bar.
Explanation of the navigation bar controls and buttons.
Descriptions of commonly used buttons within the software.
Information on the onscreen keyboard for data entry.
Overview of the scanner's home screen and its functions.
Overview of how to set scanning parameters manually or via profiles.
How to select and manage scan profiles.
Adjusting the resolution and quality settings for scans.
Setting the horizontal and vertical scan area angles.
Enabling or disabling built-in sensors for scan registration.
Configuring the scanner to capture color photos with scans.
Adjusting exposure metering modes for color capture.
Using High Dynamic Range imaging for better luminosity.
Improving color photo quality in low light conditions.
Accessing settings for projects, profiles, operators, and service.
Managing scan projects and organizing them into clusters.
Entering customer, file base name, and initial scan number.
Creating new projects by duplicating existing ones.
Procedure for deleting scan projects or clusters.
Explanation of how scan projects are stored on the SD card.
Steps to edit the details of an existing scan project.
Explains the meaning of icons used in the project list.
How to add, edit, and manage custom scan profiles.
Instructions for editing existing scan profiles.
Overview of the factory default scan profiles and their settings.
Factory settings for HDR, Night Mode, and Far Distances.
Managing operator profiles for scan data attribution.
Steps to create a new operator profile.
Instructions for editing operator profile details.
How to assign an operator profile to captured scans.
Information and settings for the scanner's integrated sensors.
Details on scanner temperature sensors and fan control.
Using the inclinometer to level the scanner accurately.
Configuration and display of inclination warnings.
Using the electronic compass for scanner orientation.
Information and settings for the built-in GPS sensor.
Using the altimeter for altitude measurement and synchronization.
Adjusting screen brightness, theme, and calibration.
Details on the condition and capacity of the inserted battery.
Enabling automatic rotation of the display based on scanner orientation.
Changing the scanner's date, time, and format.
Instructions for changing the controller software's language.
Setting preferred units for length and temperature.
Configuration and usage of the scanner's Wireless LAN interface.
Settings for WLAN modes: Infrastructure and Access Point.
Viewing and changing scanner identification details.
Settings for uploading, processing, and registering scans on-site.
Enabling automatic detection of planes for target-based registration.
Enabling colorization of uploaded scans.
Creating point clouds for fast visualization of scan points.
Methods for aligning and joining uploaded scans in SCENE.
Defining network address settings for the SCENE computer.
Viewing and managing scanner warnings and error messages.
Viewing SD card details and formatting options.
Procedure for formatting the inserted SD card.
Saving and clearing scanner log files for troubleshooting.
Creating automatic and manual backups of scanner settings.
Steps for creating manual backups of scanner parameters.
Restoring scanner settings from backup files.
Procedures for updating the scanner's firmware.
Resetting scanner settings to factory default.
Examining preview pictures of scans stored on the SD card.
Accessing online help and viewing status notifications.
How to view warnings and status messages.
Accessing online help for the currently displayed view.
Enables processing and registration of scans while on-site.
Procedure to test and improve scanner angular accuracy.
Steps for connecting to and controlling the scanner remotely.
Details on how to operate the on-site registration feature.
Procedure for setting up on-site registration.
Overview of scanned areas and scan positions on a map.
Displays a list of all scans with their status and details.
Detailed information and actions for a specific scan.
Option to re-register a scan that was successful or failed.
Option to remove a successfully registered scan from the map.
Procedure for deleting a scan from the cluster or project.
Steps for performing the on-site compensation process.
Ensuring the scan site has the necessary facilities for compensation.
Guidelines for setting up the physical compensation site.
Connecting the scanner to a computer via WLAN.
Configuring the scanner to act as a WLAN access point.
Steps to configure WLAN on the scanner.
Steps to establish WLAN connection from the computer.
Step-by-step guide for the on-site compensation process.
Choosing the folder where compensation data will be stored.
Initial setup steps for the on-site compensation process.
Entering the scanner's IP address for connection.
Instructions for placing compensation targets.
Guidelines for printing target sheets for compensation.
Instructions for placing targets at the physical site.
Procedure for horizontally aligning the scanner tripod.
Starting the scan and compensation process.
Solutions for common errors encountered during compensation.
Procedures for cleaning the scanner's optics and lenses.
List of approved cleaning supplies and recommended suppliers.
Cleaning procedures for optics with minor contamination.
Method for cleaning optics using compressed air or duster spray.
Wet cleaning method using tissue and isopropyl alcohol.
Steps for preparing the cleaning pad for wet cleaning.
Instructions for cleaning the mirror module or sensor cover.
Cleaning procedures for optics with heavy contamination.
Dry cleaning method for strongly contaminated optics.
Wet cleaning method using water or mild soap solution.
List of suppliers for recommended optics cleaning tools.
General technical specifications of the FARO Laser Scanner.
Technical data related to the laser optical transmitter.
Specifications for data storage and scanner control methods.
Technical specifications for the ranging unit and measurement speeds.
Technical specifications for the color unit and HDR.
Specifications for multi-sensor components like compensator and GPS.
Details on the scanner's interface connection options.
Technical specifications of the deflection unit.
Operating and storage conditions for the scanner.
Notes and definitions related to technical data.
Physical dimensions of the FARO Laser Scanner.
Dimensions related to the scanner mount and tripod interface.
Details of the standard service plans for the scanner.
Specifies which hardware components are covered by service.
Details on coverage for FARO proprietary software updates.
Additional benefits and coverage provided by premium service plans.
Information on maintenance releases and upgrades for FARO software.
Description of FARO's training programs for hardware and software.
Copyright notice and redistribution conditions for google-breakpad.
Copyright notice for paintlib code used in firmware.
Copyright notices for libtiff components.
Acknowledgement of the Independent JPEG Group's work.
Copyright notice for KissFFT library.
Copyright and redistribution terms for the CV Library.
Copyright notices for the i2c controller core software.
Terms and conditions of the Apache License, Version 2.0.
GNU General Public License (GPL) terms and conditions.
EC Declaration of Conformity for the FARO Laser Scanner.
FCC authorization and compliance statements.
Industry Canada compliance statements for radio equipment.
| Weight | 4.2 kg |
|---|---|
| Battery Life | 4.5 hours |
| Field of View (Horizontal) | 360° |
| Protection Class | IP54 |
| Beam Divergence | 0.3 mrad |
| Ingress Protection Rating | IP54 |
| Type | Laser Scanner |
| Measurement Range | 0.6 to 70 m |
| Operating Temperature | 5°C to 40°C |
| Laser Class | Class 1 |
| HDR Photo Resolution | 12 MP |
| Dimensions | 230 x 183 x 103 mm |
| Camera | Integrated |