FARO
®
Laser Scanner Manual
35
Chapter 6: Getting Started
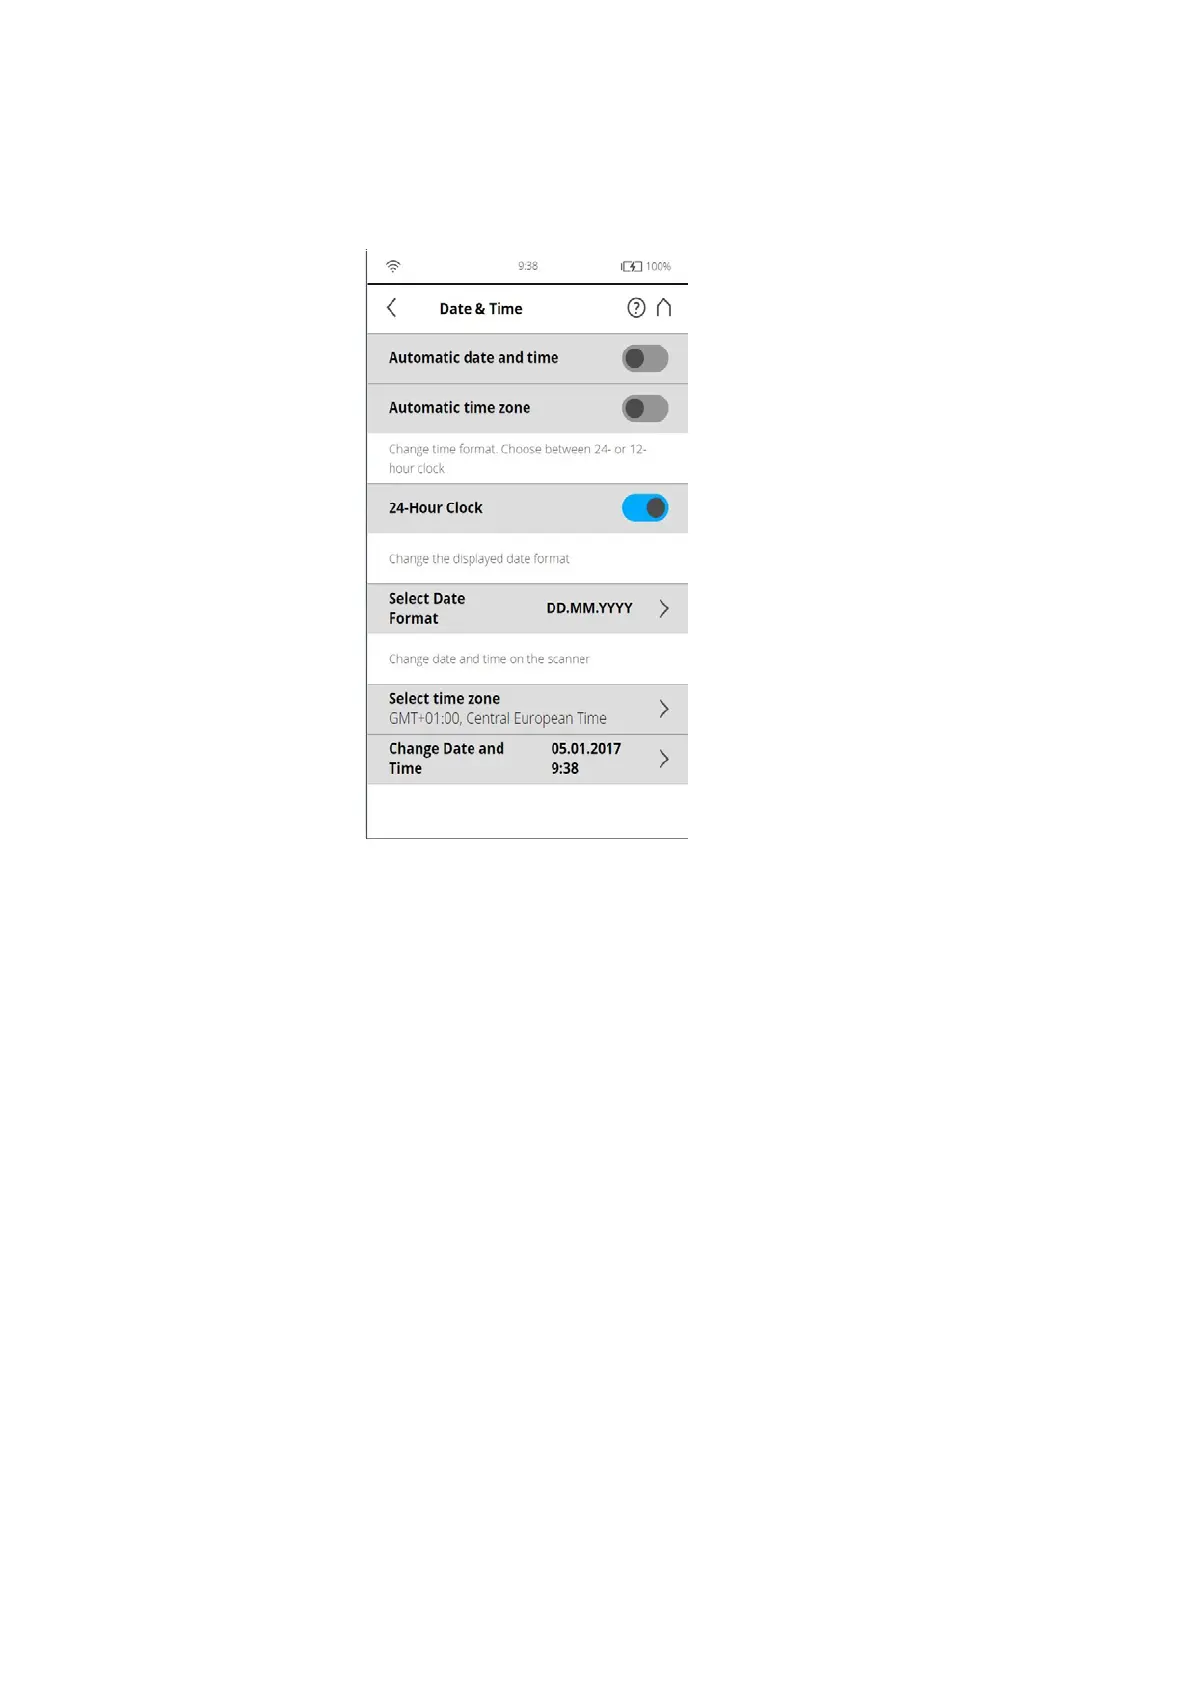
6.5.2 Setting the Date and Time
To change the date and time settings, go to Home > Manage > General Settings >
Date & Time.
Figure 6-17: Date and Time Settings
Automatic date and time - Tap and slide the button to activate automatic date
and time settings.
Automatic time zone - Tap and slide the button to activate automatic time zone
settings.
24-Hour Clock - Tap to set the time format. The scanner can display time
either in the 24-hour or the 12-hour clock format. Slide the button to ON to
select the 24-hour clock. Slide the button to OFF to select the 12-hour clock.
Select Date Format - Tap to choose the date format. The currently selected
date format is displayed with the option.
Select time zone - Tap to choose the date format. The currently selected date
format is displayed with the option.
Change date and time - Tap to set the internal clock of the FARO Laser
Scanner.