PARTS DIAGRAMS AND LISTS
4. Insert an output bearing cone and the bronze
gear into the housing. Slide the output shaft
through the bronze gear and bearing cone,
taking care not to scratch the shaft.
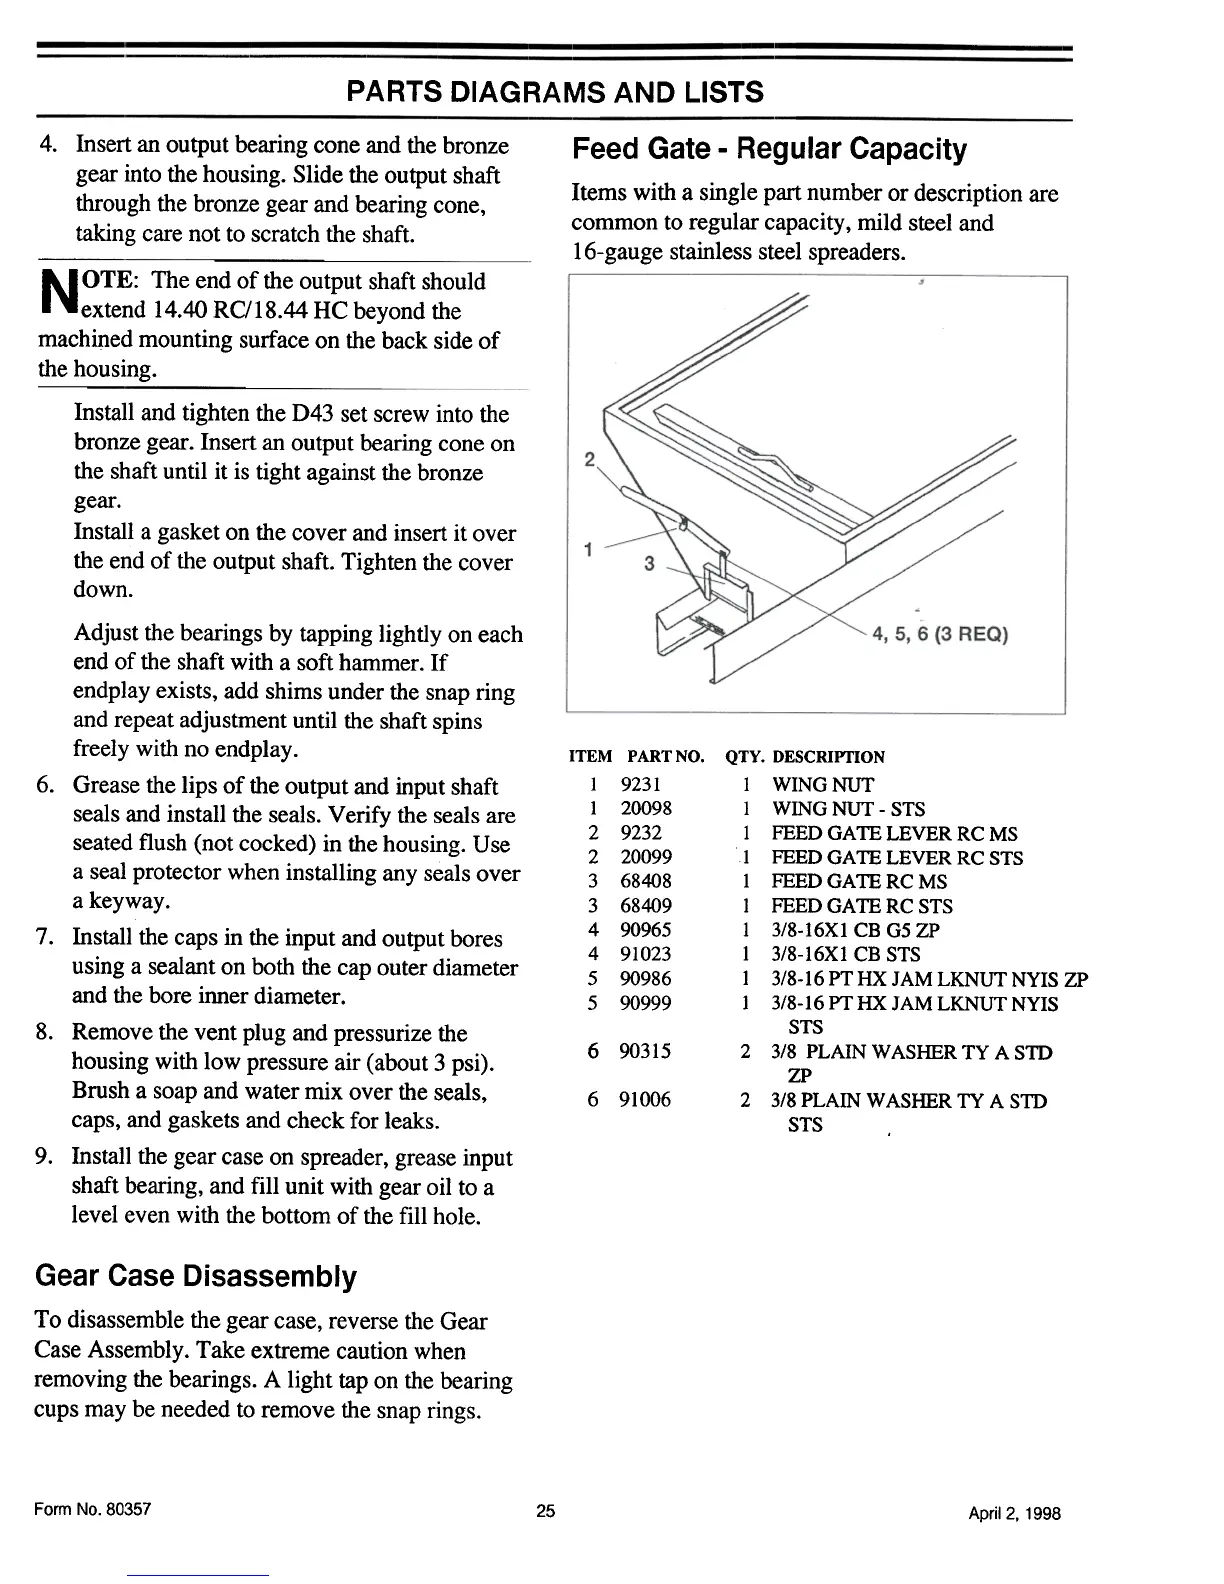
Feed Gate -Regular Capacity
Items with a single part number or description are
common to regular capacity, mild steel and
16-gauge stainless steel spreaders.
N OTE: The end of the output shaft should
extend 14.40 RC/18.44 HC beyond the
machined mounting surface on the back side of
the housing.
Illstall and tighten the D43 set screw into the
bronze gear. Insert an output bearing cone on
the shaft until it is tight against the bronze
gear.
Install a gasket on the cover and insert it over
the end of the output shaft. Tighten the cover
down.
ITEM PART NO.
1 9231
I 20098
2 9232
2 20099
3 68408
3 68409
4 90965
4 91023
5 90986
5 90999
903156
91006
6
QTY. DESCRIPTION
I WING NUT
I WING NUT -STS
I FEED GATE LEVER RC MS
I FEED GA TE LEVER RC STS
I FEEDGATERCMS
I FEEDGATERCSTS
I 3/8-16XI CB G5 ZP
I 3/8-16XI CB STS
I 3/8-16 PT HX JAM LKNUT NYIS ZP
I 3/8-16 PT HX JAM LKNUT NYIS
STS
2 3/8 PLAIN W ASHER TY A sm
ZP
2 3/8 PLAIN WASHER TY A sm
STS
Adjust the bearings by tapping lightly on each
end of the shaft with a soft hammer. If
endplay exists, add shims under the snap ring
and repeat adjustment until the shaft spins
freely with no endplay.
6. Grease the lips of the output and input shaft
seals and install the seals. Verify the seals are
seated flush (not cocked) in the housing. Use
a seal protector when installing any seals over
a keyway.
7. Install the caps in the input and output bores
using a sealant on both the cap outer diameter
and the bore inner diameter.
8. Remove the vent plug and pressurize the
housing with low pressure air (about 3 psi).
Brush a soap and water mix over the seals,
caps, and gaskets and check for leaks.
9. Install the gear case on spreader, grease input
shaft bearing, and fill unit with gear oil to a
level even with the bottom of the fill hole.
Gear Case Disassembly
To disassemble the gear case, reverse the Gear
Case Assembly. Take extreme caution when
removing the bearings. A light tap on the bearing
cups may be needed to remove the snap rings.
Form No.80357
25
April 2, 1998