© FJDynamics. All rights reserved.3
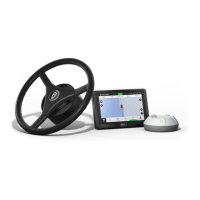
FJDynamics AT2 Auto Steer System Hardware Installation Manual
2.2.3 Air
2.2.4
Power Supply
•
Ensure that the contents of salt, acid, and sulfide in the air are within a reasonable range.
Some hazardous substances will accelerate the rusting and corrosion of metals and the
aging of parts. Keep the working environment free of harmful gases (for example, sulfur
dioxide, hydrogen sulfide, nitrogen dioxide, and chlorine).
• Input voltage: The system supports the input voltage of 9-36 V.
• Ensure that the power line is connected properly to the positive and negative terminals
of the battery. Keep wiring harnesses away from hot objects.
Prepare the following tools before installation.
2.3 Installation Tools
Installation Tools for FJDynamics AT2 Auto Steer System
No. Tool Specications Qty. Function
1
Cross
screwdriver
PH0*75
small size
1 Install the SIM card.
2
PH2*100
medium size
1 Install the GNSS receiver and bracket.
3
Allen key
3 1 Install the splined sleeves.
4 5 1
Install the motor bracket and nameplate
bracket.
5
Open-end
wrench
8 1
Install the GNSS receiver bracket on top of
the machine.
6 11 1 Fix the U-bolts of the control terminal.
7 13 2 Install the motor bracket.
8 12/14 2
Install the battery cables (bolt size
depends on the machine model) and
motor bracket.
9 18/21 1
Disassemble and install the front axle
shaft cover bolts (bolt size depends on the
machine model).
10
Sleeve
8 1
Install the GNSS receiver bracket on top of
the machine.
11 24/27 1
Disassemble and install the lock nut of the
original steering wheel.