Do you have a question about the FJDynamics AT2 and is the answer not in the manual?
Essential safety advice to prevent harm to people and equipment during installation.
Requirements for selecting a firm and unobstructed installation location for the equipment.
Environmental conditions for optimal operation and service life, avoiding extreme temperatures.
Ensuring air quality within reasonable limits to prevent corrosion and aging of parts.
Specifies input voltage range and proper connection of power lines to the battery.
Detailed planning and arrangement for installation, power, and wiring.
General safety precautions to follow during the installation process.
Detailed instructions for installing the electric steering wheel assembly onto the machine.
Lists parts for the electric steering wheel assembly, including dust cap, screws, washers, and splined sleeve.
Lists parts for the motor bracket, including nuts, washers, hoop, and bolts.
Initial steps for removing the original steering wheel and preparing the steering column.
Guide on fitting the splined sleeve and attaching the steering motor using screws and washers.
Steps to fix the steering motor and bracket, advising not to fully torque screws initially.
Instructions for installing the electric steering wheel on the machine and adjusting the motor bracket.
Final steps for installing the lock nut and dust cap onto the splined sleeve.
Lists components for the GNSS receiver installation, including receiver, pads, bracket, and screws.
Step for connecting the GNSS receiver bracket to the receiver using assembly bolts.
Describes methods for installing the GNSS receiver and bracket onto the machine's top surface.
Lists parts for the attitude sensor, including bolts, sensor, and bracket.
Instructions to install the attitude sensor onto the front axle and tighten the previously removed bolt.
Lists components for the radio antenna, including antenna, sucker base, and sticker.
Guides on attaching the radio antenna to a suitable location on the machine using a sucker base and sticker.
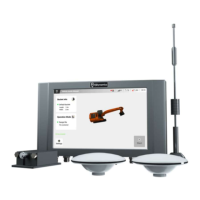
Lists parts for control terminal installation, including terminal, bracket, base, nuts, and U-bolts.
Steps to fix the control terminal mounting base using U-bolts and nuts in the cab.
Instructions for attaching the control terminal's ball joint to the bracket socket and securing it.
Final step to mount the control terminal onto its base and tighten the fixing screw.
Lists the SIM card component and provides important notes regarding compatibility and data service.
Step-by-step instructions for removing the cover, inserting the SIM card, and reattaching the cover.
Lists the different wiring harnesses included in the system, such as main, GNSS, power, and sensor harnesses.
Important notes regarding connecting harnesses, power status, and routing.
Guides on routing specific wiring harnesses (GNSS, Power, Attitude, Radio) within the vehicle cab.
Lists essential requirements for the installation site to ensure proper commissioning and operation.
Checks to ensure correct power supply connection and satisfactory voltage before system activation.
Verifies the control terminal's power indicator and normal system program startup.
Refers to the Software User Manual for detailed parameter calibration procedures.
Detailed technical specifications for the control terminal, covering size, configuration, interfaces, and operating conditions.
Technical specifications for the GNSS receiver and electric steering wheel, including dimensions, frequency bands, and operating parameters.
Technical specifications for the radio antenna and attitude sensor, detailing frequency ranges, gain, voltage, and resolution.
| Navigation | GPS/GLONASS |
|---|---|
| Connectivity | Bluetooth |
| Control | Mobile App |
| Supported Aircraft Type | Multi-rotor |
| App Support | Yes, iOS and Android |
| Accuracy | ±10 cm |