2. Find the PIN Code column below the page, and the shown number is PIN code.
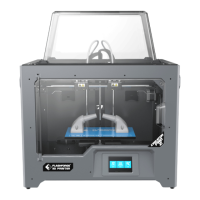
3. Connect the Adventurer 3 Pro 2 to the Internet.
Choose the appropriate network connection mode in the communication
interface to connect the network [see the 2.3.2.1 section of the connection method].
4. Connect the Adventurer 3 Pro 2 to the Polar cloud.
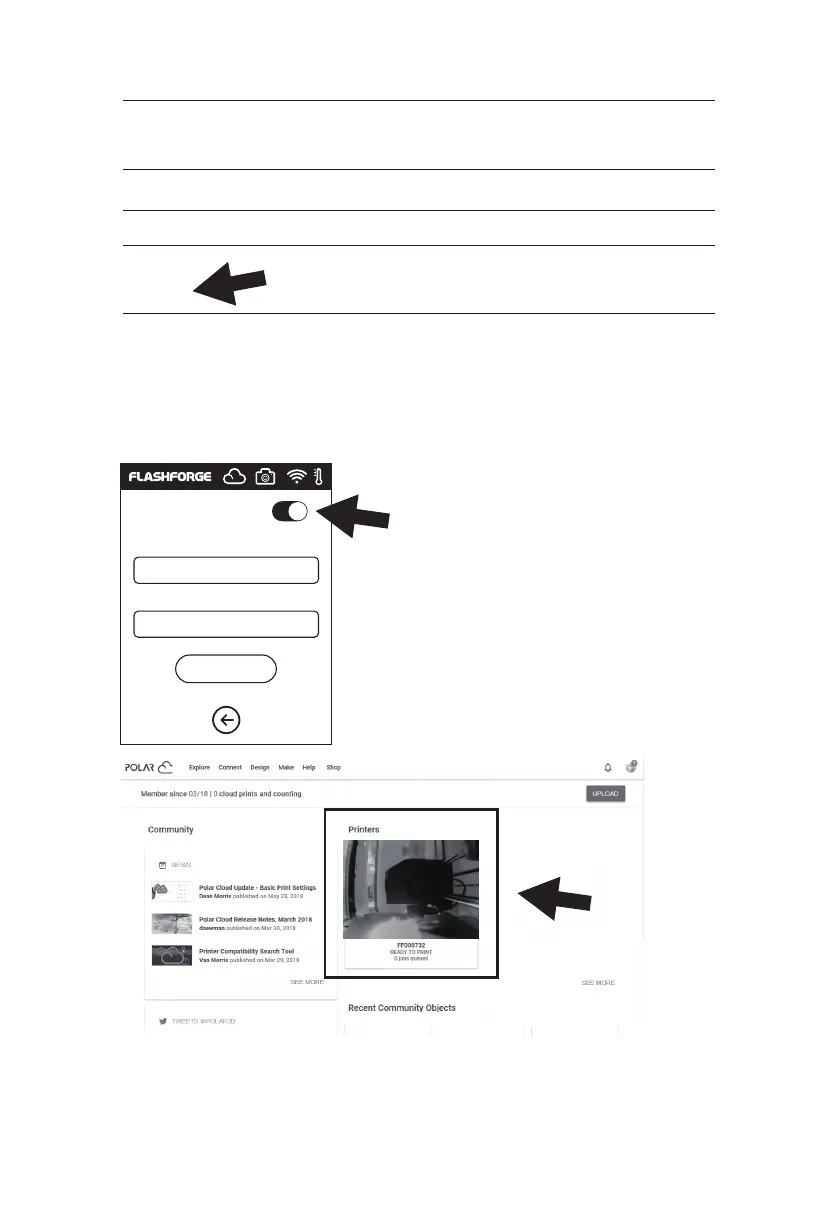
5. After the connection is completed, you can see the printer’s information on the
front page of Polar cloud website. [If you turn on the camera function, you can
see the time picture on the page].
Location
Biography
Website URL
Enter the cloud connection interface [click tools >
communication > cloud connection], turn on the
Polar cloud switch [After the Polar cloud is turned
on the switch will change into green]. Fill in the
below account and PIN code columns with the
account before the registration of Polar cloud
and the PIN code queried before, click save.
Polar cloud switch
PolarCloud
Account:
PIN:
Save
http://www.example.com/profile
Email
+ ADD Email
PIN Code
XXXX
33