Finder2.0 User Guide |
www.flashforge.com
Next, we are going to print the model.
After generating the Gcode file, you can transfer it to your Finder2.0. You can transfer
the file through USB cable and USB stick.
7.2.1 Print from Computer (USB connection)
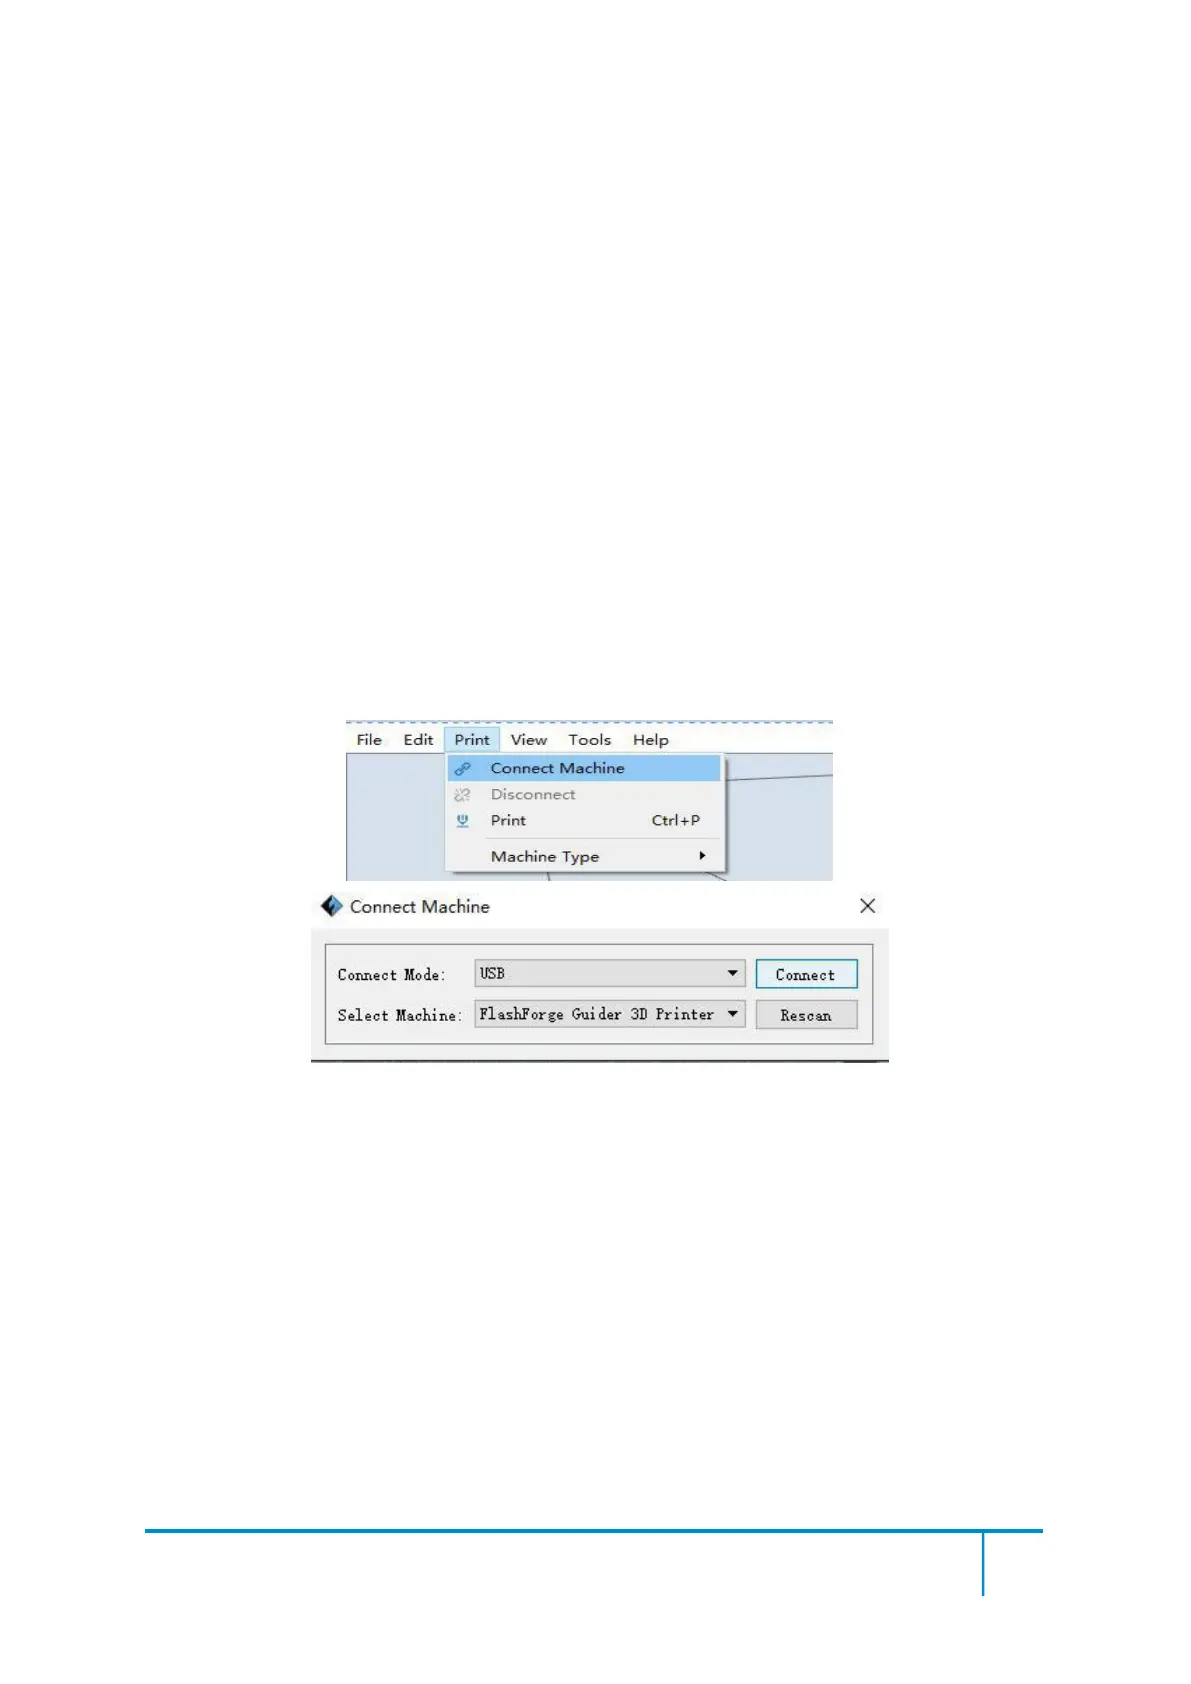
①Connect your Finder2.0 with your PC via a USB cable.
②
Turn on your Finder2.0, level the build plate and load the filament.
③ Click [Print] and transfer your Gcode file to your Finder2.0. After completing
transference, the printer will heat up automatically. And when heating finishes, the
print will start to build the model.
7-8
④When your PC connects with FlashPrint successfully. The status box on the
bottom right displays the real-time nozzle temperature. After finishing preheating,
your Finder2.0 starts the print job directly.
7.2.2 Print from Computer (WIFI connection)
①
Connect your Finder2.0 with your PC via WIFI.(Please refer to 6.1.13)
② Turn on your Finder2.0, level the build plate and load the filament.
③ Click [Print] and transfer your Gcode file to your Finder2.0. After completing