Annotating images20
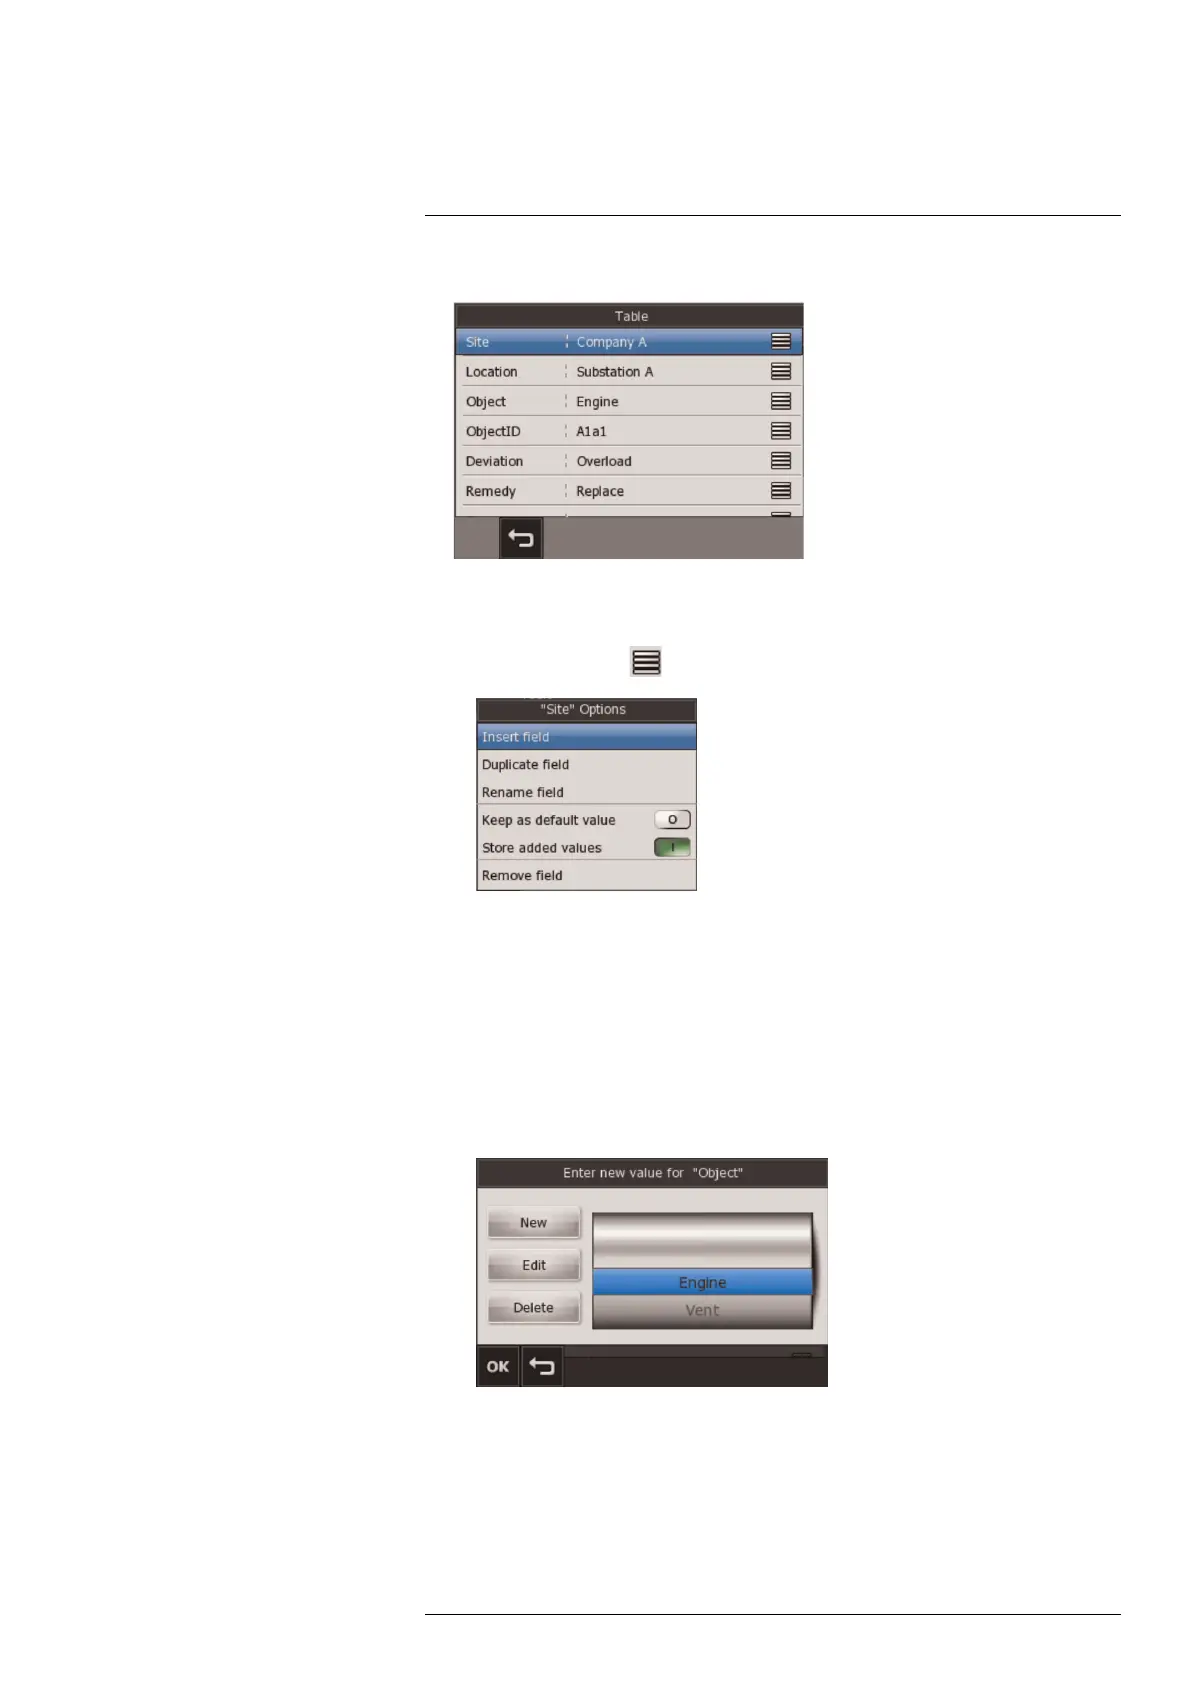
4. On the submenu, select Table. This will display the following dialog box.
This is the default table annotations template that ships with the camera.
5. Do one of the following:
• To edit a field, click
. This will display the following dialog box.
• Insert field: Select this option to insert a new field.
• Duplicate field: Select this option to duplicate the currently selected field.
• Rename field: Select this option to rename the currently selected field.
• Keep as default value: Enable this option to keep the current value as a default
value. The default value will be displayed for this field the next time you create a
table.
• Store added values: Enable this option to store added values in a glossary,
which make them easier to find the next time you create a table.
• To edit a value, click the value. This will display the following dialog box where you
can create new values, edit existing values or delete values:
6. Click OK. The table will now be added to to what is called a group, and will be
grouped together with the infrared image in the image archive, and also when moving
files from the camera to reporting software on the computer.
#T559598; r. AB/ 9443/9443; en-US
56
 Loading...