TAU-0035-00-10, version 100 April 2009 3-1
3 Basic Operation of the Tau and GUI
3.1 Operation of the Tau camera using the Photon development kit
Backward compatibility with existing Photon equipment may be the simplest way to connect to
your Tau camera to provide power and obtain video. It also facilitates serial communication for
more advanced camera command and control via the free downloadable FLIR Camera
Controller. In this first section, we will discuss simply applying power and obtaining video output,
not serial communication.
Remove the lens cap. (Remember to replace the lens cap when the camera is not in use to
prevent accidental scratching and dust contamination.)
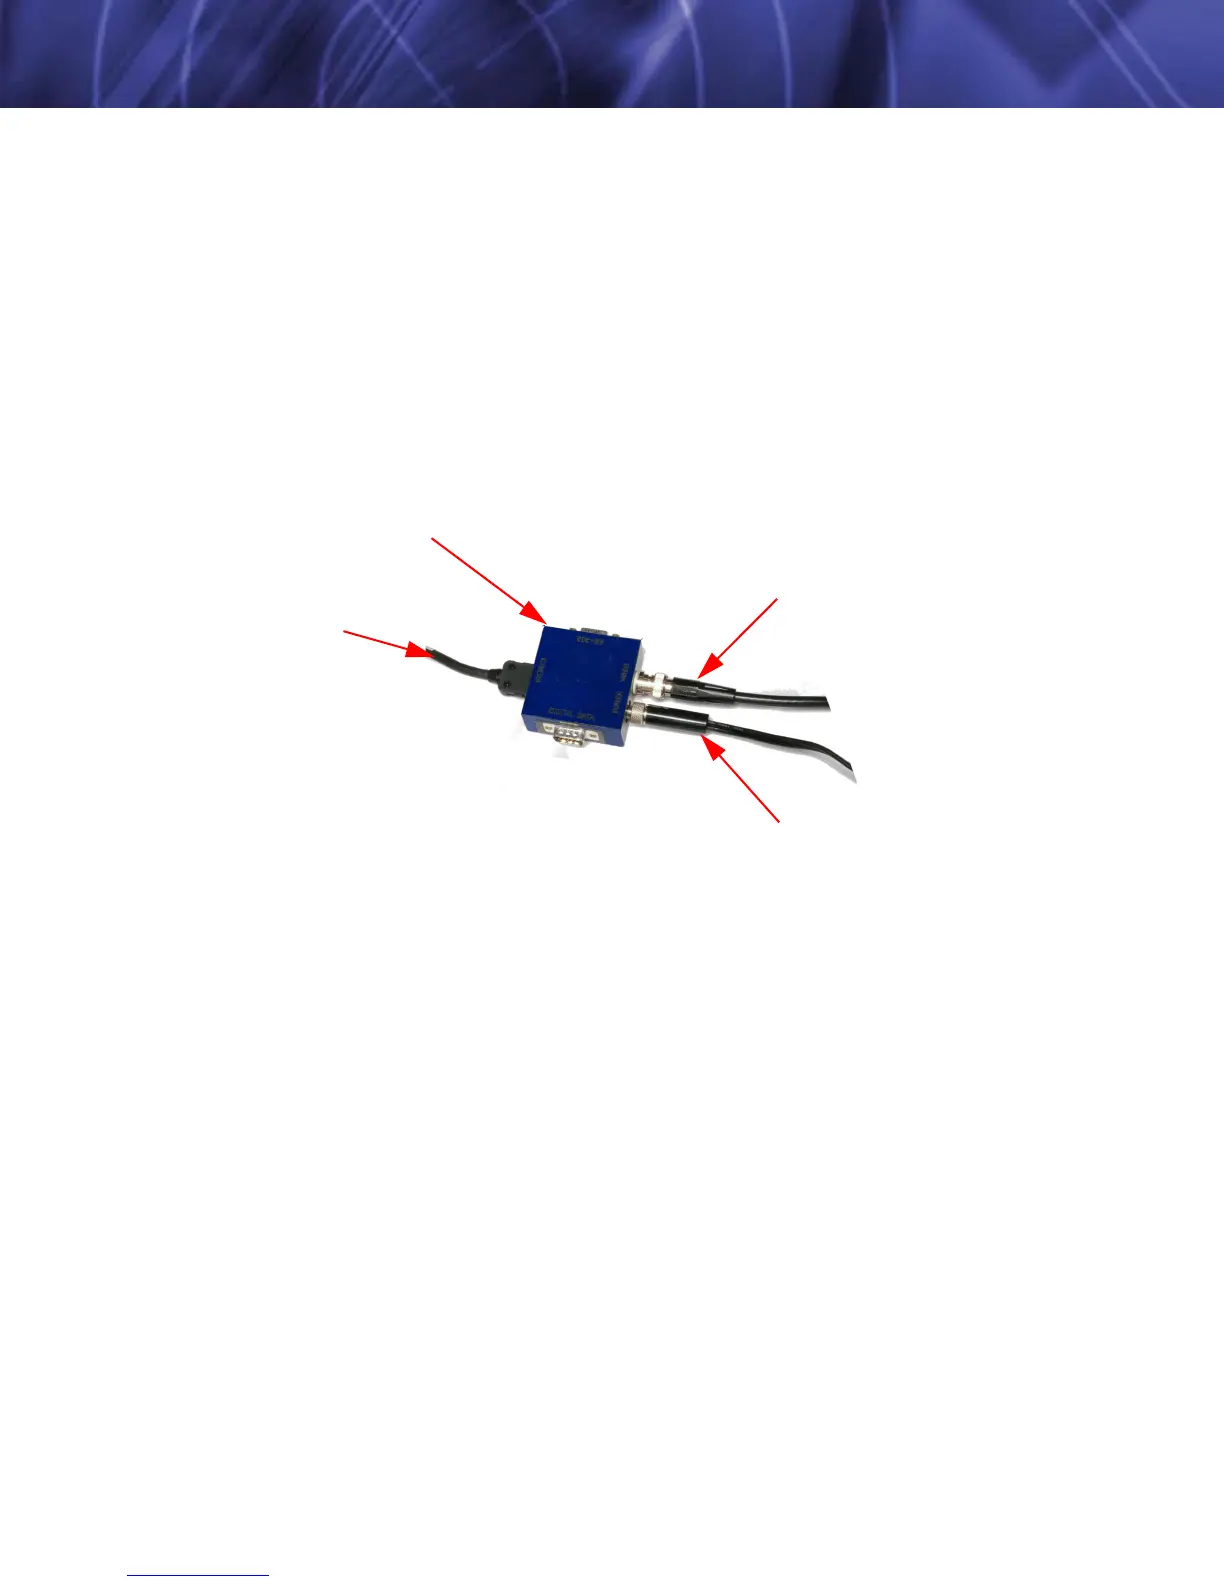
Using the Development Kit’s Interface Cable and I/O Module, plug one end of the Interface
Cable into the mating connector on the back of the camera. Connect the other end of the
Interface Cable to the mating connector on the I/O Module labeled CAMERA.
Attach one end of a standard BNC cable to the video port labeled VIDEO on the I/O Module.
Attach the other end to a compatible video monitor’s composite video input. If your monitor has
an RCA input connector, a BNC to RCA adapter can be used.
Plug the power supply into an electrical outlet. Insert the circular plug at the other end of the
power supply into the power jack labeled POWER on the I/O Module and tighten the locking
screw finger tight. The camera will take ~2 seconds to produce an image after you apply of
power.
You should see an initial splash screen with the FLIR logo displayed, and then live infrared long
wave imaging video will follow! Point the camera in different directions and notice the imagery. If
the video image appears low in contrast, point the camera at a scene with high thermal
contrast such as at a person.
To camera
I/O Module
(333-0018-00)
To video monitor
To power supply
(206-0001-20)