Tau User’s Manual 3—Basic Operation of the Tau and GUI
TAU-0035-00-10, version 100 April 2009 3-3
3.4 Installing the FLIR Camera Controller
Step 1 If you have another version of the FLIR Camera Controller loaded on your PC, you
should uninstall it using the Windows Uninstall utility via the Windows Control Panel
before proceeding with this installation. This is an important step as camera
malfunction is possible if you do not remove any older versions of Tau (or Omega/
Micron/A10) software.
Step 2 Using your favorite WWW browser, navigate to the following URL:
http://www.corebyindigo.com/service/softwareupdates.cfm
Step 3 Click the Download FLIR Camera Controller link for the version which supports your
Tau.
Step 4 When the File Download prompt appears, choose Save. This will save the installable
file in the directory of your choice. It is recommended that you create a new empty
directory such as “FLIR Camera Controller Installable Files” on your desktop, for
download. The file Tau_GUI.zip will be saved.
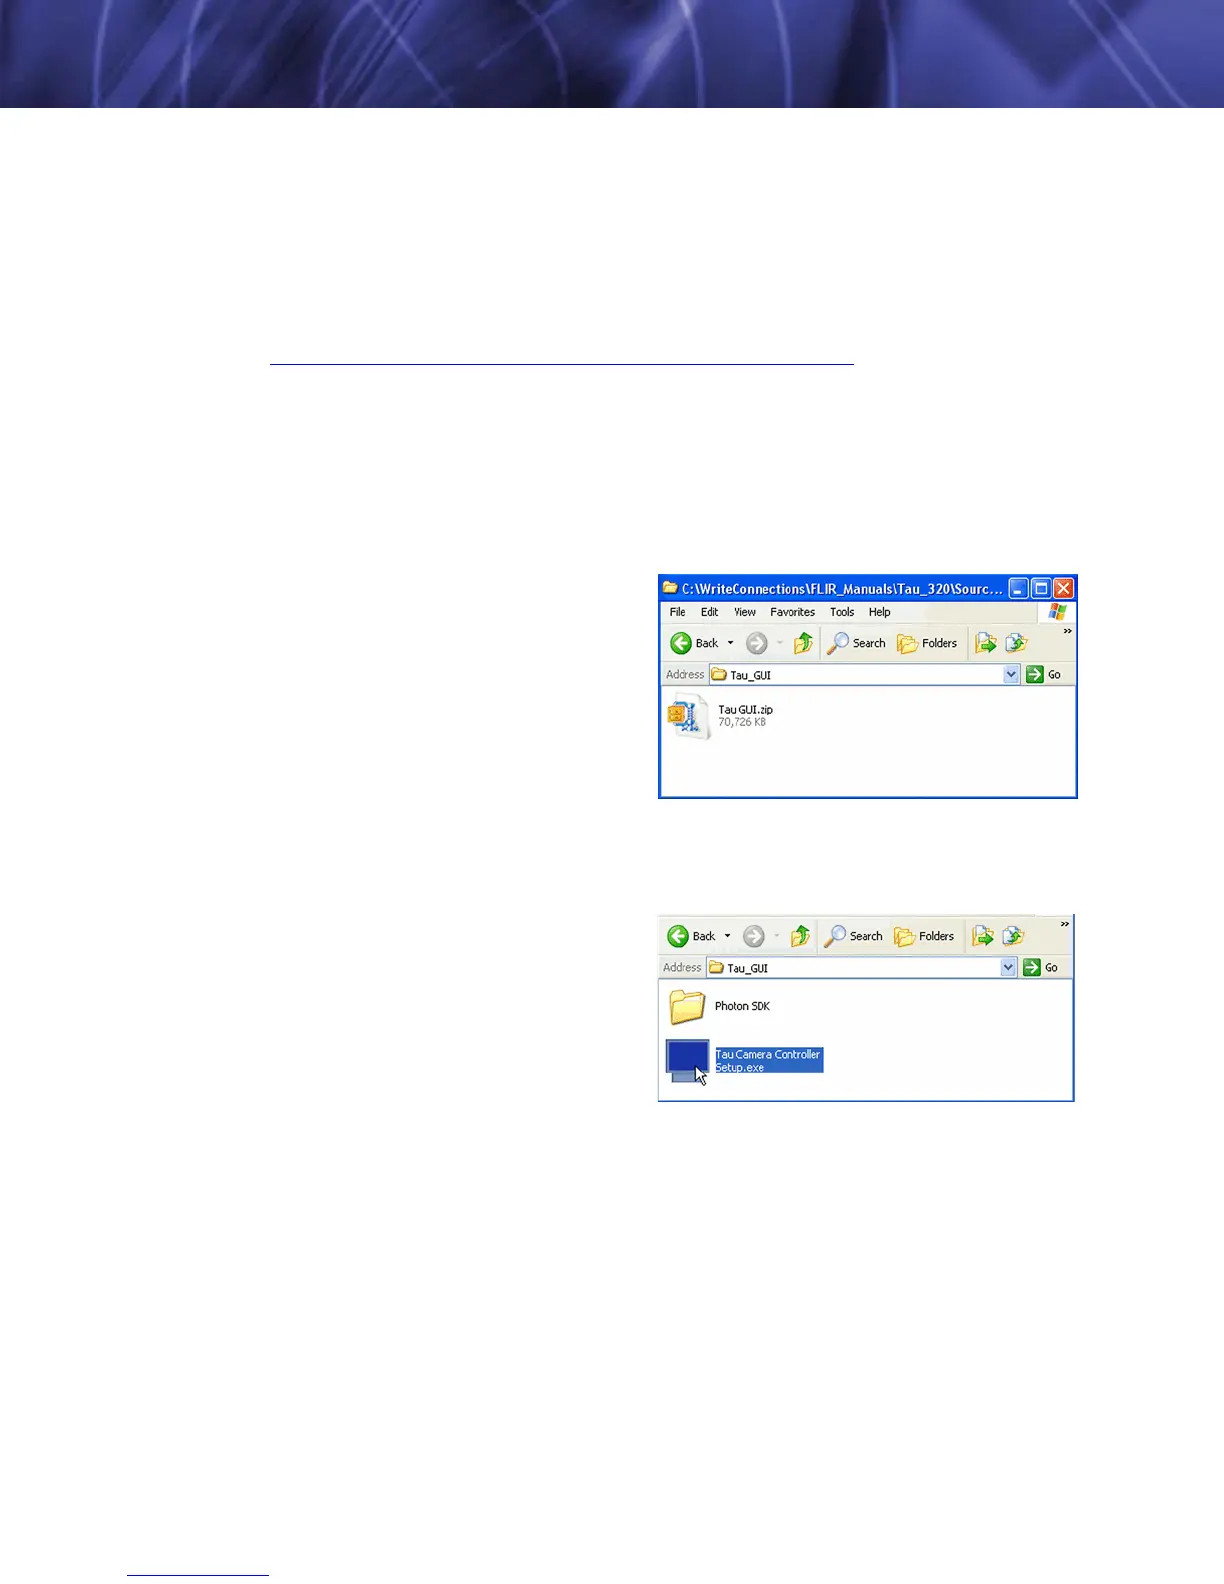
Step 5 Open the directory where you saved the
zip.
Step 6 Double click the Tua_GUI.zip file. The
WinZip utility should open the zip file
and show the compressed contents.
Step 7 Save the files shown via the WinZip
Extract command. This method is
important as it preserves the
necessary installation paths for the
install utility. It is not recommended
that you drag-and-drop the contents from the WinZip utility. Extract to a directory of
your choice.
Step 8 Navigate to the directory where you
extracted the contents. Inside that
folder you will find a directory which
should contain the files shown: Double
click the FLIR Camera Controller
setup.exe file to begin installation.