Disassembly
1. Push in the E-stop.
WARNING
Place the main electrical disconnect OFF and bleed down
all high-pressure lines. Place an “Out of Service” tag on the
main electrical disconnect and lock it out. Failure to do so
may result in equipment damage or injury to personnel.
2. Disconnect all high-pressure and low-pressure inter
-
face connections to access the tie rods. Place the
manifold and PCV assembly combination aside.
3. Use the pressure loading tool to unload the tie rods
(see Unloading the tie rods on Page 43).
For each of the three high-pressure cylinders
4. Remove the end cap, high-pressure cylinder, inlet
poppet, springs, filler tube, and sleeve.
5. Slide the dynamic seal carrier off the plunger if it did
not come out with the high-pressure cylinder. Re
-
move and discard the dynamic seal and rod seal.
CAUTION
Use care when removing the dynamic seal and rod seal.
Do not scratch or nick the seal carrier bores.
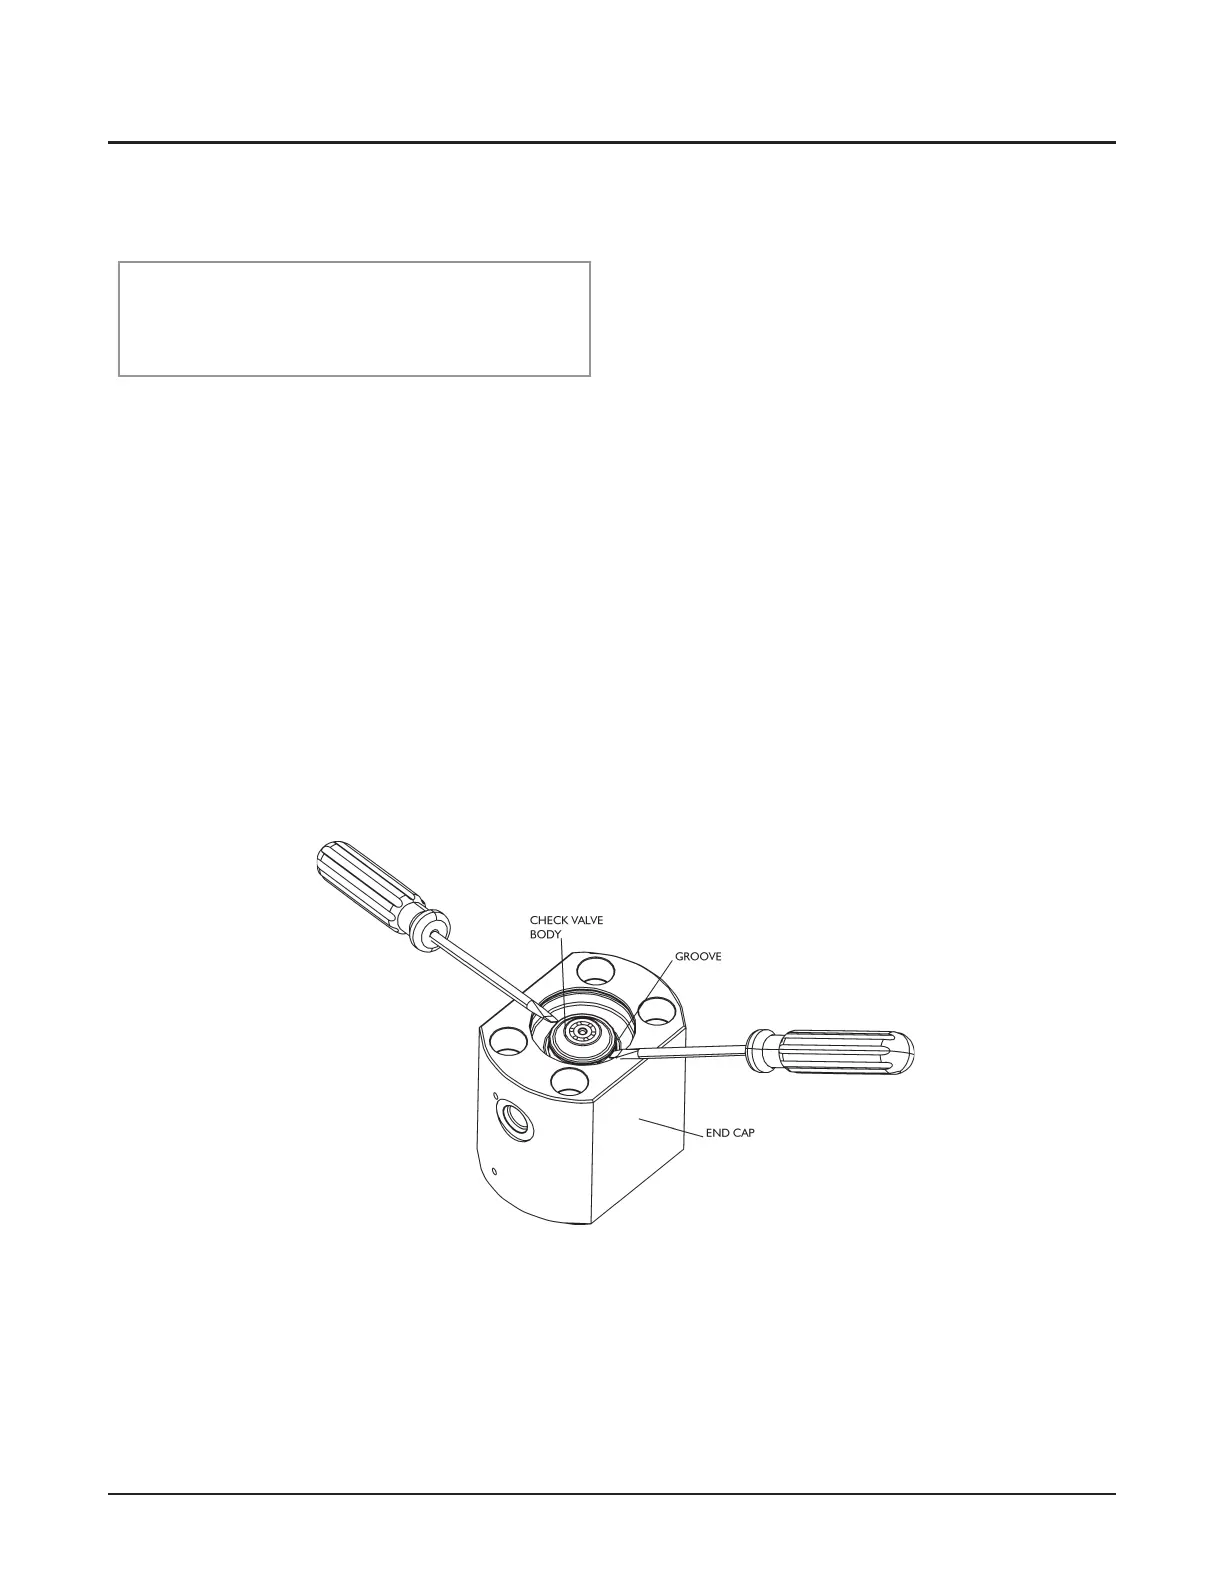
6. Place the end cap vertically on a work bench with
the check valve end up.
7. Remove the check valve assembly from the end caps
by using two flat screwdrivers in the circumferential
groove in the OD of the check valve body. Take care
not to damage the body or end cap. Remove the
o-ring from the check valve assembly.
8. Place the check valve body in the provided rebuild
clamp.
Note: Do not cover the holes on the outer circum-
ference of the check valve body to prevent metal
from being introduced into the opening.
46 | M-397 ©FlowInternationalCorporation
HYPLEX PRIME
Maintenance & Service Manual