Installation and reassembly
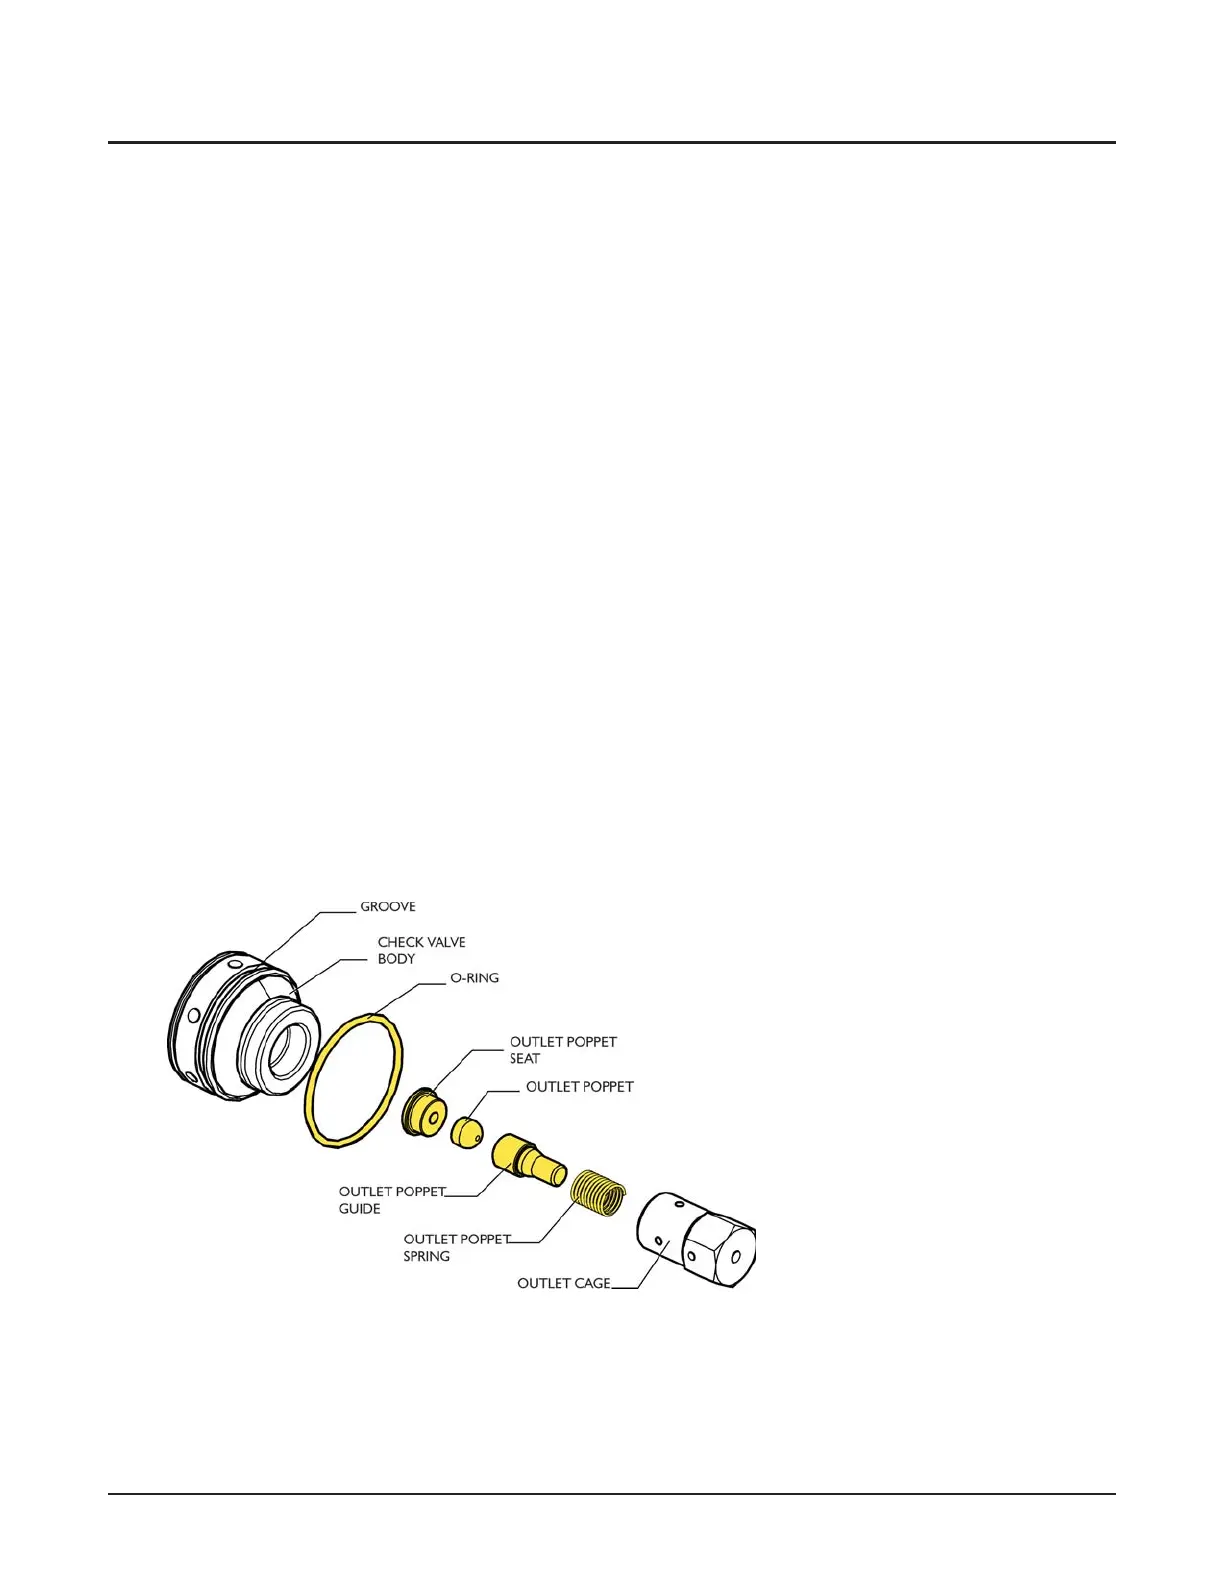
Assemble the check valve
1. Insert the new outlet poppet into the new outlet
poppet guide.
Note: Install poppet into the outlet poppet guide as
shown, with the radiused back of the outlet poppet
going in first. The counterbore in the outlet poppet
is visible after installation.
2. Place the new outlet poppet spring around the
guide. The spring should be loose on the guide.
3. Place the assembly into the outlet cage along with
the outlet poppet seat.
4. Hold the outlet cage assembly upright (threaded end
of the outlet cage facing up) so that the installed
components will not fall out. Apply a thin film of
Blue Lubricant to the threads of the outlet cage.
5. Carefully thread the new check valve body onto the
outlet cage assembly.
6. Secure the check valve body in the rebuild clamp
with the inlet face downward.
7. Secure the rebuild clamp in a vise. Torque the outlet
cage to 30 ft-lb (41 N-m).
Repeat Steps 1–7 for the remaining check valves.
70 | M-416 ©FlowInternationalCorporation
HYPLEX PRIME PUMP
Maintenance & Service Manual