1773/1775/1777
Calibration Manual
14
Basic Instrument Setup for all Verifications
The Fluke17xx-CalibrationTool_Vx.x has built-in procedures to verify and adjust the Analyzer.
The Verification of uses an external divider. This divider, (see Verification Box Assembly)
provides more accurate voltages than a direct connection to the 5520A. The 5520A uses a
divider with a 50 Ω output impedance when sourcing <330 mV. Due to variations in the Analyzer
input impedance, the actual applied voltage is less than the programmed voltage. Using an
external divider where the parallel resistance is ~30 Ω allows calculation of the applied voltage
with confidence that the Analyzer input loading will not significantly impact the applied voltage.
The Calibration Tool calculates the voltage that should be applied based on the values entered
in the setup screen:
1. Apply power to the Analyzer using the power supply and line cord.
2. Turn on the Analyzer.
3. Connect the Analyzer USB to the PC.
Accuracy Verification Procedure
The procedure verifies the Analyzer accuracy at ambient temperature 23 °C ±5 °C (intrinsic
error). Allow at least one hour for the Analyzer to warm up.
A complete accuracy verification of the 177x consists of:
Voltage Measurement
Voltage Transient Measurement (1775 and 1777 only)
Current Measurement
AUX Measurement
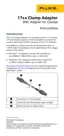
Optional iFlex, Current Clamp, and 17xx Auxiliary Input Adapter Verification
Voltage Measurement
To m e a s u re v o l t a g e :
1. Select the setup. See Basic Instrument Setup for all Verifications.
2. Make sure the instrument is on battery power with ≥50 % charge.
3. Connect the 3PHVL-1730 "N" lead and the single test lead Earth to the calibrator
NORMAL LO.
4. Use the 55x2A or 5730A calibrator to:
a. Connect the calibrator NORMAL V output to the 3PHVL-1730 L1+L2+L3 leads.
b. Connect the calibrator NORMAL V output to the V input of the reference DMM.
c. Sequentially set the calibrator to the voltages in Ta b le 9 and check that the Analyzer
reading is between the limits.
Note
Use the DMM readings as reference with the 55x2A calibrator.

 Loading...