Using the Scope and Meter
Making Automatic Meter Measurements (for models 190-xx4)
1
33
Making Automatic Meter Measurements
(for models 190-xx4)
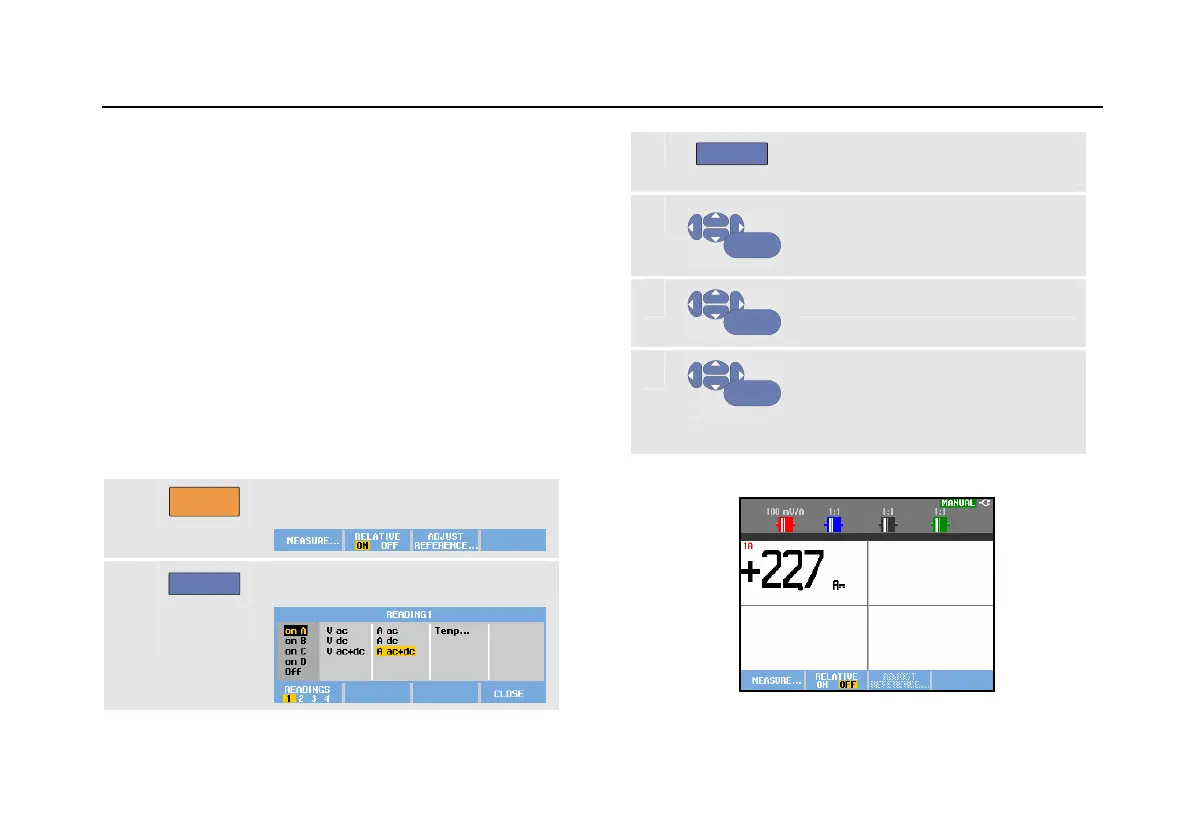
The test tool offers a wide range of automatic meter
measurements. You can display four large numeric
readings: READING 1 … 4. These readings are selectable
independently, and the measurements can be done on the
input A, B, C or input D waveform. In METER mode the
waveforms are not displayed. The 20 kHz HF rejection
filter (see Working with Noisy Waveforms on page 27)
is always on in the METER mode.
Selecting a Meter Measurement
To choose a current measurement for input A, do the
following:
1
METER
Display the METER key labels.
2
F1
Open the Reading .. menu.
3
F1
Select the reading number to be
displayed, for example READING 1
4
ENTER
Select on A. Observe that the
highlight jumps to the present
measurement.
5
ENTER
Select the A dc… measurement.
6
ENTER
Select a current probe sensitivity
that matches the connected
current probe (see Adjusting the
Probe Type Settings on page 16.)
You will see a screen like in Figure 12.
Figure 12. Meter Screen

 Loading...