Operator Maintenance
Introduction 4
4-3
Introduction
This chapter explains how to perform the routine user maintenance required to your
instrument in optimal operating condition. The topics covered in this chapter include:
XW Warning
To prevent possible electrical shock, fire, or personal injury:
• Do not operate the Product with covers removed or the case
open. Hazardous voltage exposure is possible.
• Use only specified replacement fuses.
• Remove the input signals before you clean the Product.
• Turn the Product off, remove the mains power cord, and
disconnect all input and output cables before you clean the
Product.
• Disconnect the mains power cord before you remove the
Product covers.
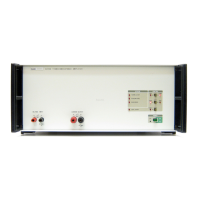
How to Replace the Mains Input Fuse
The mains input fuse holder is on the rear panel of the Product. To replace the fuse:
1. Switch the Product off with the rear-panel main power ON/OFF switch.
2. Remove the power cord from the mains input connector.
3. Use a flat-blade screwdriver to turn the fuse holder cap counterclockwise until the
cap can be pulled from the holder.
4. Replace the fuse with a new one. See Table 4-1 for approved fuses.
Table 4-1. Approved Replacement Fuses
Manufacturer Part Number Rating
W Fluke 4109196
Anti-surge T 16AH 500V 6.35 mm X 32 mm
W SIBA 70 065 65 16A
189 140.16
W For safety, use exact replacement only.
How to Clean the Air Filter
W Caution
The Product can become too hot and be damaged if the area
around the air intake is too small, the intake air is too warm, or
the air filter becomes clogged.
You remove the air filter from the rear panel of the Product. To remove the air filter:
1. Switch the Product off with the rear-panel main power ON/OFF switch.
2. Remove the power cord from the mains input connector.
3. Loosen the two screws at the top and bottom vertical panel that covers the air filter.