33
32
Chargingthebattery
The battery can be charged while it is installed in
thee-bikeoronceithasbeenremoved.
Safetywarningforthebatterycharger
The name plate on the charger refers to warning
notes and other safety information in connection
with handling the charger. Be sure to read this
beforeuse.
UseonlytheoriginalPanasoniccharger
supplied along with your e-bike. Only
this charger is designed for the lithi-
um-ionbatteryusedonyoure-bike.
Completely charge the battery using the
chargerbeforetherstridetoensurefull
batteryperformance. Read and adhere
to the operating instructions for the
chargerwhenchargingthebattery.
The battery can at any time be charged outside
or installed in the bicycle without reducing its life
span.Interruptingthechargingprocessdoesnot
damagethebattery.
Thebatteryisequippedwithatemperaturemon
-
itor that permits charging only within a tempera-
ture range
of 0 °C to 40 °C. If the battery tem-
peratureis
toohigh,the battery willnotcharge.
Inaddition,ifyoupressthecontrolbuttonforthe
LEDbatterychargelevel,
the LED at the very top [F] and bottom [E] will
blink.
Inthiscase,separatethebatteryfromthecharger
and wait until it has reached operating tempera
-
ture. Only
reconnect the charger when it has
reachedthepermittedoperatingtemperature.
The charger itself can also indicate problems via
theredLEDashing.
Blinking
patternof
chargerLED
Description Action
Blinking red
Charging er-
ror
An
errorhas
occurred in
the battery
orcharger.
Charging
cannot be
continued.
Remove any
dirt from the
terminals and
plugs.Ifthe
problem per
-
sists, contact
your
FLYER
specialist
retailer.
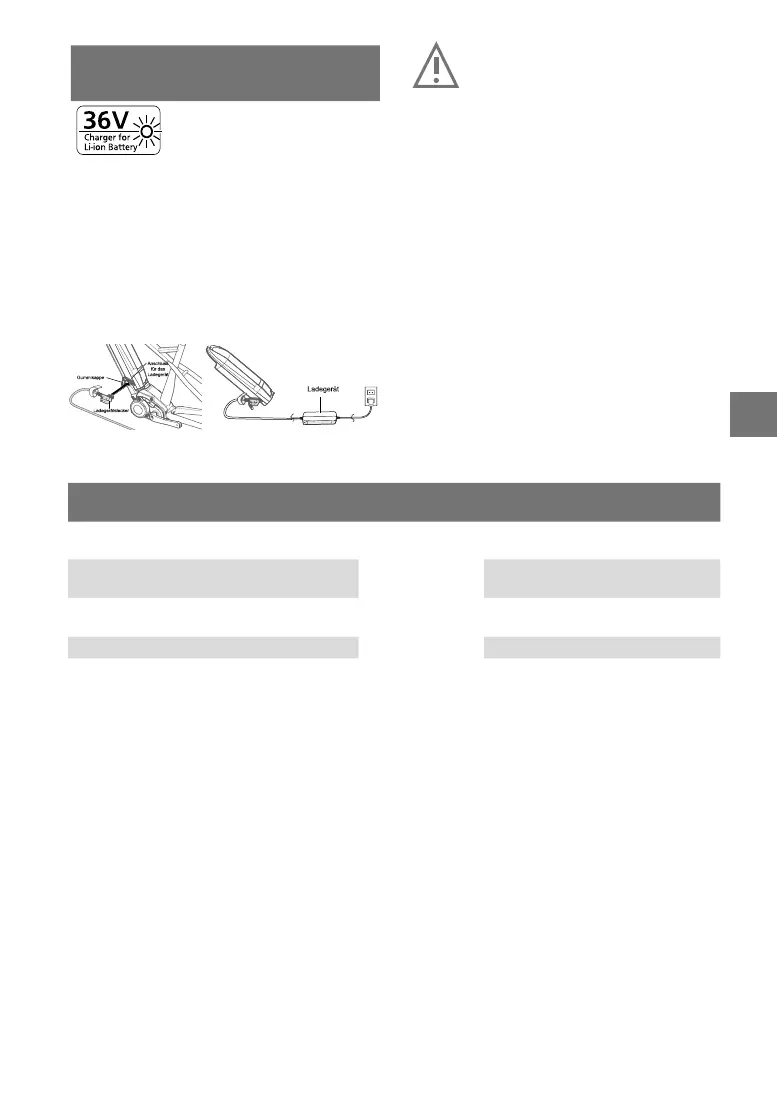
1Removetherubbercap
Opentherubbercaponthebattery.Connectthe
mainsplugtoamainssocket(220V–240VAC)and
connect
thechargertothebattery.
Do not connect the charger to the mains
socket immediately after a sudden tem-
perature
changefromcoldtowarm.Itis
possible that condensed water has col-
lected on the contacts and this will lead
to
ashortcircuit.
Do not connect the battery to the charg-
er immediately after a sudden tempera-
ture
changefromcoldtowarm.Waituntil
both devices have reached room tem-
perature before connecting the charger
or
thebattery.Alwayschargeandstore
the battery and the charger in a dry and
cleanenvironment.
2ChecktheLEDchargestatusindicator
Check whether the charge status LED is lit up.
TheLEDlightsupaccordingtothechargestatus.
ThechargestatusLEDgoesoffwhenthecharg
-
ing
process has been completed. The charging
time takes longer if the battery temperature is too
lowortoohigh.
A fully charged battery cannot be charged any
further.
Duringcharging,thefollowingmessagesmaybedisplayedbythebatteryandchargerviaLEDs:
Operation Status Batterylevelindi-
cation
lamp
Charger
LED
Connect the power source plug of the
chargerintothewallsocket.
Normalcharging
- Off
Connect the charger plug to the charging
terminal.
Off Blinking
green
Charging Lighting(battery
level indication)
Lighting
green
Charging completed Off Off