62
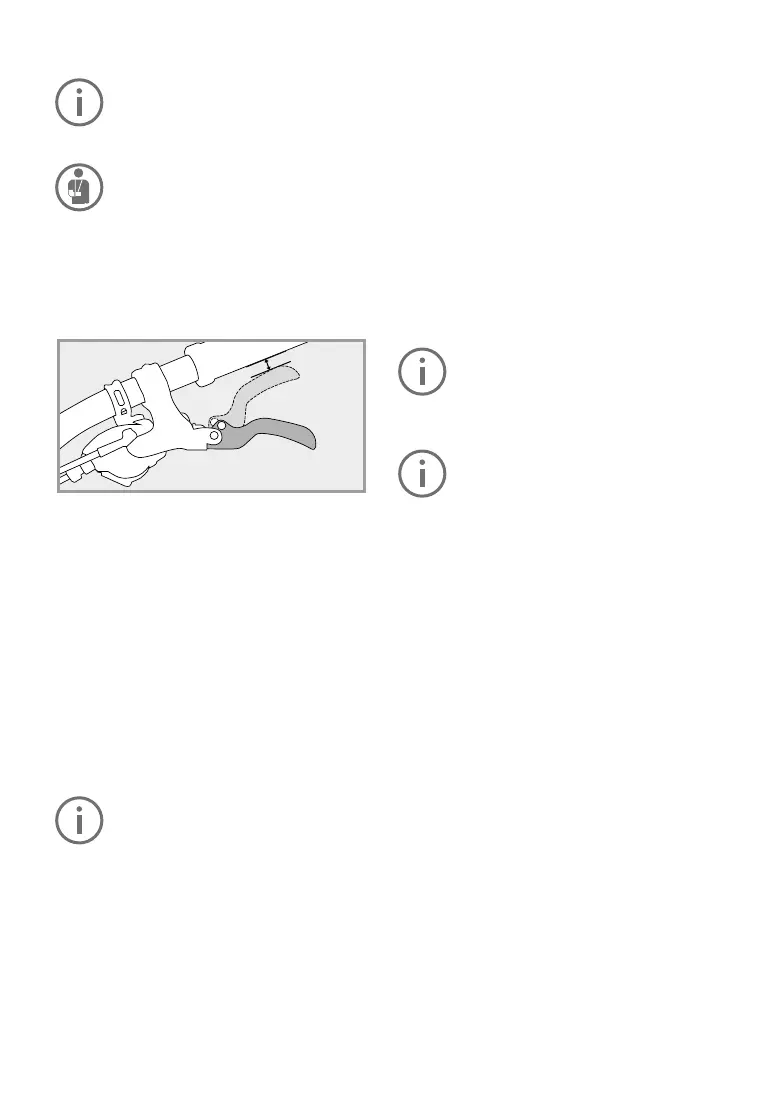
13.3 Setting up the brake levers
The brake levers should be set up so
that your hands can safely and comfort
-
ablyapplythemasastraightextension
of your arms.
Checkbeforeyourrstridewhichbrake
lever brakes which wheel.
Some brake models allow adjustment of the grip
width so that brake levers can also be safely
gripped by smaller hands.
Always have brake adjustments performed by a
FLYER specialist retailer as they concern safe
-
ty-related components.
13.4 Suspension elements
The chassis must be adjusted to the rider's weight
and type of use by a FLYER specialist retailer to
ensure appropriate function of the suspension el
-
ements.
The suspension elements must be set up in line
with the manufacturer’s operating instructions. In
principle, this means that when riding over une
-
ven ground, the action of the suspension element
must be noticeable but it must not be allowed to
be compressed all the way to the stop. If the rider
stands at the middle of the bicycle, the suspen
-
sionelement should compressto approximately
25% of the suspension travel.
Please note that the suspension may
need to be re-adjusted if you ride with
heavierloads,forexampleduringacy
-
cle tour.
If you have purchased a FLYER E-MTB with full
suspension, the rear fork of the frame is mobile
and a shock absorber provides suspension and
damping.
An air chamber aids suspension. The damping
that regulates the speed during compression and
extensionofthesuspensioncanbeadjustedon
the integrated shock absorbers.
Instructionsfor adjusting thesuspension el-
ements
The suspension elements (the suspension forks
and rear fork damner) can be adjusted to your
weight and driving style and the terrain. When ad
-
justing the suspension, you should always make
just one change at a time and make a note of it.
Thisway,youwillknowexactlyhoweachchange
aectsthehandlingofthebicycle.
The description can be applied to both the sus
-
pension forks and the rear damper element. If an
instruction only applies to one of the two com
-
ments, this is indicated.
This section describes the basic adjustment of air
spring elements.
Here,youcanadjusttwosettings:theexibilityof
the suspension and the rebound of the damping.
Ask a FLYER specialist retailer to show
you how to adjust the suspension ele
-
ments correctly.
Flexibility
Thesuspensionelementsarettedwith
a lockout that can suppress rebound or
tilting as needed, e.g. on steep asphalt
ascents. The following adjustment steps
can only be performed when the lockout
is open.
Theexibilityisthepaththroughwhichthesus
-
pension element is compressed when the rider
stands at the centre of the bicycle. It tensions the
suspension element and holds the rear wheel un
-
der slight loads or if the ground is slightly uneven.
This increases grip and traction on rough terrain.
As a rule, the exibility is 25% of the total sus
-
pension travel.
Inordertoadjusttheexibilityofyoursuspension
element,youmustcongurethesuspensionsti
-
ness/air pressure. If you change the air pressure,
the overall stiness of the suspension element
also changes. The more the suspension element
is pumped up, the harder it becomes. In order to
achieve an optimum balance between the manu
-
facturer’srecommendedexibilityandthedesired
stiness,followtheseinstructionswhenadjusting
the suspension element:
Adjustingtheexibility
Ensure that the pressure stages on the fork and
rear shock are set to the “open” position.
Fill the air chamber, using the table as a guide.
To let air out of the air chamber, remove the air
cap and press the valve pin down or press the air
release button on the suspension pump.