w
w
w
w
w
w
.
.
f
f
o
o
s
s
c
c
a
a
m
m
.
.
c
c
o
o
m
m
12
S
S
h
h
e
e
n
n
z
z
h
h
e
e
n
n
F
F
o
o
s
s
c
c
a
a
m
m
I
I
n
n
t
t
e
e
l
l
l
l
i
i
g
g
e
e
n
n
t
t
T
T
e
e
c
c
h
h
n
n
o
o
l
l
o
o
g
g
y
y
C
C
o
o
.
.
,
,
L
L
i
i
m
m
i
i
t
t
e
e
d
d
T
T
e
e
l
l
:
:
8
8
6
6
7
7
5
5
5
5
2
2
6
6
7
7
4
4
5
5
6
6
6
6
8
8
F
F
a
a
x
x
:
:
8
8
6
6
7
7
5
5
5
5
2
2
6
6
7
7
4
4
5
5
1
1
6
6
8
8
12
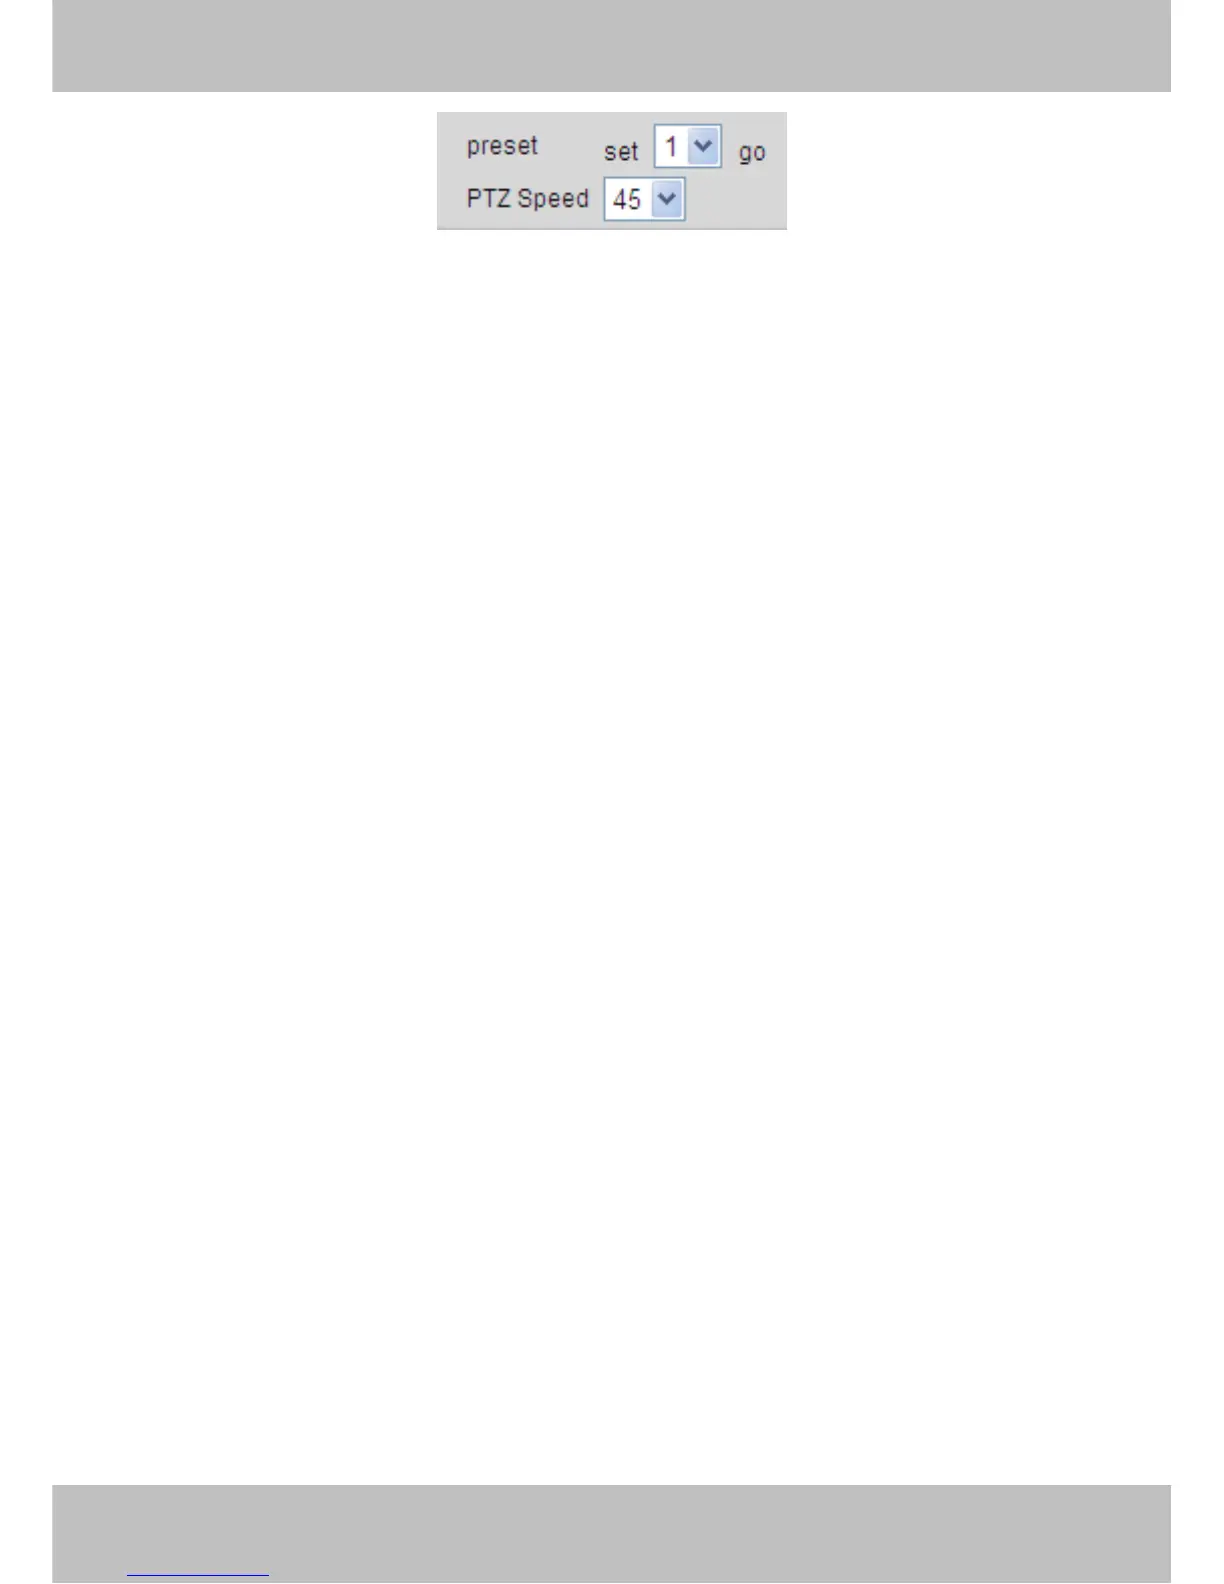
1) Preset----------Support 8 preset position, which is considered enough for DIY home & small
business surveillance market
2) Set----------- Click Set to save the position you need the camera to remember
3) Go----------- Click Go to make the camera move the preset position
4) Number button from 1 to 8--------You can click the number button with preset position, and the
camera will go to the preset position.
5) PTZ Speed-------- Here you can set the len’s moving speed .This function can be used only
when the IPCAM is a high-speed camera .It has no affection at a constant speed camera.
How to do preset position?
We can start preset settings from position 1.
Firstly, select no. 1 within the menu of Preset on the panel.
Secondly, move the camera and stop at a place where you want make preset position.
Thirdly, click set button to save it as position 1 and you have done preset of position 1.
After that, you can select no. 2 within the menu of Preset on the panel, and move the camera and
stop at another place, and set as preset position 2. You can do all the 8 preset positions with this
method.
If you want to see the preset position you have set, such as the position 1, only select the set
no.1 ,and click go button, the camera will go to position no.1.
Section4 For Administrator
For Administrator------Path to Administrator Control Panel, Click it, and it will lead to Administrator
Control Panel.
Section5 OSD Date/Time
If you have added time and camera name in the video, you can see it in the live window.
Go to For Administrator ---ÆVideo, you can reset it:
 Loading...