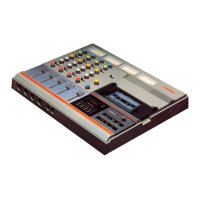
12
12. [PHONES] jack
You can connect stereo headphones with the
1/4-inch plug for monitoring.
Connector: 1/4” stereo phone jack
13. Headphones level control
This control is used to adjust the output level of
both the 1/4-inch and mini [PHONES] jacks.
14. [STATUS] / [EDIT] key
Holding down this key for a second or more enters
the status mode. In this mode, you can switch
among status display pages as well as you can edit
parameters (see page 18).
In the status display mode, this key acts as the
[EDIT] key (see page 18). Pressing this key briefly
exits the current mode while pressing the key for a
second or more enters or exits the parameter edit
-
ing mode.
In the brightness adjustment mode or meter selec
-
tion mode, this key acts as the enter key.
<Factory preset values>
• Attack time:
Approximately 5 milliseconds (fixed)
• Release time:
Approximately 200 milliseconds (fixed)
• Threshold: +12 dB (can be changed to +9 dB
or +6 dB)
• Ratio: 5:1 (can be changed to 3:1)
RTN
L
ST
You can monitor signals received from the [RTN]
in stereo.
You can monitor the left channel signal of the
stereo buss in mono.
You can monitor the stereo buss signal in stereo.
R
L+R
You can monitor the right channel signal of the
stereo buss in mono.
You can monitor the L+R signal (i.e. the L com
-
ponent of MS matrix) in mono.
MS
You can monitor the MS decoded signals (i.e.
L+R from the left, L-R from the right).
AUX
You can monitor signals received from the [AUX
IN] in stereo.
L-R
You can monitor the L-R signal (i.e. the R com-
ponent of MS matrix) in mono.
ON
OFF
The limiter function is enabled. Each of the left
and right limiters works independently.
The limiter function is disabled (the limiter circuit
is bypassed).
LINK
The limiter function is enabled with the left and
right channels linked. If either of left and right
channel signals exceeds the threshold, both the
left and right channel limiters work in the same
way.
The limiter parameters are factory-preset as shown
below.
You can change the threshold level and ratio from
the output status display (see page 21).
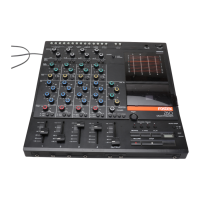
11. Monitor select switch
This switch selects the signals monitored from the
[PHONE] jacks on the front and right side panels.
6. [SLATE] switch (1k / OFF / MIC)
When it is set to “1k”, a 1-kHz slate tone is gener-
ated and sent to the stereo L and R busses. While
you hold it down to “MIC”, the internal slate micro
-
phone signal is sent to the stereo L and R busses.
7. [ ] / [-] key
Holding down this key for a second or more enters
the brightness adjustment mode.
In the brightness adjustment mode, meter selection
mode or status display mode, this key acts as the [-]
key (see page 17).
8. [METER] / [+] key
Holding down this key for a second or more enters
the meter selection mode. In the brightness adjust
-
ment mode, meter selection mode or status display
mode, this key acts as the [+] key (see page 18).
9. EMPTY indicator
This indicator flashes when the battery voltage falls
below the threshold while you operate the unit on
battery power (see page 23).
In normal condition, this indicator is unlit.
10. [POWER] switch (INT / OFF / EXT)
This switch turns the unit on or off.
When you operate the unit on external power (using
the optional AC adaptor or external battery), set it
to EXT.
When you operate the unit on internal battery pow
-
er, set it to INT.
15. [LIMITER] switch (ON, OFF, LINK)
This switch enables or disables the limiter function.
The limiter can work individually or in link, as de
-
scribed below.
The limiter circuit is inserted after the [MASTER]
fader.