25
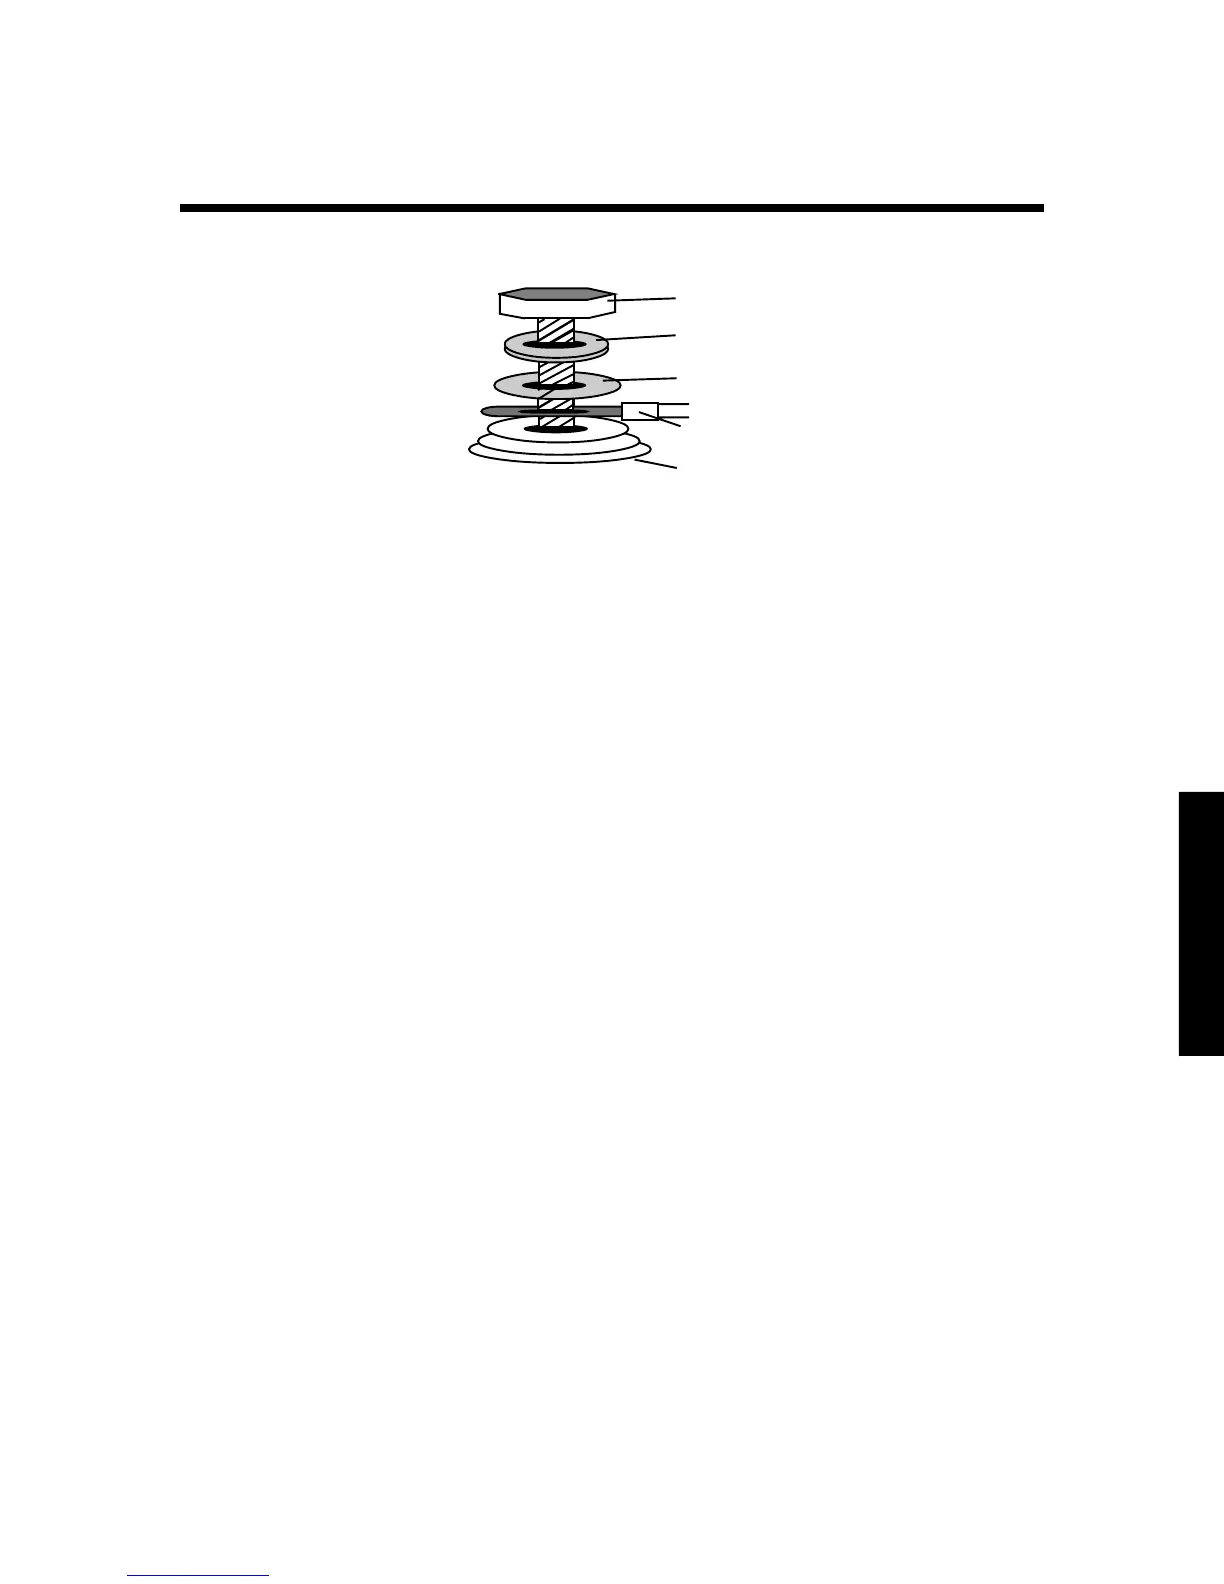
Battery Cable Hardware Stackup Diagram
2. Tighten the battery terminal bolts to a torque value be-
tween 160 inch-pounds and 180 inch-pounds.
3. Install the black battery terminal cover on the negative
terminal.
4. Attach the positive (+) battery cable to the unit. Follow the
battery hardware stack up diagram. The positive cable
may be red for identification.
5. Tighten the battery terminal bolts to a torque value be-
tween 160 inch-pounds and 180 inch-pounds.
6. Install the red battery terminal cover on the positive
terminal.
7. If the positive (+) and negative (-) cables run parallel to
each other, twist the cables together. This will minimize
the adverse effects of cable length inductance.
8. Install the fuse in between the positive (+) inverter cable
and the positive (+) battery cable. See “Step 5: Install
battery cable fuses” on page 26 for instructions.
9. Connect the other end of the positive (+) battery cable to
either:
• Positive post of the house or auxiliary battery bank.
• Through a battery bank selector switch to one or more
battery banks. If you are charging multiple battery
banks, you can install a battery bank selector switch to
allow the banks to be used or charged individually or
simultaneously.
• Through a solenoid to battery banks connected in
parallel.
Bolt
Lock Washer
Flat Washer
Battery Cable with Ring Terminal
Inverter/Charger
 Loading...